Moving software from a staging environment to live production is one of the most critical transitions in the development lifecycle. A single misconfiguration or overlooked dependency can lead to downtime, security breaches, and a degraded user experience. The classic "it works on my machine" is no longer an acceptable standard for modern, distributed systems that demand resilience and reliability from the moment they go live. A generic checklist simply won't suffice; these complex architectures require a rigorous, technical, and actionable validation process.
This comprehensive 10-point production readiness checklist is engineered for DevOps professionals, SREs, and engineering leaders who are accountable for guaranteeing stability, scalability, and security from day one. It moves beyond high-level concepts and dives deep into the specific, tactical steps required for a successful launch. We will cover critical domains including Infrastructure as Code (IaC) validation, security hardening, robust observability stacks, and graceful degradation patterns.
Throughout this guide, you will find actionable steps, code snippets, real-world examples, and specific tool recommendations to ensure your next deployment is not just a launch, but a stable, performant success. Forget the guesswork and last-minute panic. This is your technical blueprint for achieving operational excellence and ensuring your application is truly prepared for the demands of a live production environment. We will explore everything from verifying Terraform plans and setting up SLO-driven alerts to implementing circuit breakers and validating database migration scripts. This checklist provides the structured discipline needed to de-risk your release process and build confidence in your system's operational integrity.
1. Infrastructure and Deployment Readiness: Building a Resilient Foundation
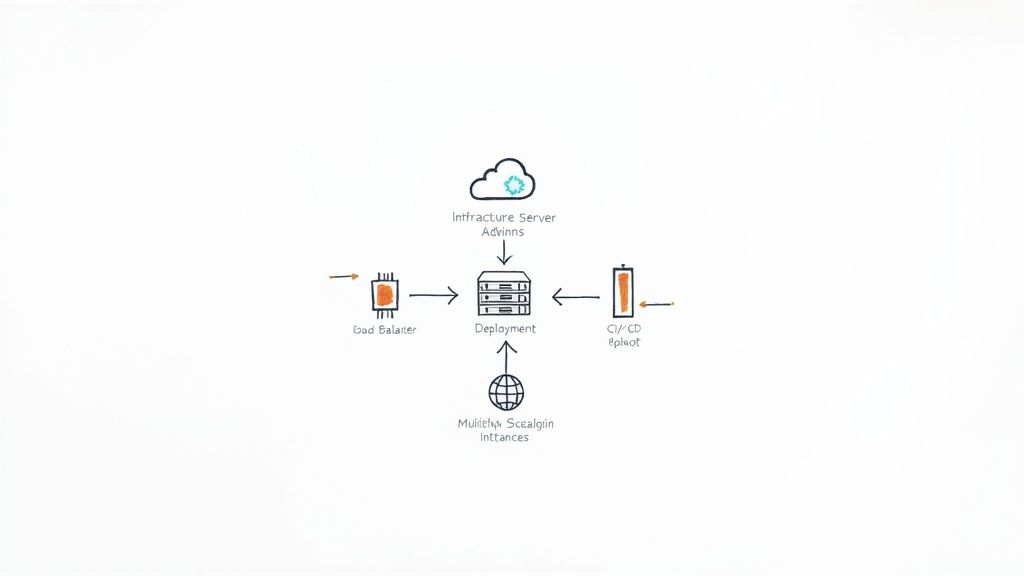
Before any code serves a user, the underlying infrastructure must be robust, automated, and fault-tolerant. This foundational layer dictates your application's stability, scalability, and resilience. A critical step in any production readiness checklist is a comprehensive audit of your infrastructure's automation, from provisioning resources to deploying code. The goal is to create an antifragile system that can withstand unexpected failures and traffic surges without manual intervention.
This means moving beyond manual server configuration and embracing Infrastructure-as-Code (IaC) to define and manage your environment programmatically. Combined with a mature CI/CD pipeline, this approach ensures deployments are repeatable, predictable, and fully automated.
Why It's a Core Production Readiness Check
Without a solid infrastructure and automated deployment process, you introduce significant operational risk. Manual deployments are error-prone, inconsistent, and slow, while a poorly designed infrastructure can lead to catastrophic outages during peak traffic or minor hardware failures. As seen with Netflix's Chaos Monkey, proactively building for failure ensures services remain available even when individual components fail. Similarly, an e-commerce site using AWS Auto Scaling Groups can seamlessly handle a 10x traffic spike during a Black Friday sale because its infrastructure was designed for elasticity.
Actionable Implementation Steps
To achieve infrastructure readiness, focus on these key technical practices:
- Mandate IaC Peer Reviews: Treat your Terraform, CloudFormation, or Ansible code like application code. Enforce pull request-based workflows with mandatory peer reviews for every infrastructure change. Use static analysis tools like
tflintfor Terraform orcfn-lintfor CloudFormation in your CI pipeline to automatically catch syntax errors and non-standard practices. - Implement Pipeline Dry Runs: Your CI/CD pipeline must include a "plan" or "dry run" stage. For Terraform, this means running
terraform plan -out=tfplanand posting a summary of the output to the pull request for review. This allows engineers to validate the exact changes (e.g., resource creation, modification, or destruction) before they are applied to production. - Use State Locking: To prevent conflicting infrastructure modifications from multiple developers or automated processes, use a remote state backend with a locking mechanism. For Terraform, using an S3 backend with a DynamoDB table for locking is a standard and effective pattern. This prevents state file corruption, a common source of critical infrastructure failures.
- Automate Disaster Recovery Drills: Don't just write a disaster recovery plan, test it. Automate scripts that simulate a regional outage in a staging environment (e.g., by shutting down a Kubernetes cluster in one region and verifying that traffic fails over). This validates your failover mechanisms (like DNS routing policies and cross-region data replication) and ensures your team is prepared for a real incident. For a deeper dive into deployment techniques, explore these zero-downtime deployment strategies.
2. Security and Compliance Verification
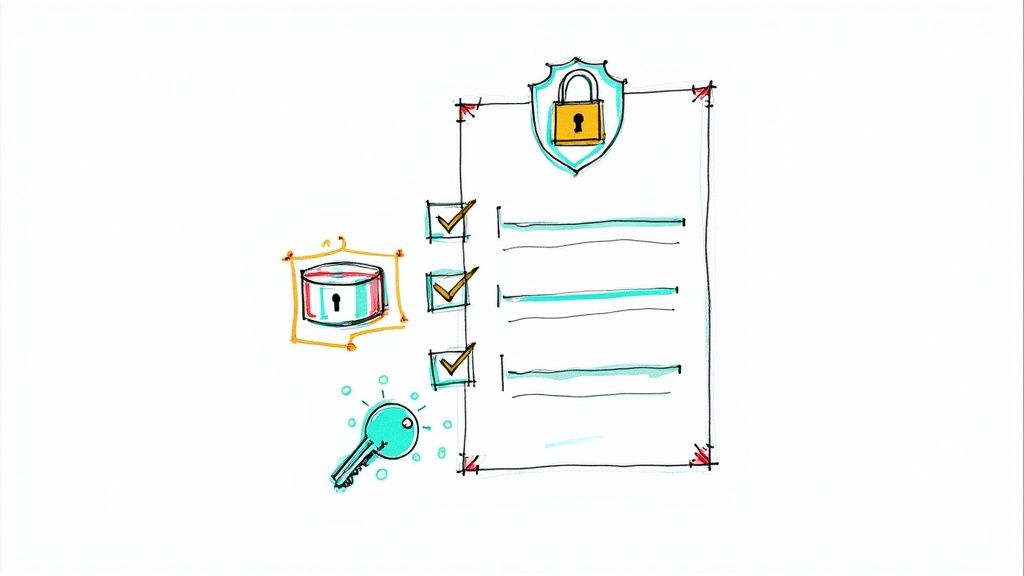
An application can be functionally perfect and highly available, but a single security breach can destroy user trust and business viability. Security and compliance verification is not a final step but an integrated, continuous process of auditing security measures, validating against regulatory standards, and proactively managing vulnerabilities. This critical part of any production readiness checklist ensures your application protects sensitive data and adheres to legal frameworks like GDPR, HIPAA, or SOC 2.
The goal is to embed security into the development lifecycle, from code to production. This involves a multi-layered approach that includes secure coding practices, vulnerability scanning, rigorous access control, and comprehensive data encryption, ensuring the system is resilient against threats.
Why It's a Core Production Readiness Check
Neglecting security exposes your organization to data breaches, financial penalties, and reputational damage. In today's regulatory landscape, compliance is non-negotiable. For instance, Stripe’s success is built on a foundation of rigorous PCI DSS compliance and a transparent security posture, making it a trusted payment processor. Similarly, Microsoft's Security Development Lifecycle (SDL) demonstrates how integrating security checks at every stage of development drastically reduces vulnerabilities in the final product. A proactive stance on security is an operational and business necessity.
Actionable Implementation Steps
To achieve robust security and compliance, focus on these technical implementations:
- Automate Vulnerability Scanning in CI/CD: Integrate Static Application Security Testing (SAST) and Dynamic Application Security Testing (DAST) tools directly into your pipeline. Use tools like Snyk or OWASP ZAP to automatically scan code, container images (
trivy), and dependencies on every commit, failing the build if critical vulnerabilities (e.g., CVE score > 8.0) are found. - Enforce Strict Secret Management: Never hardcode secrets like API keys or database credentials. Use a dedicated secrets management solution such as HashiCorp Vault or AWS Secrets Manager. Your application should fetch credentials at runtime using an IAM role or a service account identity, eliminating secrets from configuration files and environment variables. Implement automated secret rotation policies to limit the window of exposure.
- Conduct Regular Penetration Testing: Schedule third-party penetration tests at least annually or after major architectural changes. These simulated attacks provide an unbiased assessment of your defenses and identify vulnerabilities that automated tools might miss. The final report should include actionable remediation steps and a timeline for resolution.
- Implement a Defense-in-Depth Strategy: Layer your security controls. Essential for locking down the system is implementing a robust Anti Malware Protection, a critical component of security infrastructure. Combine this with network firewalls (e.g., AWS Security Groups with strict ingress/egress rules), a web application firewall (WAF) to block common exploits like SQL injection, and granular IAM roles with the principle of least privilege. For a deeper look at specific compliance frameworks, explore these SOC 2 compliance requirements.
3. Performance and Load Testing: Ensuring Stability Under Pressure
An application that works for one user might crumble under the load of a thousand. Performance and load testing is the critical process of simulating real-world user traffic to verify that your system can meet its performance targets for responsiveness, throughput, and stability. This isn't just about finding the breaking point; it's about understanding how your application behaves under expected, peak, and stress conditions.
This proactive testing identifies bottlenecks in your code, database queries, and infrastructure before they impact users. By measuring response times, error rates, and resource utilization under heavy load, you can confidently scale your services and prevent performance degradation from becoming a catastrophic outage.
Why It's a Core Production Readiness Check
Failing to load test is a direct path to production incidents, lost revenue, and damaged customer trust. Imagine an e-commerce platform launching a major sale only to have its payment gateway time out under the strain. This is a common and preventable failure. Companies like Amazon conduct extensive Black Friday load testing simulations months in advance to ensure their infrastructure can handle the immense traffic spike. Similarly, LinkedIn’s rigorous capacity planning relies on continuous load testing to validate that new features don't degrade the user experience for its millions of active users. A key part of any production readiness checklist is confirming the system's ability to perform reliably under pressure.
Actionable Implementation Steps
To integrate performance testing effectively, focus on these technical implementation details:
- Establish Performance Baselines in CI: Integrate automated performance tests into your CI/CD pipeline using tools like k6, JMeter, or Gatling. For every build, run a small-scale test against a staging environment that mirrors production hardware. Configure the pipeline to fail if key metrics (e.g., P95 latency) regress by more than a predefined threshold, such as 10%, preventing performance degradation from being merged.
- Simulate Realistic User Scenarios: Don't just hit a single endpoint with traffic. Script tests that mimic real user journeys, such as logging in, browsing products, adding to a cart, and checking out. Use a "think time" variable to simulate realistic pauses between user actions. This multi-step approach uncovers bottlenecks in complex, stateful workflows that simple API-level tests would miss.
- Conduct Spike and Endurance Testing: Go beyond standard load tests. Run spike tests that simulate a sudden, massive increase in traffic (e.g., from 100 to 1000 requests per second in under a minute) to validate your autoscaling response time. Also, perform endurance tests (soak tests) that apply a moderate load over an extended period (e.g., 8-12 hours) to identify memory leaks, database connection pool exhaustion, or other resource degradation issues.
- Test Database and Downstream Dependencies: Isolate and test your database performance under load by simulating high query volumes. Use tools like
pgbenchfor PostgreSQL ormysqlslapfor MySQL and analyze query execution plans (EXPLAIN ANALYZE) to identify slow queries. If your service relies on third-party APIs, use mock servers like WireMock or rate limiters to simulate their performance characteristics and potential failures. To learn more about identifying and resolving these issues, explore these application performance optimization techniques.
4. Database and Data Integrity Checks: Safeguarding Your Most Critical Asset
Your application is only as reliable as the data it manages. Ensuring the integrity, availability, and recoverability of your database is a non-negotiable part of any production readiness checklist. This involves validating not just the database configuration itself but also the entire data lifecycle, from routine backups to disaster recovery. A failure here doesn't just cause downtime; it can lead to permanent, catastrophic data loss.
The core goal is to establish a data management strategy that guarantees consistency and enables rapid, reliable recovery from any failure scenario. This means moving from a "set it and forget it" approach to an active, tested, and automated system for data protection. It treats data backups and recovery drills with the same seriousness as code deployments.
Why It's a Core Production Readiness Check
Without robust data integrity and backup strategies, your system is fragile. A simple hardware failure, software bug, or malicious attack could wipe out critical user data, leading to irreversible business damage. For example, a fintech application using Amazon RDS with Multi-AZ deployments can survive a complete availability zone outage without data loss or significant downtime. In contrast, a service without a tested backup restoration process might discover its backups are corrupted only after a real disaster, rendering them useless.
Actionable Implementation Steps
To achieve comprehensive database readiness, implement these technical controls:
- Automate and Encrypt Backups: Configure automated daily backups for all production databases. Use platform-native tools like Amazon RDS automated snapshots or Google Cloud SQL's point-in-time recovery. Critically, enable encryption at rest for both the database and its backups using a managed key service like AWS KMS. Verify that your backup retention policy meets compliance requirements (e.g., 30 days).
- Schedule and Log Restoration Drills: A backup is only useful if it can be restored. Schedule quarterly, automated drills where a production backup is restored to a separate, isolated environment. Script a series of data validation checks (e.g., row counts, specific record lookups) to confirm the integrity of the restored data. Document the end-to-end time taken to refine your recovery time objective (RTO).
- Implement High-Availability Replication: For critical databases, configure a high-availability setup using replication. A common pattern is a primary-replica (or leader-follower) architecture, such as a PostgreSQL streaming replication setup or a MySQL primary-replica configuration. This allows for near-instantaneous failover to a replica node, minimizing downtime during a primary node failure.
- Establish Geographically Redundant Copies: Store backup copies in a separate, geographically distant region from your primary infrastructure. This protects against region-wide outages or disasters. Use cross-region snapshot copying in AWS or similar features in other clouds to automate this process. This is a key requirement for a comprehensive disaster recovery (DR) strategy.
5. Monitoring, Logging, and Observability Setup
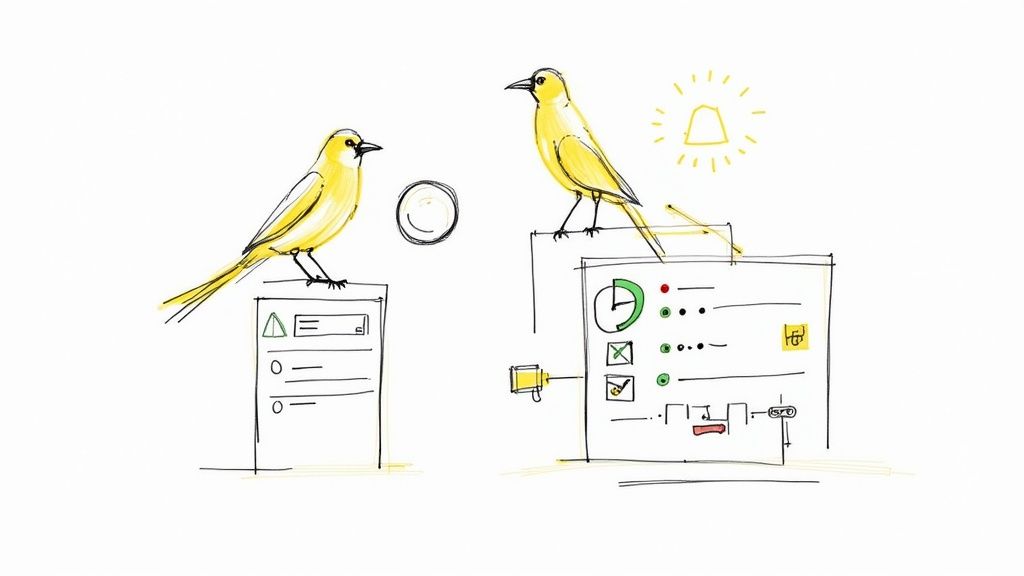
Once an application is live, operating it blindly is a recipe for disaster. A comprehensive monitoring, logging, and observability setup is not an optional add-on; it is the sensory system of your production environment. This involves collecting metrics, aggregating logs, and implementing distributed tracing to provide a complete picture of your application's health, performance, and user behavior in real-time.
The goal is to move from reactive problem-solving to proactive issue detection. By understanding the "three pillars of observability" (metrics, logs, and traces), your team can quickly diagnose and resolve problems, often before users even notice them. This is a critical component of any serious production readiness checklist, enabling you to maintain service level objectives (SLOs) and deliver a reliable user experience.
Why It's a Core Production Readiness Check
Without robust observability, you are effectively flying blind. When an issue occurs, your team will waste critical time trying to identify the root cause, leading to extended outages and frustrated customers. As systems become more complex, especially in microservices architectures, understanding the flow of a request across multiple services is impossible without proper instrumentation. For example, Uber's extensive logging and tracing infrastructure allows engineers to pinpoint a failing service among thousands, while Datadog enables teams to correlate a spike in CPU usage with a specific bad deployment, reducing Mean Time to Resolution (MTTR) from hours to minutes.
Actionable Implementation Steps
To build a production-grade observability stack, focus on these technical implementations:
- Standardize Structured Logging: Mandate that all application logs are written in a structured format like JSON. Include consistent fields such as
timestamp,level,service_name,traceId, anduserId. This allows for powerful, field-based querying in log aggregation tools like the ELK Stack (Elasticsearch, Logstash, Kibana) or Splunk. - Implement Distributed Tracing with Context Propagation: In a microservices environment, use an OpenTelemetry-compatible library to instrument your code for distributed tracing. Ensure that trace context (e.g.,
traceparentW3C header) is automatically propagated across service boundaries via HTTP headers or message queue metadata. This provides a unified view of a single user request as it traverses the entire system in tools like Jaeger or Honeycomb. - Configure Granular, Actionable Alerting: Avoid alert fatigue by creating high-signal alerts based on symptom-based metrics, not causes. For instance, alert on a high API error rate (e.g., 5xx responses exceeding 1% over 5 minutes) or increased P99 latency (symptoms) rather than high CPU utilization (a potential cause). Use tools like Prometheus with Alertmanager to define precise, multi-level alerting rules that route to different channels (e.g., Slack for warnings, PagerDuty for critical alerts).
- Establish Key Dashboards and SLOs: Before launch, create pre-defined dashboards for each service showing the "Four Golden Signals": latency, traffic, errors, and saturation. Define and instrument Service Level Objectives (SLOs) for critical user journeys (e.g., "99.9% of login requests should complete in under 500ms"). Your alerts should be tied directly to your SLO error budget burn rate.
6. Testing Coverage and Quality Assurance: Building a Safety Net of Code
Untested code is a liability waiting to happen. Comprehensive testing and a rigorous quality assurance (QA) process form the critical safety net that catches defects before they impact users. This step in a production readiness checklist involves a multi-layered strategy to validate application behavior, from individual functions to complex user journeys. The objective is to build confidence in every release by systematically verifying that the software meets functional requirements and quality standards.
This goes beyond just writing tests; it involves cultivating a culture where quality is a shared responsibility. It means implementing the Testing Pyramid, where a wide base of fast, isolated unit tests is supplemented by fewer, more complex integration and end-to-end (E2E) tests. This approach ensures rapid feedback during development while still validating the system as a whole.
Why It's a Core Production readiness Check
Shipping code without adequate test coverage is like navigating without a map. It leads to regressions, production bugs, and a loss of user trust. A robust testing strategy prevents this by creating a feedback loop that identifies issues early, drastically reducing the cost and effort of fixing them. For example, Google's extensive use of automated testing across multiple layers allows them to deploy thousands of changes daily with high confidence. Similarly, Amazon's strong emphasis on high test coverage is a key reason they can maintain service stability while innovating at a massive scale.
Actionable Implementation Steps
To achieve high-quality test coverage, focus on these key technical practices:
- Enforce Code Coverage Gates: Integrate a code coverage tool like JaCoCo (Java), Coverage.py (Python), or Istanbul (JavaScript) into your CI pipeline. Configure it to fail the build if the coverage on new code (incremental coverage) drops below a set threshold, such as 80%. This creates a non-negotiable quality standard for all new code without penalizing legacy modules.
- Implement a Pyramid Testing Strategy: Structure your tests with a heavy focus on unit tests using frameworks like JUnit or Pytest for fast, granular feedback. Add a smaller number of integration tests that use Docker Compose or Testcontainers to spin up real dependencies like a database or message queue. Reserve a minimal set of E2E tests for critical user workflows using tools like Cypress or Selenium. To establish a strong safety net of code and validate your product thoroughly, explore various effective quality assurance testing methods.
- Automate All Test Suites in CI: Your CI/CD pipeline must automatically execute all test suites (unit, integration, and E2E) on every commit or pull request. This ensures that no code is merged without passing the full gauntlet of automated checks, providing immediate feedback to developers within minutes.
- Schedule Regular Test Suite Audits: Tests can become outdated or irrelevant over time. Schedule quarterly reviews to identify and remove "flaky" tests (tests that pass and fail intermittently without code changes). Use test analytics tools to identify slow-running tests and optimize them. This keeps your test suite a reliable and valuable asset rather than a source of friction.
7. Documentation and Knowledge Transfer: Building Institutional Memory
Code and infrastructure are only half the battle; the other half is the human knowledge required to operate, debug, and evolve the system. Comprehensive documentation and a clear knowledge transfer process transform tribal knowledge into an accessible, institutional asset. This step in the production readiness checklist ensures that the "why" behind architectural decisions and the "how" of operational procedures are captured, making the system resilient to team changes and easier to support during an incident.
The goal is to move from a state where only a few key engineers understand the system to one where any on-call engineer can quickly find the information they need. This involves creating and maintaining architectural diagrams, API contracts, operational runbooks, and troubleshooting guides. It’s about building a sustainable system that outlasts any single contributor.
Why It's a Core Production Readiness Check
Without clear documentation, every incident becomes a fire drill that relies on finding the "right person" who remembers a critical detail. This creates single points of failure, slows down incident response, and makes onboarding new team members painfully inefficient. Google’s SRE Book codifies this principle, emphasizing that runbooks (or playbooks) are essential for ensuring a consistent and rapid response to common failures. Similarly, a well-documented API, complete with curl examples, prevents integration issues and reduces support overhead for other teams.
Actionable Implementation Steps
To build a culture of effective documentation and knowledge transfer, focus on these technical practices:
- Standardize Runbook Templates: Create a mandatory runbook template in your wiki (e.g., Confluence, Notion) for every microservice. This template must include: links to key metric dashboards, definitions for every critical alert, step-by-step diagnostic procedures for those alerts (e.g., "If alert X fires, check log query Y for error Z"), and escalation contacts.
- Automate API Documentation Generation: Integrate tools like Swagger/OpenAPI with your build process. Use annotations in your code to automatically generate an interactive API specification. The build process should fail if the generated documentation is not up-to-date with the code, ensuring API contracts are always accurate and discoverable.
- Implement Architectural Decision Records (ADRs): For significant architectural changes, use a lightweight ADR process. Create a simple Markdown file (
001-record-database-choice.md) in the service'sdocs/adrdirectory that documents the context, the decision made, and the technical trade-offs. This provides invaluable historical context for future engineers. - Schedule "Game Day" Scenarios: Conduct regular "game day" exercises where the team simulates a production incident (e.g., "The primary database is down") using only the available documentation. This practice quickly reveals gaps in your runbooks and troubleshooting guides in a controlled environment, forcing updates and improvements before a real incident occurs.
8. Capacity Planning and Resource Allocation
Under-provisioning resources can lead to degraded performance and outages, while over-provisioning wastes money. Strategic capacity planning is the process of forecasting the compute, memory, storage, and network resources required to handle production workloads effectively, ensuring you have enough headroom for growth and traffic spikes. The goal is to match resource supply with demand, maintaining both application performance and cost-efficiency.
This involves moving from reactive scaling to proactive forecasting. By analyzing historical data and business projections, you can make informed decisions about resource allocation, preventing performance bottlenecks before they impact users. A well-executed capacity plan is a critical component of any production readiness checklist, as it directly supports application stability and financial discipline.
Why It's a Core Production Readiness Check
Without a deliberate capacity plan, you are flying blind. A sudden marketing campaign or viral event could easily overwhelm your infrastructure, causing a catastrophic failure that erodes user trust and loses revenue. For example, Netflix meticulously plans its capacity to handle massive global streaming demands, especially for major show releases. This ensures a smooth viewing experience for millions of concurrent users. Similarly, an e-commerce platform that fails to plan for a holiday sales surge will face slow load times and checkout failures, directly impacting its bottom line.
Actionable Implementation Steps
To achieve robust and cost-effective capacity management, focus on these technical practices:
- Analyze Historical Metrics: Use your monitoring platform (e.g., Datadog, Prometheus) to analyze historical CPU, memory, and network utilization over the past 6-12 months. Identify trends, daily and weekly peaks, and correlate them with business events to build a predictive model for future demand. Use this data to set appropriate resource
requestsandlimitsin Kubernetes. - Establish a Headroom Buffer: A common best practice is to provision for at least 50-100% (or 1.5x-2x) of your expected peak traffic. This buffer absorbs unexpected surges and gives your auto-scaling mechanisms (e.g., Kubernetes Horizontal Pod Autoscaler) time to react without service degradation. For example, if peak CPU is 40%, set your HPA target to 60-70%.
- Implement Tiered Resource Allocation: Combine different purchasing models to optimize costs. Use Reserved Instances or Savings Plans for your predictable, baseline workload (e.g., the minimum number of running application instances) to get significant discounts. For variable or spiky traffic, rely on on-demand instances managed by auto-scaling groups to handle fluctuations dynamically.
- Conduct Regular Load Testing: Don't guess your system's breaking point; find it. Use tools like k6 or JMeter to simulate realistic user traffic against a staging environment that mirrors production. This validates your capacity assumptions and reveals hidden bottlenecks in your application or infrastructure. Review and adjust your capacity plan at least quarterly or ahead of major feature launches.
9. Error Handling and Graceful Degradation: Engineering for Resilience
Modern applications are distributed systems that depend on a network of microservices, APIs, and third-party dependencies. In such an environment, failures are not exceptional events; they are inevitable. Graceful degradation is the practice of designing a system to maintain partial functionality even when some components fail, preventing a single point of failure from causing a catastrophic outage. Instead of a complete system crash, the application sheds non-critical features to preserve core services.
This design philosophy, popularized by Michael Nygard's Release It!, shifts the focus from preventing failures to surviving them. It involves implementing patterns like circuit breakers, retries, and timeouts to isolate faults and manage dependencies intelligently. This approach ensures that a failure in a secondary service, like a recommendation engine, does not bring down a primary function, such as the checkout process.
Why It's a Core Production Readiness Check
Without robust error handling and degradation strategies, your system is fragile. A minor, transient network issue or a slow third-party API can trigger cascading failures that take down your entire application. This leads to poor user experience, lost revenue, and a high mean time to recovery (MTTR). For example, if a payment gateway API is slow, a system without proper timeouts might exhaust its connection pool, making the entire site unresponsive. In contrast, a resilient system would time out the payment request, perhaps offering an alternative payment method or asking the user to try again later, keeping the rest of the site functional. This makes proactive fault tolerance a critical part of any production readiness checklist.
Actionable Implementation Steps
To build a system that degrades gracefully, focus on these technical patterns:
- Implement the Circuit Breaker Pattern: Use a library like Resilience4j (Java) or Polly (.NET) to wrap calls to external services. Configure the circuit breaker to "open" after a certain threshold of failures (e.g., 50% failure rate over 10 requests). Once open, it immediately fails subsequent calls with a fallback response (e.g., a cached result or a default value) without hitting the network, preventing your service from waiting on a known-failed dependency.
- Configure Intelligent Retries with Exponential Backoff: For transient failures, retries are essential. However, immediate, rapid retries can overwhelm a struggling downstream service. Implement exponential backoff with jitter, where the delay between retries increases with each attempt (e.g., 100ms, 200ms, 400ms) plus a small random value. This prevents a "thundering herd" of synchronized retries from exacerbating an outage.
- Enforce Strict Timeouts and Deadlines: Never make a network call without a timeout. Set aggressive but realistic timeouts for all inter-service communications and database queries (e.g., a 2-second timeout for a critical API call). This ensures a slow dependency cannot hold up application threads indefinitely, which would otherwise lead to resource exhaustion and cascading failure.
- Leverage Feature Flags for Dynamic Degradation: Use feature flags not just for new features but also as a "kill switch" for non-essential functionalities. If your monitoring system detects that your user profile service is failing (high error rate), an automated process can toggle a feature flag to dynamically disable features like personalized greetings or avatars site-wide until the service recovers, ensuring the core application remains available.
10. Post-Deployment Verification and Smoke Testing: The Final Sanity Check
Deployment is not the finish line; it’s the handover. Post-deployment verification and smoke testing act as the immediate, final gatekeeper, ensuring that the new code functions as expected in the live production environment before it impacts your entire user base. This process involves a series of automated or manual checks that validate critical application functionalities right after a release. The goal is to quickly detect catastrophic failures, such as a broken login flow or a failing checkout process, that may have slipped through pre-production testing.
This critical step in any production readiness checklist serves as an essential safety net. By running targeted tests against the live system, you gain immediate confidence that the core user experience has not been compromised. It's the difference between discovering a critical bug yourself in minutes versus hearing about it from frustrated customers hours later.
Why It's a Core Production Readiness Check
Skipping post-deployment verification is like launching a rocket without a final systems check. It introduces immense risk. Even with extensive testing in staging, subtle configuration differences in production can cause unforeseen issues. For instance, a misconfigured environment variable or a network ACL change could bring down a core service. Google's use of canary deployments, where traffic is slowly shifted to a new version while being intensely monitored, exemplifies this principle. If error rates spike, traffic is immediately rerouted, preventing a widespread outage. This practice confirms that the application behaves correctly under real-world conditions.
Actionable Implementation Steps
To build a reliable post-deployment verification process, integrate these technical practices into your pipeline:
- Automate Critical User Journey Tests: Script a suite of smoke tests that mimic your most critical user paths, such as user registration, login, and adding an item to a cart. These tests should be integrated directly into your CI/CD pipeline and run automatically against the production environment immediately after a deployment. Tools like Cypress or Playwright are excellent for this. The test should use a dedicated test account.
- Implement a "Health Check" API Endpoint: Create a dedicated API endpoint (e.g.,
/healthzor/readyz) that performs deep checks on the application's dependencies, such as database connectivity, external API reachability, and cache status. The deployment orchestrator (e.g., Kubernetes) should query this endpoint after the new version is live to confirm all connections are healthy before routing traffic to it. - Trigger Automated Rollbacks on Failure: Configure your deployment orchestrator (like Kubernetes, Spinnaker, or Harness) to monitor the smoke test results and key performance indicators (KPIs) like error rate or latency. If a critical smoke test fails or KPIs breach predefined thresholds within the first 5 minutes of deployment, the system should automatically trigger a rollback to the previous stable version without human intervention.
- Combine with Progressive Delivery: Use strategies like blue-green or canary deployments. This allows you to run smoke tests against the new version with zero or minimal user traffic. For a blue-green deployment, all verification happens on the "green" environment before the router is switched, completely de-risking the release. In a canary deployment, you run tests against the new instance before increasing its traffic share.
10-Point Production Readiness Checklist Comparison
| Item | Implementation complexity | Resource requirements | Expected outcomes | Ideal use cases | Key advantages |
|---|---|---|---|---|---|
| Infrastructure and Deployment Readiness | High — IaC, CI/CD, orchestration | Significant cloud resources, automation tooling, ops expertise | Reliable, scalable production deployments | High-traffic services, continuous delivery pipelines | Reduces manual errors, enables rapid scaling, consistent environments |
| Security and Compliance Verification | High — audits, controls, remediation | Security tools, skilled security engineers, audit processes | Compliant, hardened systems that reduce legal risk | Regulated industries, enterprise customers, payment/data services | Protects data, builds trust, reduces legal/financial exposure |
| Performance and Load Testing | Medium–High — test design and execution | Load generators, test environments, monitoring infrastructure | Identified bottlenecks and validated scalability | Peak events, SLA validation, capacity planning | Prevents outages, establishes performance baselines |
| Database and Data Integrity Checks | Medium — backups, replication, validation | Backup storage, replication setups, restore testing time | Ensured data consistency and recoverability | Data-critical applications, compliance-driven systems | Prevents data loss, ensures business continuity |
| Monitoring, Logging, and Observability Setup | Medium–High — instrumentation and dashboards | Monitoring/logging platforms, storage, alerting config | Real-time visibility and faster incident response | Production operations, troubleshooting complex issues | Rapid detection, root-cause insights, data-driven fixes |
| Testing Coverage and Quality Assurance | Medium — test suites and automation | Test frameworks, CI integration, QA resources | Reduced defects and safer releases | Frequent releases, refactoring-heavy projects | Regression protection, higher code quality |
| Documentation and Knowledge Transfer | Low–Medium — writing and upkeep | Documentation tools, time from engineers, review cycles | Faster onboarding and consistent operational knowledge | Team scaling, handovers, on-call rotations | Reduces context loss, speeds incident resolution |
| Capacity Planning and Resource Allocation | Medium — forecasting and modeling | Analytics tools, cost management, monitoring data | Optimized resource usage and planned headroom | Cost-sensitive services, expected growth scenarios | Prevents exhaustion, optimizes cloud spending |
| Error Handling and Graceful Degradation | Medium — design patterns and testing | Dev time, resilience libraries, testing scenarios | Resilient services with partial availability under failure | Distributed systems, unreliable third-party integrations | Prevents cascading failures, maintains user experience |
| Post-Deployment Verification and Smoke Testing | Low–Medium — automated and manual checks | Smoke test scripts, health checks, pipeline hooks | Immediate detection of deployment regressions | Continuous deployment, rapid release cycles | Quick rollback decisions, increased deployment confidence |
From Checklist to Culture: Embedding Production Readiness
Navigating the extensive 10-point production readiness checklist is a formidable yet crucial step toward operational excellence. We've journeyed through the technical trenches of infrastructure automation, fortified our applications with robust security protocols, and established comprehensive observability frameworks. From rigorous performance testing to meticulous data integrity checks and strategic rollback plans, each item on this list represents a critical pillar supporting a stable, scalable, and resilient production environment.
Completing this checklist for a single deployment is a victory. However, the true goal isn’t to simply check boxes before a release. The ultimate transformation occurs when these checks evolve from a manual, pre-launch gate into a deeply ingrained, automated, and cultural standard. The real value of a production readiness checklist is its power to shift your organization's mindset from reactive firefighting to proactive engineering.
Key Takeaways: From Manual Checks to Automated Pipelines
The most impactful takeaway from this guide is the principle of "shifting left." Instead of treating production readiness as the final hurdle, integrate these principles into the earliest stages of your development lifecycle.
- Infrastructure and Deployment: Don't just configure your servers; codify them using Infrastructure as Code (IaC) with tools like Terraform or Pulumi. Your CI/CD pipeline should not only build and test code but also provision and configure the environment it runs in. Use static analysis tools like
tflintto enforce standards automatically. - Security and Compliance: Security isn't a post-development audit. It's a continuous process. Integrate static application security testing (SAST) and dynamic application security testing (DAST) tools directly into your pipeline. Automate dependency scanning with tools like Snyk or Dependabot to catch vulnerabilities before they ever reach production.
- Monitoring and Observability: True observability isn't about having a few dashboards. It’s about structuring your logs in JSON, implementing distributed tracing with OpenTelemetry from the start, and defining service-level objectives (SLOs) that are automatically tracked by your monitoring platform. This setup should be part of the application's core design, not an afterthought.
By embedding these practices directly into your automated workflows, you remove human error, increase deployment velocity, and ensure that every single commit is held to the same high standard of production readiness.
The Broader Impact: Building Confidence and Accelerating Innovation
Mastering production readiness transcends technical stability; it directly fuels business growth and innovation. When your engineering teams can deploy changes with confidence, knowing a comprehensive safety net is in place, they are empowered to experiment, iterate, and deliver value to customers faster.
A mature production readiness process transforms deployments from high-stakes, anxiety-ridden events into routine, non-disruptive operations. This psychological shift unlocks a team's full potential for innovation.
This confidence reverberates throughout the organization. Product managers can plan more ambitious roadmaps, support teams can spend less time triaging incidents, and leadership can trust that the technology backbone is solid. Your production readiness checklist becomes less of a restrictive document and more of a strategic enabler, providing the framework needed to scale complex systems without sacrificing quality or speed. It is the bedrock upon which reliable, high-performing software is built, allowing you to focus on building features, not fixing failures.
Ready to transform your production readiness checklist from a document into a fully automated, cultural standard? The elite freelance DevOps and SRE experts at OpsMoon specialize in implementing the robust systems and pipelines discussed in this guide. Visit OpsMoon to book a free work planning session and build a production environment that enables speed, security, and unwavering reliability.