Author: opsmoon

  • Unlocking Elite Talent: An Actionable Guide to Consultant Talent Acquisition

    Unlocking Elite Talent: An Actionable Guide to Consultant Talent Acquisition

    Sourcing an elite technical consultant doesn't start with firing off job posts. That's a final-stage tactic, not an opening move. The process begins by creating a precise technical blueprint. This is not a glorified job description; it's a detailed specification document that quantifies success within your operational context. Executing this correctly is the primary filter that attracts specialists capable of solving your specific engineering challenges.

    Crafting Your Technical Blueprint for the Right Consultant

    Forget posting a vague request for a "DevOps Expert." To attract top-tier consultants, you must construct a detailed profile that maps high-level business objectives to tangible, measurable technical requirements. This blueprint, which often becomes the core of a Statement of Work (SOW), is the foundational layer of your entire acquisition process.

    Its importance cannot be overstated. It establishes explicit expectations from day one, acting as a high-pass filter to disqualify consultants who lack the specific expertise required. This ensures the engaged expert is aligned with measurable business outcomes from the moment they start.

    The primary failure mode in consultant engagements is an ambiguous definition of requirements. Vague goals lead directly to scope creep and make success impossible to measure. The only effective countermeasure is a significant upfront investment in building a rigorous technical and operational profile.

    Translate Business Goals into Technical Imperatives

    First, you must translate business pain points into the technical work required to resolve them. Abstract goals like "improve system stability" are not actionable. They must be decomposed into specific, quantifiable engineering metrics. This level of clarity provides a consultant with an exact problem statement.

    Here are concrete examples of this translation process:

    • Business Goal: Reduce customer-facing downtime and improve system reliability.
      • Technical Imperative: Increase Service Level Objective (SLO) adherence from 99.9% to 99.95% within two quarters.
      • Associated Metric: Reduce Mean Time to Resolution (MTTR) for P1 incidents by 30%, measured against the previous six-month average.
    • Business Goal: Accelerate the software delivery lifecycle to increase feature velocity.
      • Technical Imperative: Transition from a weekly monolithic deployment schedule to an on-demand, per-service deployment model.
      • Associated Metric: Decrease the median CI/CD pipeline execution time from 45 minutes to under 15 minutes.
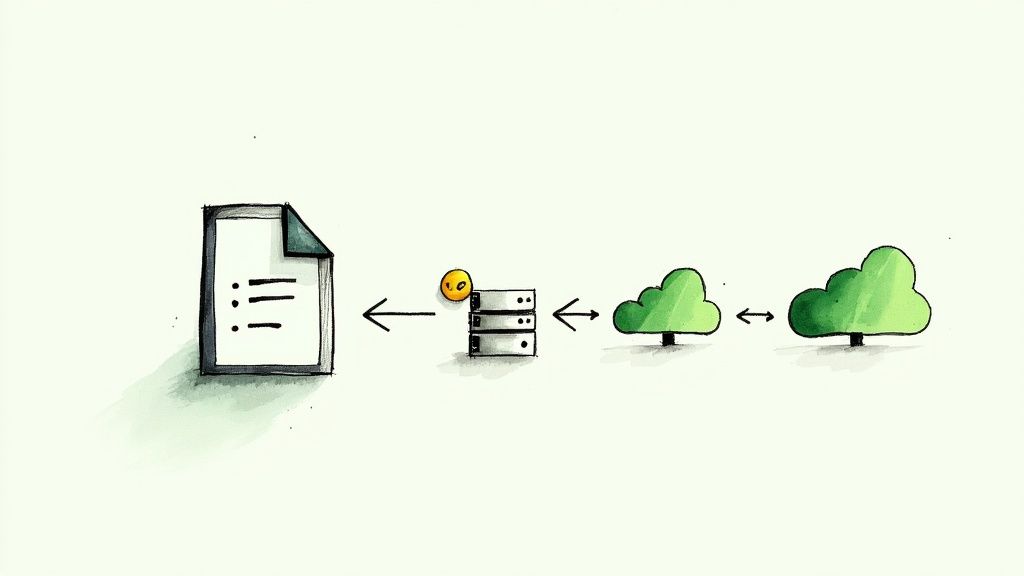
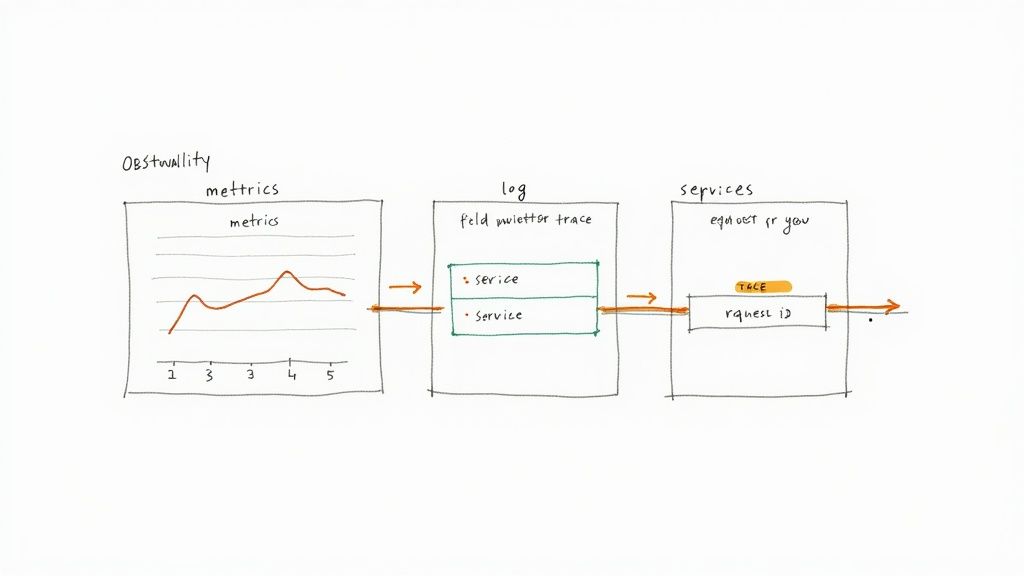
    • Business Goal: Enhance system observability to preempt outages.
      • Technical Imperative: Implement a comprehensive observability stack leveraging OpenTelemetry.
      • Associated Metric: Achieve 95% trace coverage and structured logging for all Tier-1 microservices.

    When you frame requirements in the language of metrics, you provide a non-ambiguous "definition of done." A qualified consultant can parse these imperatives and immediately determine if their skill set is a direct match for the technical challenge.

    Map Objectives to Specific Tech Stack Skills

    With the what and why defined, you must specify the how. This involves mapping your technical imperatives directly to the required competencies for your specific tech stack. This moves the process from high-level objectives to the granular, hands-on expertise you need to source.

    For example, if the objective is to improve infrastructure scalability and reliability, the required skills matrix might look like this:

    Objective: Automate infrastructure provisioning to handle a 50% spike in user traffic with zero manual intervention.

    • Required Skills:
      • Infrastructure as Code (IaC): Expert-level proficiency in Terraform is non-negotiable. The candidate must demonstrate experience creating reusable, version-controlled modules and managing complex state files across multiple environments (e.g., dev, staging, prod) using Terragrunt or similar wrappers.
      • Container Orchestration: Advanced operational knowledge of Kubernetes, including demonstrable experience authoring custom operators or CRDs, building production-grade Helm charts, and configuring Horizontal Pod Autoscalers (HPA) and Cluster Autoscalers.
      • Cloud Provider: Deep proficiency with AWS services, specifically EKS, with a strong command of VPC networking (e.g., CNI plugins like Calico or Cilium) and granular IAM for Service Accounts (IRSA) to build secure, multi-tenant clusters.

    This level of detail ensures you are not just searching for someone who "knows Kubernetes." You are targeting a specialist who has solved analogous problems within a similar technical ecosystem. This detailed technical blueprint becomes the most powerful filter in your consultant talent acquisition strategy, ensuring every interaction is highly targeted and productive.

    How to Find and Engage Top-Tier Technical Consultants

    The best technical consultants are rarely active on mainstream job boards. They are passive talent—deeply engaged in solving complex problems, contributing to open-source projects, or leading discussions in high-signal technical communities. To engage them, you must operate where they do, adopting a proactive, targeted sourcing model.

    This requires a fundamental shift from reactive recruiting to proactive talent intelligence. Instead of casting a wide net with a generic job post, you must become a technical sourcer, capable of identifying signals of genuine expertise in specialized environments.

    Go Beyond LinkedIn Sourcing

    While LinkedIn is a useful directory, elite technical talent validates their expertise in specialized online forums. Your sourcing strategy must expand to these high-signal platforms where technical credibility is earned through demonstrated skill, not self-proclaimed titles.

    • GitHub and GitLab: An active repository is a public-facing portfolio of work. Look for consistent, high-quality contributions, well-documented code, and evidence of collaboration through pull requests and issue resolution. A consultant who is a core maintainer of a relevant open-source tool is providing verifiable proof of their expertise.
    • Technical Communities: Immerse yourself in platforms like the CNCF Slack channels, domain-specific subreddits (e.g., r/devops, r/sre), or specialized mailing lists. Monitor discussions to identify individuals who provide deeply insightful answers, share nuanced technical knowledge, and command peer respect.
    • Specialized Freelance Platforms: Move beyond generalist marketplaces. Platforms like Toptal and Braintrust, along with highly curated agencies, perform rigorous technical vetting upfront. This significantly reduces your screening overhead. These platforms command a premium, but the talent quality is typically much higher. Explore options for specialized DevOps consulting firms in our comprehensive guide.

    This multi-channel approach is critical for building a qualified candidate pipeline. The global talent acquisition market is projected to grow from USD 312.78 billion in 2024 to roughly USD 563.79 billion by 2031, driven precisely by this need for specialized recruitment methodologies.

    Sourcing Channel Effectiveness for Technical Consultants

    Effective sourcing requires understanding the trade-offs between candidate quality, time-to-engage, and cost for each channel. This table breaks down the typical effectiveness for specialized DevOps and SRE roles.

    Sourcing Channel Typical Candidate Quality Average Time-to-Engage Cost Efficiency
    Specialized Agencies Very High 1-2 Weeks Low (High Premiums)
    Curated Freelance Platforms High 2-4 Weeks Medium
    Technical Communities (Slack/Reddit) High 4-8 Weeks High (Time Intensive)
    GitHub/GitLab Very High 4-12+ Weeks Very High (Time Intensive)
    LinkedIn Medium to High 2-6 Weeks Medium
    Referrals Very High 1-4 Weeks Very High

    A blended sourcing strategy is optimal. Leverage referrals and specialized platforms for immediate, time-sensitive needs, while cultivating a long-term talent pipeline through continuous engagement in open-source and technical communities.

    Leverage AI-Powered Sourcing Tools

    Manually parsing these channels is inefficient. Modern AI-powered sourcing tools can dramatically accelerate this process, identifying candidates with specific, rare skill combinations that are nearly impossible to find with standard boolean searches.

    For example, sourcing a Platform Engineer with production experience in both Google's Anthos and legacy Jenkins pipeline migrations via a LinkedIn search would likely yield zero results. An AI tool, however, can search based on conceptual skills and public code contributions, pinpointing qualified candidates in hours. These tools analyze GitHub commits, conference presentations, and technical blog posts to build a holistic profile of a candidate's applied expertise.

    Craft Outreach That Actually Gets a Reply

    Once a potential consultant is identified, the initial outreach is your only chance to bypass their spam filter. Top engineers are inundated with generic recruiter messages. Your communication must stand out by being authentic, technically specific, and problem-centric.

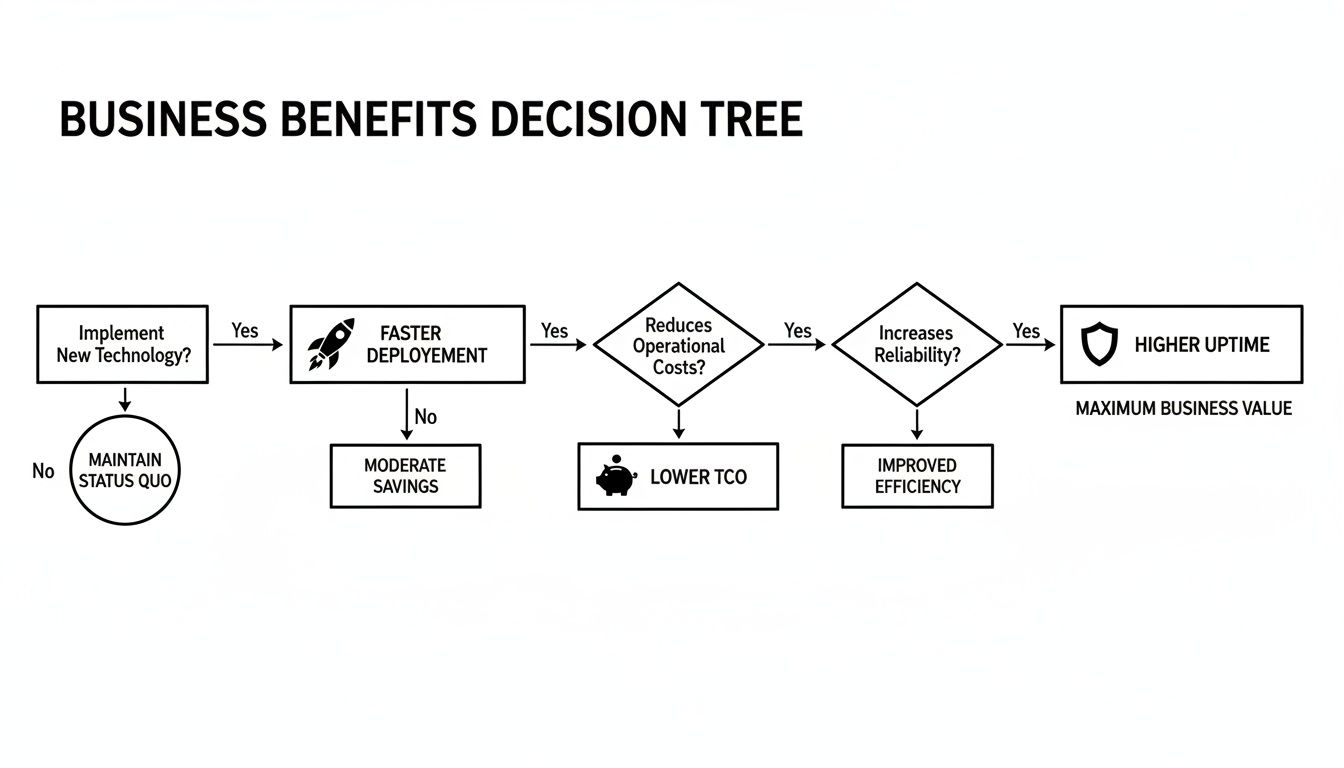
    The chart below visualizes the high-impact goals that motivate top-tier consultants. Your outreach must speak this language.

    A chart outlining "Blueprint Goals" with metrics like MTTR, Frequency, and Reliability, represented by horizontal bars and icons.

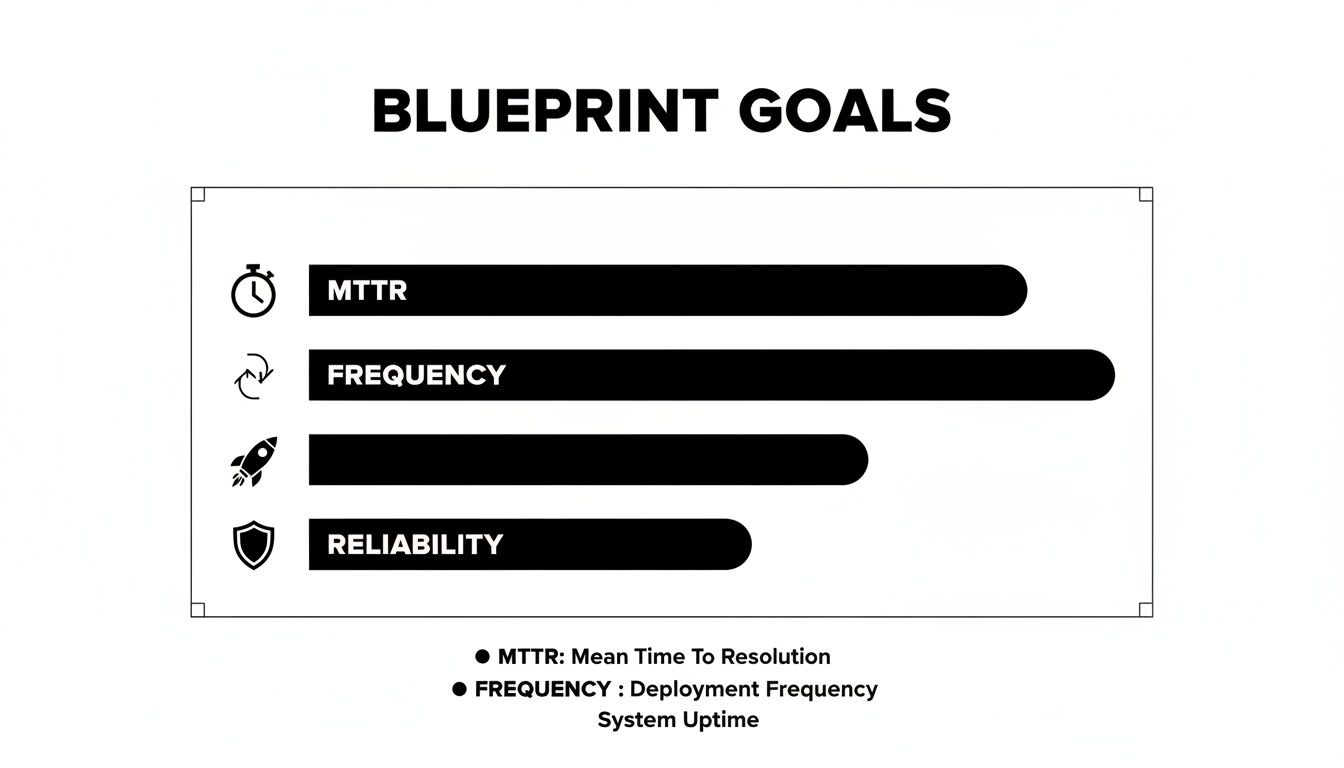
    These blueprint goals—improving MTTR, deployment frequency, and reliability—are the technical challenges you need to articulate.

    Your outreach should read like a message from one technical peer to another, not a generic hiring request. Lead with the compelling engineering problem you are trying to solve, not a job title.

    This three-part structure is highly effective:

    1. Demonstrate Specific Research: Reference a specific piece of their work—an open-source project, a technical article, or a conference talk. Example: "I was impressed by the idempotency handling in your Terraform module for managing EKS node groups on GitHub…" This proves you're not mass-messaging.
    2. Present the Problem, Not the Position: Frame the opportunity as a specific technical challenge. Example: "…We're architecting a solution to reduce our CI/CD pipeline duration from 40 minutes to under 10, and your expertise in build parallelization and caching strategies seems directly applicable."
    3. Make a Clear, Low-Friction Ask: Do not request a resume or a formal interview. The initial ask should be a low-commitment technical discussion. Example: "Would you be open to a 15-minute call next week to exchange ideas on this specific problem?"

    A solid understanding the contingent workforce is crucial for framing contracts correctly from the start. This entire outreach methodology respects the consultant's time and expertise, initiating a peer-level technical dialogue rather than a standard recruitment cycle.

    A promising resume is merely an entry point. The critical phase is verifying that a candidate possesses the requisite technical depth to execute. This is where you must separate true experts from those who can only articulate theory. Without a structured, objective vetting framework, you are simply relying on intuition—a high-risk strategy. A standardized assessment process is non-negotiable; it mitigates bias and ensures every candidate is evaluated against the same high technical bar.

    Visual representation of vetting technical expertise through coding, system design, and a scorecard.

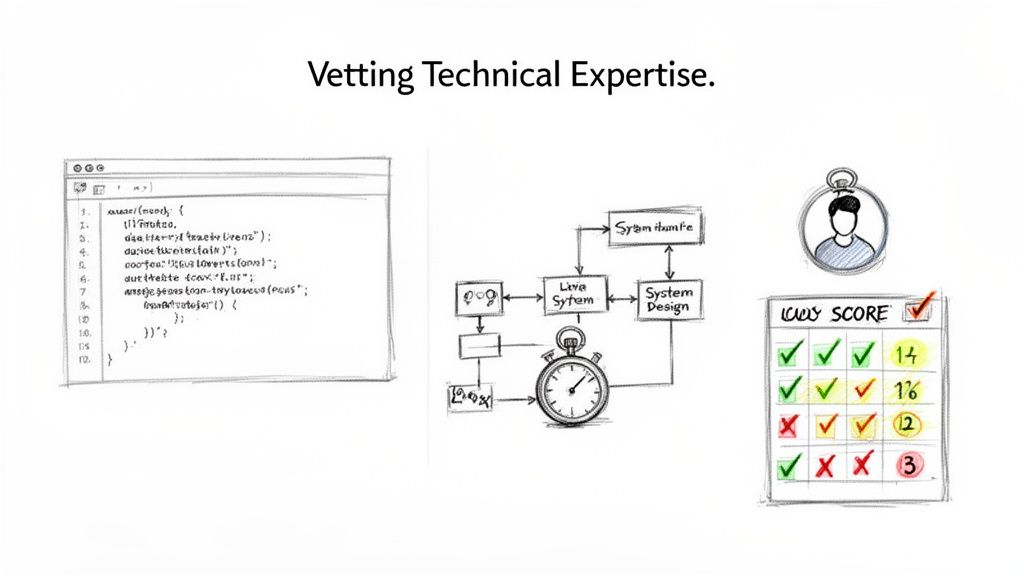
    The key is to design assessments that mirror the real-world problems your team encounters. Generic algorithm tests (e.g., FizzBuzz) or abstract whiteboard problems are useless. They do not predict a consultant's ability to debug a failing Kubernetes pod deployment at 2 AM. You need hands-on, scenario-based assessments that directly test the skills specified in your Statement of Work (SOW).

    Designing Relevant Scenario-Based Assessments

    The most effective technical assessments are custom-built to reflect your specific environment. Creating a problem that feels authentic provides a much clearer signal on a consultant's thought process, communication under pressure, and raw technical aptitude.

    Here are two examples of effective, role-specific assessments:

    • For a Platform Engineer: Present a system design challenge grounded in your reality. For instance, "Design a scalable, multi-tenant CI/CD platform on AWS EKS for an organization with 50 microservices. Present an architecture that addresses security isolation between tenants, cost-optimization for ephemeral build agents, and developer self-service. Specify the core Kubernetes components, controllers, and AWS services you would use, and diagram their interactions."

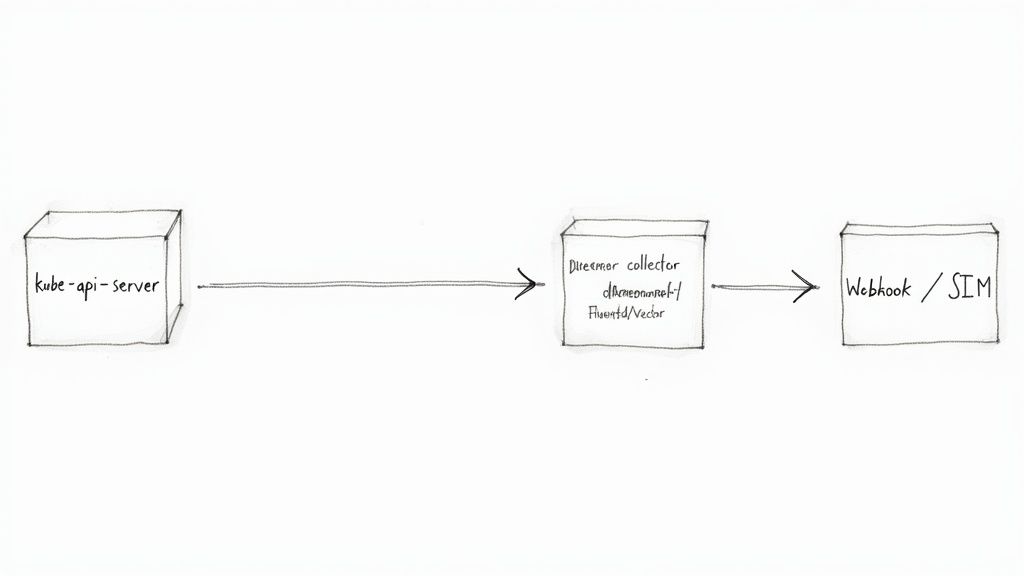
    • For an SRE Consultant: Conduct a live, hands-on troubleshooting exercise. Provision a sandboxed environment with a pre-configured failure scenario (e.g., a misconfigured Prometheus scrape target, a memory leak in a container, or a slow database query caused by an inefficient index). Grant them shell access and observe their diagnostic methodology. Do they start with kubectl logs? Do they query metrics first? How effectively do they articulate their debugging process and hypotheses?

    This practical approach assesses their applied skills, not just their theoretical knowledge. You get to observe how they solve problems, which is invariably more valuable than knowing what they know.

    Implementing a Technical Interview Scorecard

    A standardized scorecard is your most effective tool for eliminating "gut feel" hiring decisions. It compels every interviewer to evaluate candidates against the exact same criteria, all of which are derived directly from the SOW. This data-driven methodology improves hiring quality and makes the entire process more defensible and equitable.

    A scorecard for a senior DevOps consultant might include these categories, each rated from 1-5:

    Competency Category Description Key Evaluation Points
    Infrastructure as Code (IaC) Proficiency with tools like Terraform or Pulumi. Does their code demonstrate modularity and reusability? Can they articulate best practices for managing state and secrets in a team environment?
    Container Orchestration Deep knowledge of Kubernetes and its ecosystem. How do they approach RBAC and network policies for cluster security? Can they design effective autoscaling strategies for both pods and nodes? Do they understand the trade-offs between Helm and Kustomize?
    CI/CD Pipeline Architecture Ability to design and optimize build/release workflows. Can they articulate the pros and cons of different pipeline orchestrators (e.g., Jenkins vs. GitHub Actions)? How do they approach securing the software supply chain (e.g., image signing, dependency scanning)?
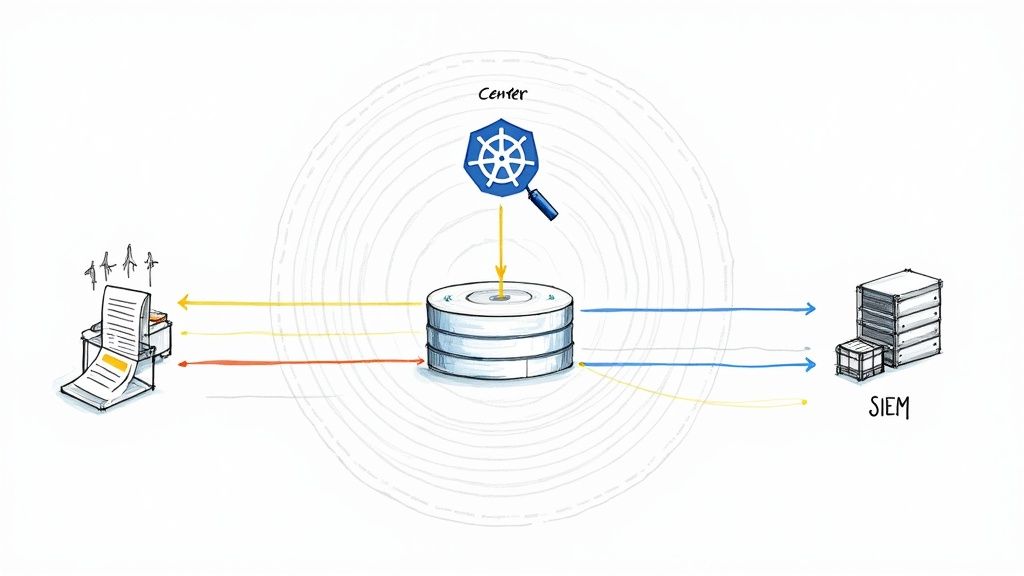
    Observability & Monitoring Expertise in tools like Prometheus, Grafana, and Jaeger. How do they define and implement SLOs and error budgets? Can they leverage distributed tracing to pinpoint latency in a microservices architecture?
    Problem-Solving & Communication How they approach ambiguity and explain technical concepts. Do they ask precise clarifying questions before attempting a solution? Can they explain a complex technical solution to a non-technical stakeholder?

    Using a scorecard ensures all feedback is structured and directly relevant to the role's requirements. By 2025, generative AI and talent-intelligence platforms will become central to corporate hiring. Organizations are already investing in data-driven sourcing to hire faster without sacrificing quality. A well-designed scorecard provides the structured data needed to power these systems.

    Beyond the Technical: Assessing Consulting Acumen

    An elite consultant is more than just a technical executor; they must be a strategic partner and a force multiplier. Your vetting process must evaluate their consulting skills—the competencies required to drive meaningful change within an organization.

    A consultant's true value is measured not just by the technical problems they solve, but by their ability to upskill your team, influence architectural decisions, and leave your organization more capable than they found it.

    To assess these non-technical skills, ask targeted, behavior-based questions:

    • "Describe a time you had to gain buy-in for a significant technical change from a resistant engineering team. What was your strategy?"
    • "Walk me through a project where the initial requirements were ambiguous or incomplete. How did you collaborate with stakeholders to define the scope and establish a clear definition of 'done'?"
    • "What specific mechanisms do you use to ensure successful knowledge transfer to the full-time team before an engagement concludes?"

    Their responses will reveal their ability to navigate organizational dynamics and manage stakeholder expectations—skills that are often as critical as their technical proficiency. Partnering with a premier DevOps consulting company can provide access to talent where this balance of technical and consulting acumen is already a core competency.

    Structuring Contracts and Fair Compensation Models

    After identifying a top-tier consultant who has successfully passed your rigorous technical vetting, the next critical step is to formalize the engagement. This process is not merely about rate negotiation; it is about constructing a clear, equitable, and legally sound agreement that mitigates risk and aligns all parties for success.

    A well-architected contract eliminates ambiguity and synchronizes expectations from day one. The entire consultant talent acquisition process can fail at this stage. A poorly defined or one-sided agreement is a significant red flag that will cause elite candidates to disengage, regardless of the strength of the technical challenge.

    Choosing the Right Engagement Model

    The compensation model directly influences a consultant's incentives and your ability to forecast budgets. The choice of model should be dictated by the nature of the work.

    • Hourly/Daily Rate: This is the most flexible model, ideal for open-ended projects, staff augmentation, or engagements where the scope is expected to evolve. You pay for precisely the time consumed, making it perfect for troubleshooting, advisory work, or initial discovery phases.

    • Fixed-Project Fee: This model is best suited for projects with a well-defined Statement of Work (SOW) and clear, finite deliverables. You agree on a single price for the entire outcome (e.g., "migrate our primary application's CI/CD pipeline from Jenkins to GitHub Actions"). This provides cost predictability and incentivizes the consultant to deliver efficiently.

    • Retainer: A retainer is used to secure a consultant's availability for a predetermined number of hours per month. It is ideal for ongoing advisory services, system maintenance, or ensuring an expert is on-call for critical incident response. This model guarantees priority access to their expertise.

    A common error is applying the wrong model to a project. Attempting to use a fixed fee for an exploratory R&D initiative, for example, will inevitably lead to difficult scope negotiations. Always align the engagement model with the project's characteristics.

    Consultant Engagement Model Comparison

    This matrix breaks down the models to help you select the most appropriate one based on your project goals, budget constraints, and need for flexibility.

    Model Best For Key Advantage Potential Risk
    Hourly/Daily Rate Evolving scope, advisory, staff augmentation High flexibility, pay for exact work done Unpredictable final cost, less incentive for speed
    Fixed-Project Fee Clearly defined projects with specific deliverables Budget certainty, incentivizes consultant efficiency Inflexible if scope changes, requires detailed SOW
    Retainer Ongoing support, advisory, on-call needs Guaranteed availability of expert talent Paying for unused hours if demand is low

    The optimal model aligns incentives and creates a mutually beneficial structure for both your organization and the consultant.

    Setting Fair Market Rates for Niche Skills

    Compensation for senior DevOps, SRE, and Platform Engineering consultants is high because their skills are specialized and in extreme demand. As of 2024, rates in North America vary significantly based on expertise and the complexity of the technology stack.

    For a senior consultant with deep, demonstrable expertise in Kubernetes, Terraform, and a major cloud platform (AWS, GCP, or Azure), you should budget for rates within these ranges:

    • Hourly Rates: $150 – $250+ USD
    • Daily Rates: $1,200 – $2,000+ USD

    Rates at the upper end of this spectrum are standard for specialists with highly niche skills, such as implementing a multi-cluster service mesh with Istio or Linkerd, or developing a sophisticated FinOps strategy to optimize cloud spend. Always benchmark against current market data, not historical rates.

    Essential Clauses for a Rock-Solid Contract

    Your consulting agreement is a critical risk management instrument. While legal counsel should always conduct a final review, several non-negotiable clauses are essential to protect your organization.

    A contract should be a tool for clarity, not a weapon. Its primary purpose is to create a shared understanding of responsibilities, deliverables, and boundaries so both parties can focus on the work.

    Ensure your agreement includes these key sections:

    1. Scope of Work (SOW): This must be hyper-detailed, referencing the technical blueprint. It must explicitly define project objectives, key deliverables, milestones, and acceptance criteria for what constitutes "done."
    2. Intellectual Property (IP): The contract must state unequivocally that all work product—including all code, scripts, documentation, and diagrams—created during the engagement is the exclusive property of your company.
    3. Confidentiality (NDA): This clause protects your sensitive information, trade secrets, and proprietary data. It must be written to survive the termination of the contract.
    4. Term and Termination: Define the engagement's start and end dates. Crucially, include a termination for convenience clause that allows either party to end the agreement with reasonable written notice (e.g., 14 or 30 days). This provides a clean exit strategy if the engagement is not working.
    5. Liability and Indemnification: This section limits the consultant's financial liability and clarifies responsibilities in the event of a third-party claim arising from their work.

    When drafting agreements, it is vital to account for potential future modifications. This guide to understanding contract addendums provides valuable context on how to formally amend legal agreements.

    Getting Consultant Impact from Day One

    The first 30 days of a technical consulting engagement determine its trajectory. A haphazard onboarding process consisting of account provisioning and HR paperwork is a direct impediment to value delivery. To maximize ROI, you must implement a structured, immersive onboarding plan designed to accelerate a consultant's time-to-impact.

    This is not about providing access; it is a deliberate process to rapidly integrate them into your technical stack, team workflows, and the specific business problems they were hired to solve. Without this structure, even the most skilled engineer will spend weeks on non-productive ramp-up.

    Timeline illustrating key milestones for a consultant's first 90 days: architecture document, stakeholder meeting, and KPI.

    A Practical Onboarding Checklist for Technical Consultants

    A structured onboarding process is a strategic advantage. It signals professionalism and establishes a high-impact tone from the start. A comprehensive checklist ensures critical steps are not missed and systematically reduces a consultant's time-to-productivity.

    Adapt this actionable checklist for your needs:

    • Week 1: Deep Dive and Discovery

      • Architecture Review: Schedule dedicated sessions for them to walk through key system architecture diagrams with a senior engineer who can provide historical context and explain design trade-offs.
      • Stakeholder Interviews: Arrange concise, 30-minute meetings with key stakeholders (product owners, tech leads, operations staff) to help them understand the political landscape and project history.
      • Codebase and Infrastructure Tour: Grant read-only access to critical code repositories and infrastructure-as-code (IaC) repos. Facilitate a guided tour to accelerate their understanding of your environment.
    • Week 2: Goal Alignment and an Early Win

      • SOW and Goal Finalization: Conduct a joint review of the Statement of Work (SOW). Collaboratively refine and finalize the 30-60-90 day goals to ensure complete alignment on the definition of success.
      • First Small Win: Assign a low-risk, well-defined task, such as fixing a known bug, improving a specific piece of documentation, or adding a unit test. This familiarizes them with your development workflow and builds critical initial momentum.

    This focused methodology enables a consultant to start delivering meaningful contributions far more rapidly than a passive onboarding process.

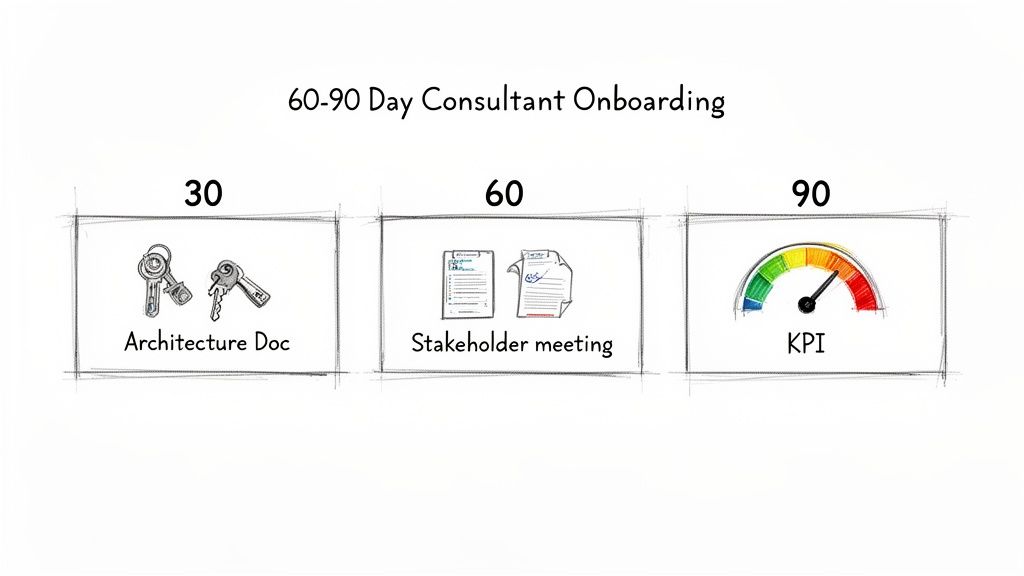
    Defining Your 30-60-90 Day Goals

    The most critical component of onboarding is establishing clear, measurable goals derived directly from the SOW. A 30-60-90 day plan creates a concrete roadmap with tangible milestones for tracking progress. It transforms the engagement from "we hired a consultant" to "we are achieving specific, contracted outcomes."

    A well-defined 30-60-90 plan is the bridge between a consultant's potential and their actual impact. It ensures their day-to-day work is always pointed at the strategic goals you hired them to hit.

    Here is a practical example for an SRE consultant hired to improve system reliability:

    • First 30 Days (Assessment & Quick Wins):

      • Objective: Conduct a comprehensive audit of the current monitoring and alerting stack to identify critical gaps and sources of noise.
      • Key Result: Deliver a detailed assessment report outlining the top five reliability risks and a prioritized remediation roadmap.
      • KPI: Implement one high-impact, low-effort fix, such as tuning a noisy alert responsible for significant alert fatigue.
    • First 60 Days (Implementation):

      • Objective: Begin executing the high-priority items on the observability roadmap.
      • Key Result: Implement standardized structured logging across two business-critical microservices.
      • KPI: Achieve a 20% reduction in Mean Time to Detect (MTTD) for incidents related to those services.
    • First 90 Days (Validation & Scaling):

      • Objective: Validate the impact of the initial changes and develop a plan to scale the solution.
      • Key Result: Define and implement Service Level Objectives (SLOs) and error budgets for the two target services.
      • KPI: Demonstrate SLO adherence for one full month and present a documented plan for rolling out SLOs to five additional services.

    Tying Goals to Tangible KPIs

    Defining goals is only half the process; measuring them is the other. Your Key Performance Indicators (KPIs) must be specific, measurable, and directly linked to business value. This provides an objective basis for proving the consultant's contribution and justifying the investment. When you hire remote DevOps engineers, tying their work to unambiguous metrics is even more critical for maintaining alignment.

    Effective KPIs for technical consultants are not abstract. They are quantifiable:

    • CI/CD Pipeline Duration: A measurable decrease in the average time from git commit to production deployment (e.g., from 35 minutes to under 15 minutes).
    • System Reliability Metrics: A statistically significant improvement in SRE metrics like Mean Time Between Failures (MTBF) or a reduction in the error budget burn rate.
    • Infrastructure Cost Reduction: A quantifiable decrease in the monthly cloud provider bill, achieved through resource optimization or implementing automated cost-control scripts.

    The industry is already moving toward this outcome-based approach. In 2024–2025, companies began shifting talent metrics from activity tracking to outcome-based measures like quality of hire. With 66% of companies focused on improving manager skills, the ability to define and track these outcomes is non-negotiable. Insights from Mercer's global talent trends confirm this shift. This focus on tangible results ensures every consulting dollar delivers demonstrable value.

    Common Questions About Technical Consultant Hiring

    Even with a robust framework, your consultant talent acquisition process will encounter challenges, particularly when sourcing high-demand, specialized engineers.

    You will inevitably face difficult questions regarding the verification of past work, rate negotiation, and sourcing strategy. Navigating these moments effectively often determines the success of an engagement.

    Based on extensive experience, here are tactical answers to the most common challenges.

    How Do You Verify a Consultant's Past Project Claims Without Breaking NDAs?

    This is a classic challenge. A top consultant's most significant work is almost always protected by a non-disclosure agreement. You cannot ask them to violate it.

    The solution is to shift your line of questioning from the what (confidential project details) to the how and the why (their process and decision-making).

    During the interview, frame your questions to probe their methodology and technical reasoning:

    • "Without naming the client, describe the architecture of the most complex distributed system you have designed. What were the primary technical trade-offs you evaluated?"
    • "Describe the most challenging production incident you've had to debug. What was your diagnostic process, and what was the ultimate root cause and solution?"

    This approach respects their legal obligations while still providing deep insight into their problem-solving capabilities. Additionally, use reference checks strategically. Ask former managers to speak to their technical contributions and collaboration skills in general terms, rather than requesting specifics about project deliverables.

    What's the Best Way to Handle Rate Negotiations with a High-Demand Consultant?

    Attempting to lowball an elite consultant is a failed strategy. They are aware of their market value and have multiple opportunities. The key is to enter the negotiation prepared and to frame the discussion around the total value of the engagement, not just the hourly rate.

    First, conduct thorough market research. Have current, reliable compensation data for their specific skill set and experience level. This demonstrates that your position is based on market reality.

    Next, shift the focus to the non-financial aspects of the project that are valuable to top talent:

    • The technical complexity and unique engineering challenges involved.
    • The direct, measurable impact their work will have on the business.
    • The potential for a long-term, mutually beneficial partnership.

    If their rate is firm and slightly exceeds your budget, explore other levers. Can you offer a more flexible work schedule? Propose a performance-based bonus tied to achieving specific KPIs from the SOW? Or can the scope be marginally adjusted to align with the budget?

    Should We Use a Specialized Recruitment Agency or Source Consultants Directly?

    This decision is a trade-off between speed, cost, and control. There is no universally correct answer; it depends on your team's internal capacity and the urgency of the need.

    Using a Specialized Agency
    A reputable agency acts as a force multiplier. They maintain a pre-vetted network of talent and can often present qualified candidates in days or weeks, a fraction of the time direct sourcing might take. This velocity comes at a significant premium, typically 20-30% of the first year's contract value.

    Direct Sourcing
    Direct sourcing is more cost-effective and provides complete control over the process and the candidate experience. However, it requires a substantial and sustained internal effort. Sourcing, screening, and engaging potential consultants is a resource-intensive function.

    A hybrid model is often the most pragmatic solution. Initiate your internal sourcing efforts first, but be prepared to engage a specialized agency for particularly hard-to-fill or business-critical roles where time-to-hire is the primary constraint.


    Ready to bypass the hiring headaches and connect with elite, pre-vetted DevOps talent? At OpsMoon, we match you with engineers from the top 0.7% of the global talent pool. Start with a free work planning session to build your technical roadmap and find the perfect expert for your project.

  • Why site reliability engineering: A Technical Guide to Uptime and Innovation

    Why site reliability engineering: A Technical Guide to Uptime and Innovation

    Site Reliability Engineering (SRE) is the engineering discipline that applies software engineering principles to infrastructure and operations problems. Its primary goals are to create scalable and highly reliable software systems. By codifying operational tasks and using data to manage risk, SRE bridges the gap between the rapid feature delivery demanded by development teams and the operational stability required by users.

    Why Site Reliability Engineering Is Essential

    In a digital-first economy, service downtime translates directly to lost revenue, diminished customer trust, and a tarnished brand reputation. Traditional IT operations, characterized by manual interventions and siloed teams, are ill-equipped to manage the scale and complexity of modern, distributed cloud-native applications.

    This creates a classic dilemma: accelerate feature deployment and risk system instability, or prioritize stability and lag behind competitors. SRE was engineered at Google to resolve this conflict.

    SRE reframes operations as a software engineering challenge. Instead of manual "firefighting," SREs build software systems to automate operations. The focus shifts from a reactive posture—responding to failures—to a proactive one: engineering systems that are resilient, self-healing, and observable by design.

    Shifting from Reaction to Prevention

    The core principle of SRE is the systematic reduction and elimination of toil—the manual, repetitive, automatable, tactical work that lacks enduring engineering value. Think of the difference between manually SSH-ing into a server to restart a failed process versus an automated control loop that detects the failure via a health check and orchestrates a restart, all within milliseconds and without human intervention.

    This engineering-driven approach yields quantifiable business outcomes:

    • Accelerated Innovation: By using data-driven Service Level Objectives (SLOs) and error budgets, SRE provides a clear framework for managing risk. This empowers development teams to release features with confidence, knowing exactly how much risk they can take before impacting users.
    • Enhanced User Trust: Consistent service availability and performance are critical for customer retention. SRE builds a foundation of reliability that directly translates into user loyalty.
    • Reduced Operational Overhead: Automation eliminates the linear relationship between service growth and operational headcount. By automating toil, SREs free up engineering resources to focus on high-value initiatives that drive business growth.

    The strategic value of this approach is reflected in market trends: the global SRE market is projected to surpass $5,500 million by 2025. This growth underscores a widespread industry recognition that reliability is not an accident—it must be engineered.

    SRE is what happens when you ask a software engineer to design an operations function. The result is a proactive discipline focused on quantifying reliability, managing risk through data, and automating away operational burdens.

    Traditional Ops vs. SRE: A Fundamental Shift

    To fully appreciate the SRE paradigm, it is crucial to contrast it with traditional IT operations. The distinction lies not just in tooling but in a fundamental philosophical divergence on managing complex systems.

    Aspect Traditional IT Operations Site Reliability Engineering (SRE)
    Primary Goal Maintain system uptime; "Keep the lights on." Achieve a defined reliability target (SLO) while maximizing developer velocity.
    Approach to Failure Reactive. Respond to alerts and outages as they happen. Proactive. Design systems for resilience; treat failures as expected events.
    Operations Tasks Often manual and repetitive (high toil). Characterized by runbooks. Automated. Toil is actively identified and eliminated via software. Runbooks are codified into automation.
    Team Structure Siloed. Dev and Ops teams are separate with conflicting incentives (change vs. stability). Integrated. SRE is a horizontal function that partners with development teams, sharing ownership of reliability.
    Risk Management Risk-averse. Change is viewed as the primary source of instability. Change freezes are common. Risk-managed. Risk is quantified via error budgets, enabling a calculated balance between innovation and reliability.
    Key Metric Mean Time to Recovery (MTTR). Service Level Objectives (SLOs) and Error Budgets.

    This table illustrates the core transformation SRE enables: evolving from a reactive cost center to a strategic engineering function that underpins business agility.

    Ultimately, understanding why site reliability engineering is critical comes down to this: in modern software, reliability is a feature that must be designed, implemented, and maintained with the same rigor as any other. By integrating core SRE practices, you build systems that are not only stable but also architected for future scalability and evolution. A crucial starting point is mastering the core site reliability engineering principles that form its foundation.

    Building the Technical Foundation of SRE

    The effectiveness of site reliability engineering stems from its methodical, data-driven approach to reliability. SRE translates the abstract concept of "stability" into a quantitative engineering discipline grounded in concrete metrics.

    This is achieved through a hierarchical framework of three core concepts: SLIs, SLOs, and Error Budgets. This framework establishes a data-driven contract between stakeholders, creating a productive tension between feature velocity and system stability.

    SRE functions as the engineering bridge connecting the imperative for innovation with the non-negotiable requirement for a stable service. It provides the mechanism to move fast without breaking the user experience.

    Start with Service Level Indicators

    The foundation of this framework is the Service Level Indicator (SLI). An SLI is a direct, quantitative measure of a specific aspect of the service's performance. It is the raw telemetry—the ground truth—that reflects the user experience.

    An analogy is an aircraft's flight instruments. The altimeter measures altitude, the airspeed indicator measures speed, and the vertical speed indicator measures rate of climb or descent. Each is a specific, unambiguous measurement of a critical system state.

    In a software context, common SLIs are derived from application telemetry:

    • Request Latency: The time taken to process a request, typically measured in milliseconds at a specific percentile (e.g., 95th or 99th). For example, histogram_quantile(0.99, sum(rate(http_request_duration_seconds_bucket[5m])) by (le)) in PromQL.
    • Availability: The ratio of successful requests to total valid requests. This is often defined as (HTTP 2xx + HTTP 3xx responses) / (Total HTTP responses - HTTP 4xx responses). Client-side errors (4xx) are typically excluded as they are not service failures.
    • Throughput: The number of requests processed per second (RPS).
    • Error Rate: The percentage of requests that result in a service error (e.g., HTTP 5xx responses).

    The selection of SLIs is critical. They must be a proxy for user happiness. Low CPU utilization is irrelevant if API latency is unacceptably high.

    Define Your Targets with Service Level Objectives

    Once you have identified your SLIs, the next step is to define Service Level Objectives (SLOs). An SLO is a target value or range for an SLI, measured over a specific compliance period (e.g., a rolling 28-day window). This is the formal reliability promise made to users.

    If the SLI is the aircraft's altimeter reading, the SLO is the mandated cruising altitude for that flight path. It is a precise target that dictates engineering decisions. Meeting aggressive SLOs often requires significant performance engineering, such as engaging specialized Ruby on Rails performance services to optimize database queries and reduce request latency.

    Examples of well-defined SLOs:

    • Latency SLO: "99% of requests to the /api/v1/users endpoint will be completed in under 200ms, measured over a rolling 28-day window."
    • Availability SLO: "The authentication service will have a success rate of 99.95% for all valid requests over a calendar month."

    A robust SLO must be measurable, meaningful to the user, and achievable. Targeting 100% availability is an anti-pattern. It creates an unattainable goal, leaves no room for planned maintenance or deployments, and ignores the reality that failures in complex distributed systems are inevitable.

    The Power of the Error Budget

    This leads to the most transformative concept in SRE: the Error Budget. An error budget is the mathematical inverse of an SLO, representing the maximum permissible level of unreliability before breaching the user promise.

    Formula: Error Budget = 100% – SLO Percentage

    For an availability SLO of 99.9%, the error budget is 0.1%. Over a 30-day period (approximately 43,200 minutes), this translates to a budget of 43.2 minutes of acceptable downtime or degraded performance.

    The error budget becomes a shared, data-driven currency for risk management between development and operations teams. If the service is operating well within its error budget, teams are empowered to deploy new features, conduct experiments, and take calculated risks.

    Conversely, if the error budget is depleted, a "policy" is triggered. This could mean a temporary feature deployment freeze, where the team's entire focus shifts to reliability improvements—such as hardening tests, fixing bugs, or improving system resilience—until the service is once again operating within its SLO. This creates a powerful self-regulating system that organically balances innovation with stability.

    Eradicating Toil with Strategic Automation

    A primary directive for any SRE is the relentless identification and elimination of toil. Toil is defined as manual, repetitive, automatable work that is tactical in nature and provides no enduring engineering value. Examples include manually provisioning a virtual machine, applying a security patch across a fleet of servers, or restarting a crashed service via SSH.

    Individually, these tasks seem minor, but they accumulate, creating a significant operational drag that scales linearly with service growth—a fundamentally unsustainable model. SRE aims to break this linear relationship through software automation.

    Capping Toil to Foster Innovation

    The SRE model enforces a strict rule: an engineer's time should be split, with no more than 50% dedicated to operational tasks (including toil and on-call duties). The remaining 50% must be allocated to development work, primarily focused on building automation to reduce future operational load.

    This 50% cap acts as a critical feedback loop. If toil consumes more than half of the team's capacity, the mandate is to halt new project work and focus exclusively on building automation to drive that number down. This cultural enforcement mechanism ensures that the team invests in scalable, long-term solutions rather than perpetuating a cycle of manual intervention.

    Toil is the operational equivalent of technical debt. By systematically identifying and automating it, SREs pay down this debt, freeing up engineering capacity for work that creates genuine business value and drives innovation forward.

    Industry data confirms the urgency: recent reports show toil consumes a median of 30% of an engineer’s time. Organizations that successfully implement SRE models report significant gains, including a 20-25% boost in operational efficiency and over a 30% improvement in system resilience.

    Practical Automation Strategies in SRE

    SRE applies a software engineering discipline to operational problems, architecting systems designed for autonomous operation.

    This manifests in several key practices:

    • Self-Healing Infrastructure: Instead of manual server replacement, SREs build systems using orchestrators like Kubernetes. A failing pod is automatically detected by the control plane's health checks, terminated, and replaced by a new, healthy instance, often without any human intervention.
    • Automated Provisioning (Infrastructure as Code): Manual environment setup is slow and error-prone. SREs use Infrastructure as Code (IaC) tools like Terraform or Pulumi to define infrastructure declaratively. This allows for the creation of consistent, version-controlled, and repeatable environments with a single command (terraform apply).
    • Bulletproof CI/CD Pipelines: Deployments are a primary source of instability. SREs engineer robust CI/CD pipelines that automate testing (unit, integration, end-to-end), static analysis, and progressive delivery strategies like canary deployments or blue-green releases. An automated quality gate can analyze SLIs from the canary deployment and trigger an automatic rollback if error rates increase or latency spikes, protecting the user base from a faulty release. A deep dive into the benefits of workflow automation is foundational to building these systems.

    Modern tooling is further advancing this front. Exploring AI-driven automation insights from Parakeet-AI reveals how machine learning is being applied to anomaly detection and predictive scaling.

    Ultimately, automation is the engine of SRE scalability. By engineering away the operational burden, SREs can focus on strategic, high-leverage work: improving system architecture, enhancing performance, and ensuring long-term reliability.

    Putting SRE Into Practice in Your Organization

    Adopting Site Reliability Engineering is a significant cultural and technical transformation. It requires more than renaming an operations team; it involves re-architecting the relationship between development and operations and instilling a shared ownership model for reliability. A pragmatic, phased roadmap is essential for success.

    The journey typically begins when an organization starts experiencing specific, painful symptoms of scale.

    Is It Time for SRE?

    Pain is a powerful catalyst for change. If your organization is grappling with the following issues, it is likely a prime candidate for SRE adoption:

    • Developer Velocity is Stalling: Development cycles are impeded by operational bottlenecks, complex deployment processes, or frequent "all hands on deck" firefighting incidents. When innovation is sacrificed for stability, it’s a clear signal.
    • Frequent Outages Are Hurting Customers: Service disruptions have become normalized, leading to customer complaints, support ticket overload, and churn.
    • Scaling is Painful and Unpredictable: Every traffic spike, whether from a marketing campaign or organic growth, triggers a high-stakes incident response. The inability to scale elastically caps business growth.
    • "Alert Fatigue" Is Burning Out Engineers: On-call engineers are inundated with low-signal, non-actionable alerts, leading to burnout and a purely reactive operational posture.

    If these challenges resonate, a structured SRE implementation is the most effective path forward.

    SRE Adoption Readiness Checklist

    Before embarking on an SRE transformation, a candid assessment of organizational readiness is crucial. This checklist helps initiate the necessary conversations.

    Indicator Description Actionable Question For Your Team
    Operational Overload Your operations team spends more than 50% of its time on manual, repetitive tasks and firefighting. "Can we quantify the percentage of our operations team's time spent on toil versus proactive engineering projects over the last quarter?"
    Reliability Blame Game Outages result in finger-pointing between development and operations teams. "What was the key outcome of our last postmortem? Did it result in specific, assigned action items to improve the system, or did it devolve into assigning blame?"
    Unquantified Reliability Discussions about service health are subjective ("it feels slow") rather than based on objective data. "Can we define and instrument a user-centric SLI for our primary service, such as login success rate, and track it for the next 30 days?"
    Siloed Knowledge Critical system knowledge is concentrated in a few individuals, creating single points of failure. "If our lead infrastructure engineer is unavailable, do we have documented, automated procedures to recover from a critical database failure?"
    Executive Buy-In Leadership understands that reliability is a feature and is willing to fund the necessary tooling and headcount. "Is our leadership prepared to pause a feature release if we exhaust our error budget for a critical service?"

    This exercise isn't about getting a perfect score; it's about identifying gaps and aligning stakeholders on the why before tackling the how.

    A Phased Approach to SRE Adoption

    A "big bang" SRE transformation is risky and disruptive. A more effective strategy is to start small, demonstrate value, and build momentum incrementally.

    1. Launch a Pilot Team: Form a small, dedicated SRE team composed of software engineers with an aptitude for infrastructure and operations engineers with coding skills. Embed this team with a single, business-critical service where reliability improvements will have a visible and measurable impact.
    2. Define Your First SLOs and Error Budgets: The pilot team's first charter is to collaborate with product managers to define the service's inaugural SLIs and SLOs. This act alone is a significant cultural shift, moving the conversation from subjective anecdotes to objective data.
    3. Show Your Work and Spread the Word: As the SRE pilot team automates toil, improves observability, and demonstrably enhances the service's reliability (e.g., improved SLO attainment, reduced MTTR), they generate powerful data. Use this success as an internal case study to evangelize the SRE model to other teams and senior leadership.

    This iterative model allows the organization to learn and adapt, de-risking the broader transformation.

    Overcoming the Inevitable Hurdles

    The path to SRE adoption is fraught with challenges. The most significant is often talent acquisition. The demand for skilled SREs is intense, with average salaries reaching $130,000. With projected job growth of 30% over the next five years and 85% of organizations aiming to standardize SRE practices by 2025, the market is highly competitive. More insights on this can be found in discussions about the future of SRE and its challenges at NovelVista.

    SRE adoption is a journey, not a destination. It requires overcoming cultural inertia, securing executive buy-in for necessary tools and training, and patiently fostering a culture of shared ownership over reliability.

    Other common obstacles include:

    • Cultural Resistance: Traditional operations teams may perceive SRE as a threat, while developers may resist taking on operational responsibilities. Overcoming this requires clear communication, executive sponsorship, and focusing on the shared goal of building better products.
    • Tooling and Training Costs: Effective SRE requires investment in modern observability platforms, automation frameworks, and continuous training. A strong business case must be made, linking this investment to concrete outcomes like reduced downtime costs and increased developer productivity.

    By anticipating these challenges and employing a phased rollout, organizations can successfully build an SRE practice that transforms reliability from an operational chore into a strategic advantage.

    Measuring S.R.E. Success with Key Performance Metrics

    While SLOs and error budgets are the strategic framework for managing reliability, a set of Key Performance Indicators (KPIs) is needed to measure the operational effectiveness and efficiency of the SRE practice itself.

    These metrics, often referred to as DORA metrics, provide a quantitative assessment of an engineering organization's performance. They answer the critical question: "Is our investment in SRE making us better at delivering and operating software?"

    When visualized on a dashboard, these KPIs provide a holistic, data-driven narrative of an SRE team's impact, connecting engineering effort to system stability and development velocity.

    Shifting Focus to Mean Time To Recovery

    For decades, the primary operational metric was Mean Time Between Failures (MTBF), which aimed to maximize the time between incidents. In modern distributed systems where component failures are expected, this metric is obsolete.

    The critical measure of resilience is not if you fail, but how quickly you recover.

    SRE prioritizes Mean Time To Recovery (MTTR). This metric measures the average time from when an incident is detected to the moment service is fully restored to users. A low MTTR is a direct indicator of a mature incident response process, robust automation, and high-quality observability.

    To reduce MTTR, it must be broken down into its constituent parts:

    • Time to Detect (TTD): The time from failure occurrence to alert firing.
    • Time to Acknowledge (TTA): The time from alert firing to an on-call engineer beginning work.
    • Time to Fix (TTF): The time from acknowledgement to deploying a fix. This includes diagnosis, implementation, and testing.
    • Time to Verify (TTV): The time taken to confirm that the fix has resolved the issue and the system is stable.

    By instrumenting and analyzing each stage, teams can identify and eliminate bottlenecks in their incident response lifecycle. A consistently decreasing MTTR is a powerful signal of SRE effectiveness.

    Quantifying Stability with Change Failure Rate

    Innovation requires change, but every change introduces risk. The Change Failure Rate (CFR) quantifies this risk by measuring the percentage of deployments to production that result in a service degradation or require a remedial action (e.g., a rollback or hotfix).

    Formula: CFR = (Number of Failed Deployments / Total Number of Deployments) x 100%

    A high CFR indicates systemic issues in the development lifecycle, such as inadequate testing, a brittle CI/CD pipeline, or a lack of progressive delivery practices. SREs work to reduce this metric by engineering safety into the release process through automated quality gates, canary analysis, and feature flagging. A low and stable CFR demonstrates the ability to deploy frequently without compromising stability.

    A low Change Failure Rate isn't about slowing down; it's the result of building a high-quality, automated delivery process that makes shipping code safer and more predictable. It shows you've successfully engineered risk out of your release cycle.

    Measuring Velocity with Deployment Frequency

    The final core metric is Deployment Frequency. This measures how often an organization successfully releases code to production. It is a direct proxy for development velocity and the ability to deliver value to customers.

    Elite-performing teams deploy on-demand, often multiple times per day. Lower-performing teams may deploy on a weekly or even monthly cadence.

    Deployment Frequency and Change Failure Rate should be analyzed together. They provide a balanced view of speed and stability. The ideal state is an increasing Deployment Frequency with a stable or decreasing Change Failure Rate.

    This combination is the hallmark of a mature SRE and DevOps culture. It provides definitive proof that the organization can move fast and maintain reliability—the central promise of Site Reliability Engineering.

    Speed Up Your SRE Adoption with OpsMoon

    Transitioning to Site Reliability Engineering is a complex undertaking, involving steep learning curves in tooling, process, and culture. While understanding the principles is a critical first step, the practical implementation—instrumenting services, defining meaningful SLOs, and integrating error budget policies into workflows—is where many organizations falter. This execution gap is the primary challenge in realizing the value of why site reliability engineering is adopted.

    OpsMoon is designed to bridge this gap between theory and practice. We provide a platform and expert guidance to accelerate your SRE journey, simplifying the most technically challenging aspects of adoption. Our solution helps your teams instrument services to define meaningful SLIs, establish realistic SLOs, and monitor error budget consumption in real-time, providing the data-driven foundation for a successful SRE practice.

    From Good Ideas to Real Results

    Adopting SRE is a cultural transformation enabled by technology. OpsMoon provides the tools and expertise to foster this new operational mindset, delivering tangible outcomes that address the most common pain points of an SRE implementation.

    Here's a look at the OpsMoon dashboard. It gives you a single, clear view of your service health, SLOs, and error budgets.

    This level of integrated visibility is transformative. It converts abstract reliability targets into actionable data, empowering engineers to make informed, data-driven decisions daily.

    With OpsMoon, your team can:

    • Slash MTTR: By automating incident response workflows and providing rich contextual data, we help your teams diagnose and remediate issues faster.
    • Run Real Blameless Postmortems: Our platform centralizes the telemetry and event data necessary for effective postmortems, enabling teams to focus on systemic improvements rather than attributing blame.
    • Put a Number on Reliability Work: We provide the tools to quantify the impact of reliability initiatives, connecting engineering efforts directly to business objectives and improved user experience.

    Embarking on the SRE journey can be daunting, but you don’t have to do it alone. By leveraging our specialized platform and expertise, you can achieve your reliability targets more efficiently. To explore how we can architect your SRE roadmap, review our dedicated SRE services and solutions.

    Answering Your SRE Questions

    As organizations explore Site Reliability Engineering, several common questions arise regarding its relationship with DevOps, its applicability to smaller companies, and the practical first steps for implementation.

    What's the Real Difference Between SRE and DevOps?

    SRE and DevOps are not competing methodologies; they are complementary. DevOps is a broad cultural and philosophical movement aimed at breaking down silos between development and operations to improve software delivery velocity and quality. It provides the "what" and "why": shared ownership, automated pipelines, and rapid feedback loops.

    SRE is a specific, prescriptive, and engineering-driven implementation of the DevOps philosophy. It provides the "how." For example, while DevOps advocates for "shared ownership," SRE operationalizes this principle through concepts like error budgets, which create a data-driven contract for managing risk between development and operations.

    Think of DevOps as the architectural blueprint for a bridge—it outlines the goals, the vision, and the overall structure. SRE is the civil engineering that follows, specifying the exact materials, the load-bearing calculations, and the construction methods you need to build that bridge so it won't collapse.

    Does My Small Company Really Need an SRE Team?

    A small company or startup typically does not need a dedicated SRE team, but it absolutely benefits from adopting SRE principles from day one. In an early-stage environment, developers are inherently on-call for the services they build, making reliability a de facto part of their responsibilities.

    By formally adopting SRE practices early, you build a culture of reliability and prevent the accumulation of operational technical debt. This includes:

    • Defining SLOs: Establish clear, measurable reliability targets for core user journeys.
    • Automating Pipelines: Invest in a robust CI/CD pipeline from the outset to ensure all deployments are safe, repeatable, and automated.
    • Running Postmortems: Conduct blameless postmortems for every user-impacting incident to institutionalize a culture of continuous learning and system improvement.

    This approach ensures that as the company scales, its systems are built on a reliable and scalable foundation. The formal SRE role can be introduced later as organizational complexity increases.

    How Do I Even Start Measuring SLIs and SLOs?

    Getting started with SLIs and SLOs can feel intimidating. The key is to start small and iterate. Do not attempt to define SLOs for every service at once. Instead, select a single, critical user journey, such as the authentication process or e-commerce checkout flow.

    1. Find a Simple SLI: Choose a Service Level Indicator that is a direct proxy for the user experience of that journey. Good starting points are availability (the percentage of successful requests, e.g., HTTP 200 responses) and latency (the percentage of requests served under a specific threshold, e.g., 500ms).
    2. Look at Your History: Use your existing monitoring or observability tools (like Prometheus or Datadog) to query historical performance data for that SLI over the past 2-4 weeks. This establishes an objective, data-driven baseline.
    3. Set a Realistic SLO: Set your initial Service Level Objective slightly below your historical performance to create a small but manageable error budget. For instance, if your service has historically demonstrated 99.95% availability, setting an initial SLO of 99.9% is a safe and practical first step that allows room for learning and iteration.

    Ready to turn SRE theory into practice? The expert team at OpsMoon can help you implement these principles, accelerate your adoption, and build a more reliable future. Start with a free work planning session today at opsmoon.com.

  • 10 Actionable SRE Best Practices for Building Resilient Systems

    10 Actionable SRE Best Practices for Building Resilient Systems

    Site Reliability Engineering (SRE) bridges the gap between development and operations by applying a software engineering mindset to infrastructure and operations problems. The objective is to create scalable and highly reliable software systems through data-driven, automated solutions. This guide moves beyond theory to provide a prioritized, actionable roundup of essential SRE best practices, detailing specific technical strategies to enhance system stability and performance.

    This is not a list of abstract concepts. Instead, we will detail specific, technical strategies that form the foundation of a robust SRE culture. We will cover how to quantitatively define reliability using Service Level Indicators (SLIs) and Objectives (SLOs), and how to use the resulting error budgets to balance innovation with stability. You will learn practical steps for implementing everything from blameless postmortems that foster a culture of learning to advanced techniques like chaos engineering for proactive failure testing.

    Each practice in this listicle is presented as a self-contained module, complete with:

    • Implementation Guidance: Step-by-step instructions to get started.
    • Actionable Checklists: Quick-reference lists to ensure you cover key tasks.
    • Concrete Examples: Real-world scenarios illustrating the principles in action.
    • Expertise Indicators: Clear signals for when it's time to bring in external SRE consultants.

    Whether you're a CTO at a startup aiming for scalable infrastructure, an engineering leader refining your incident response process, or a platform engineer seeking to automate operational toil, this article provides the technical blueprints you need. The following sections offer a deep dive into the core SRE best practices that drive elite operational performance.

    1. Error Budgets

    An error budget is the maximum allowable level of unreliability a service can experience without violating its Service Level Objective (SLO). It is a direct mathematical consequence of an SLO. For an SLO of 99.9% availability over a 30-day window, the error budget is the remaining 0.1%, which translates to (1 - 0.999) * 30 * 24 * 60 = 43.2 minutes of downtime. This budget is the currency SREs use to balance risk and innovation.

    If a service has consumed its error budget, all deployments of new features are frozen. The development team's priority must shift exclusively to reliability-focused work, such as fixing bugs, hardening infrastructure, or improving test coverage. Conversely, if the budget is largely intact, the team has the green light to take calculated risks, such as rolling out a major feature or performing a complex migration. This data-driven policy removes emotional debate from deployment decisions.

    How to Implement Error Budgets

    Implementing error budgets provides a common, objective language for developers and operations teams to balance innovation velocity with system stability.

    • Establish SLOs First: An error budget is 100% - SLO%. Without a defined SLO, the budget cannot be calculated. Start with a user-critical journey (e.g., checkout process) and define an availability SLO based on historical performance data.
    • Automate Budget Tracking: Use a monitoring tool like Prometheus to track your SLI (e.g., sum(rate(http_requests_total{status_code=~"^5.."})) / sum(rate(http_requests_total{}))) against your SLO. Configure a Grafana dashboard to visualize the remaining error budget percentage and its burn-down rate. Set up alerts that trigger when the budget is projected to be exhausted before the end of the window (e.g., "Error budget will be consumed in 72 hours at current burn rate").
    • Define and Enforce Policies: Codify the error budget policy in a document. For example: "If the 28-day error budget drops below 25%, all new feature deployments to this service are halted. A JIRA epic for reliability work is automatically created and prioritized." Integrate this policy check directly into your CI/CD pipeline, making it a required gate for production deployments.

    Key Insight: Error budgets transform reliability from an abstract goal into a quantifiable resource. This reframes the conversation from "Is the system stable enough?" to "How much risk can our current reliability level afford?"

    Companies like Google and Netflix famously use error budgets to manage deployment velocity. At Google, if a service exhausts its error budget, the SRE team can unilaterally block new rollouts from the development team until reliability is restored. This practice empowers teams to innovate quickly but provides a non-negotiable safety mechanism to protect the user experience.

    2. Service Level Objectives (SLOs) and Indicators (SLIs)

    Service Level Objectives (SLOs) are explicit reliability targets for a service, derived from the user's perspective. They are built upon Service Level Indicators (SLIs), which are the direct, quantitative measurements of service performance. An SLI is the metric (e.g., http_response_latency_ms), while the SLO is the target for that metric over a compliance period (e.g., "99% of login requests will be served in under 300ms over a rolling 28-day window").

    This framework replaces vague statements like "the system should be fast" with precise, verifiable commitments. SLOs and SLIs are foundational SRE best practices because they provide the data needed for error budgets, prioritize engineering work that directly impacts user satisfaction, and create a shared, objective understanding of "good enough" performance between all stakeholders.

    How to Implement SLOs and SLIs

    Implementing SLOs and SLIs shifts the focus from purely technical metrics to user-centric measures of happiness and system performance. This ensures engineering efforts are aligned with business outcomes.

    • Identify User-Critical Journeys: Do not measure what is easy; measure what matters. Start by mapping critical user workflows, such as 'User Login', 'Search Query', or 'Add to Cart'. Your first SLIs must measure the availability and performance of these specific journeys.
    • Choose Meaningful SLIs: Select SLIs that directly reflect user experience. Good SLIs include availability (proportion of successful requests) and latency (proportion of requests served faster than a threshold). A poor SLI is server CPU utilization, as high CPU is not intrinsically a problem if user requests are still being served reliably and quickly. A good availability SLI implementation could be: (total requests - requests with 5xx status codes) / total requests.
    • Set Realistic SLOs: Use historical performance data to set initial SLOs. If your system has historically maintained 99.9% availability, setting a 99.99% SLO immediately will lead to constant alerts and burnout. Set an achievable baseline, meet it consistently, and then incrementally raise the target as reliability improves.
    • Document and Review Regularly: SLOs must be version-controlled and documented in a location accessible to all engineers. Review them quarterly. An SLO for a new product might be relaxed to encourage rapid iteration, while the SLO for a mature, critical service should be tightened over time.

    Key Insight: SLOs and SLIs are not just monitoring metrics; they are a formal agreement on the reliability expectations of a service. They force a data-driven definition of "good enough," providing an objective framework for engineering trade-offs.

    Companies like GitHub use SLOs to manage the performance of their API, setting specific targets for response times and availability that their customers rely on. Similarly, Google Cloud publicly documents SLOs for its services, such as a 99.95% availability target for many critical infrastructure components, providing transparent reliability commitments to its users.

    3. On-Call Rotations and Alerting

    A structured on-call program is an SRE best practice that assigns engineers direct responsibility for responding to service incidents during specific, rotating shifts. It is a system designed for rapid, effective incident response and continuous system improvement, not just a reactive measure. The primary goal is to minimize Mean Time to Resolution (MTTR) while protecting engineers from alert fatigue and burnout.

    Effective on-call is defined by actionable, SLO-based alerting. An alert should only page a human if it signifies a real or imminent violation of an SLO and requires urgent, intelligent intervention. This practice creates a direct feedback loop: the engineers who write the code are directly exposed to its operational failures, incentivizing them to build more resilient, observable, and maintainable systems.

    How to Implement On-Call Rotations and Alerting

    Implementing a fair and effective on-call system minimizes incident resolution time (MTTR) and prevents alert fatigue, which is critical for team health and service reliability.

    • Alert on SLO Violations (Symptoms), Not Causes: Configure alerts based on the rate of error budget burn. For example, "Page the on-call engineer if the service is projected to exhaust its 30-day error budget in the next 48 hours." This is far more effective than alerting on high CPU, which is a cause, not a user-facing symptom. An alert must be actionable; if the response is "wait and see," it should be a ticket, not a page.
    • Establish Automated Escalation Paths: In your on-call tool (e.g., PagerDuty, Opsgenie), configure clear escalation policies. If the primary on-call engineer does not acknowledge a page within 5 minutes, it should automatically escalate to a secondary engineer. If they do not respond, it escalates to the team lead or a designated incident commander. This ensures critical alerts are never missed.
    • Invest in Runbooks and Automation: Every alert must link directly to a runbook. A runbook should provide diagnostic queries (e.g., kubectl logs <pod-name> | grep "error") and remediation commands (e.g., kubectl rollout restart deployment/<deployment-name>). The ultimate goal is to automate the runbook itself, turning a manual procedure into a one-click action or a fully automated response.

    Key Insight: A healthy on-call rotation treats human attention as the most valuable and finite resource in incident response. It uses automation to handle predictable failures and saves human intervention for novel problems requiring critical thinking.

    Companies like Stripe and Etsy have refined this practice by integrating sophisticated scheduling, automated escalations, and a strong culture of blameless postmortems. At Etsy, on-call feedback directly influences tooling and service architecture. This approach ensures that the operational load is not just managed but actively reduced over time, making it a sustainable and invaluable component of their SRE best practices.

    4. Blameless Postmortems

    A blameless postmortem is a structured, written analysis following an incident that focuses on identifying contributing systemic factors rather than assigning individual fault. This foundational SRE best practice is predicated on creating psychological safety, which encourages engineers to provide an honest, detailed timeline of events without fear of punishment. This treats every incident as a valuable, unplanned investment in system reliability.

    Illustration of three colleagues collaborating around a table with a complex process diagram above them.

    The process shifts the investigation from "Who caused the outage?" to "What pressures, assumptions, and environmental factors led to the actions that triggered the outage?". It recognizes that "human error" is a symptom of deeper systemic flaws—such as inadequate tooling, poor UI design, or insufficient safeguards in a deployment pipeline. The goal is to produce a list of concrete, tracked action items that harden the system against that entire class of failure.

    How to Implement Blameless Postmortems

    Conducting effective blameless postmortems cultivates a culture of continuous improvement and engineering excellence. The process transforms failures into valuable, actionable intelligence that strengthens the entire system.

    • Use a Standardized Template: Create a postmortem template that includes sections for: a timeline of events with precise timestamps, root cause analysis (using a method like "The 5 Whys"), user impact (quantified by SLOs), a list of action items with owners and due dates, and lessons learned. Store these documents in a centralized, searchable repository (e.g., a Confluence space or Git repo).
    • Focus on Systemic Causes: During the postmortem meeting, the facilitator must steer the conversation away from individual blame. Instead of asking "Why did you push that change?", ask "What part of our process allowed a change with this impact to be deployed?". This uncovers weaknesses in code review, testing, or automated validation.
    • Track Action Items as Engineering Work: The primary output of a postmortem is a set of action items (e.g., "Add integration test for checkout API," "Implement circuit breaker for payment service"). These items must be created as tickets in your project management system (e.g., JIRA), prioritized alongside feature work, and tracked to completion. Efficiently managing these follow-ups can be streamlined using specialized tools like a retrospective manager.

    Key Insight: Blamelessness does not mean lack of accountability. It shifts accountability from the individual who made a mistake to the entire team responsible for building and maintaining a resilient system.

    Companies like Etsy and Stripe have been vocal advocates for this SRE best practice, often sharing their postmortem methodologies to promote industry-wide transparency and learning. For teams looking to refine their incident response lifecycle, Mastering Mean Time to Resolution (MTTR) provides critical insights into the metrics that blameless postmortems help to improve. By analyzing the entire timeline of an incident, from detection to resolution, teams can identify key areas for systemic improvement.

    5. Infrastructure as Code (IaC) and Configuration Management

    Infrastructure as Code (IaC) is a core SRE practice of managing and provisioning infrastructure through machine-readable definition files, rather than through manual configuration or interactive tools. Server configurations, networking rules, load balancers, and databases are treated as software artifacts: versioned in Git, reviewed via pull requests, and deployed through automated pipelines. This approach eliminates configuration drift and makes infrastructure provisioning deterministic and repeatable.

    IaC enables teams to spin up identical environments (dev, staging, prod) on demand, which is critical for reliable testing, disaster recovery, and rapid scaling. By codifying infrastructure, you establish a single source of truth that is visible and auditable by engineering, security, and operations teams. This practice is a non-negotiable prerequisite for achieving high-velocity, reliable software delivery at scale.

    A hand-drawn diagram illustrating data flow from a document through a server to cloud services.

    How to Implement IaC and Configuration Management

    Properly implementing IaC transforms infrastructure from a fragile, manually-managed asset into a resilient, automated system that can be deployed and modified with confidence.

    • Adopt Declarative Tools: Use declarative IaC tools like Terraform or Kubernetes manifests. These tools allow you to define the desired state of your infrastructure (e.g., "I need three t3.medium EC2 instances in a VPC"). The tool is responsible for figuring out the imperative steps to achieve that state, abstracting away the complexity of the underlying API calls.
    • Version Control Everything in Git: All infrastructure code—Terraform modules, Kubernetes YAML, Ansible playbooks—must be stored in a Git repository. This provides a complete, auditable history of every change. Enforce a pull request workflow for all infrastructure modifications, requiring peer review and automated linting/validation checks before merging to the main branch.
    • Integrate into CI/CD Pipelines: The main branch of your IaC repository should represent the state of production. Automate the deployment of infrastructure changes via a CI/CD pipeline (e.g., Jenkins, GitLab CI, or Atlantis for Terraform). A terraform plan should be automatically generated on every pull request, and terraform apply should be executed automatically upon merge, ensuring infrastructure evolves in lockstep with application code. For more details, explore these Infrastructure as Code best practices.

    Key Insight: IaC fundamentally changes infrastructure management from a series of manual, error-prone commands to a disciplined software engineering practice. This makes infrastructure changes safe, predictable, and scalable.

    Companies like Uber leverage Terraform to manage a complex, multi-cloud infrastructure, ensuring consistency across different providers. Similarly, Netflix relies heavily on IaC principles to rapidly provision and manage the massive fleet of instances required for its global streaming service, enabling resilient and scalable deployments. This approach is central to their ability to innovate while maintaining high availability.

    6. Observability (Monitoring, Logging, Tracing)

    Observability is the ability to infer a system's internal state from its external outputs, enabling engineers to ask arbitrary questions to debug novel failure modes. While traditional monitoring tracks predefined metrics for known failure states (the "known unknowns"), observability provides the rich, high-cardinality data needed to investigate complex, unpredictable issues (the "unknown unknowns").

    This capability is built on three pillars: metrics (numeric time-series data, e.g., request count), logs (structured, timestamped event records, e.g., a JSON log of a single request), and traces (an end-to-end view of a request's journey across multiple services). Correlating these three data types provides a complete picture, allowing an engineer to seamlessly pivot from a high-level alert on a metric to the specific trace and log lines that reveal the root cause.

    Hand-drawn diagram illustrating observability pillars: metrics, logs, and services, linked by arrows.

    How to Implement Observability

    Implementing true observability requires instrumenting applications to emit high-quality telemetry and using platforms that can effectively correlate this data. The goal is to create a seamless debugging workflow, from a high-level alert on a metric to the specific log lines and distributed traces that explain the root cause.

    • Instrument with OpenTelemetry: Standardize your telemetry generation using OpenTelemetry (OTel). This vendor-neutral framework allows you to instrument your code once and send the data to any backend observability platform (e.g., Honeycomb, Datadog, Grafana). This avoids vendor lock-in and ensures consistent data across all services.
    • Enforce Structured Logging: Mandate that all log output be in a machine-readable format like JSON. Each log entry must include contextual metadata, such as trace_id, user_id, and request_id. This allows you to filter, aggregate, and correlate logs with metrics and traces, turning them from a simple text stream into a powerful queryable database.
    • Implement Distributed Tracing: In a microservices architecture, distributed tracing is non-negotiable. Ensure that trace context (like the trace_id) is propagated automatically across all service boundaries (e.g., HTTP requests, message queue events). This allows you to visualize the entire lifecycle of a request, pinpointing bottlenecks and errors in complex call chains.
    • Focus on High-Cardinality Data: The key differentiator of observability is the ability to analyze high-cardinality dimensions (fields with many unique values, like user_id, customer_tenant_id, or build_version). Ensure your observability platform can handle and query this data efficiently without pre-aggregation, as this is what allows you to debug issues affecting a single user.

    Key Insight: Monitoring tells you that something is wrong; observability lets you ask why. It is the essential capability for debugging complex, distributed systems in production.

    Companies like Honeycomb and Datadog have built their platforms around this principle. They empower engineers to investigate production incidents by exploring high-cardinality data in real-time. For example, an engineer can go from a dashboard showing elevated API error rates, to filtering those errors by a specific customer ID, and finally drilling down into the exact traces for that customer to see the failing database query, all within a single, unified interface.

    7. Automation and Runbooks

    Automation in SRE is the practice of systematically eliminating toil—manual, repetitive, tactical work that lacks enduring engineering value and scales linearly with service growth. This is achieved by creating software and systems to replace human operational tasks. Automation is guided by runbooks: detailed, version-controlled documents that specify the exact steps for handling a particular procedure or incident.

    A runbook serves as the blueprint for automation. First, the manual process is documented. Then, that documented procedure is converted into a script or automated tool. This ensures the automation is based on proven operational knowledge. This SRE best practice reduces human error, drastically cuts down MTTR, and frees up engineers to focus on proactive, high-value projects like performance tuning and reliability enhancements.

    How to Implement Automation and Runbooks

    Implementing automation and runbooks is a foundational step in scaling operational excellence and is a core component of mature SRE best practices.

    • Codify Runbooks in Markdown and Git: Identify the top 5 most frequent on-call tasks (e.g., restarting a service, failing over a database, clearing a cache). Document the step-by-step procedures, including exact commands to run and verification steps, in Markdown files stored in a Git repository. This treats your operational knowledge as code.
    • Automate Incrementally with Scripts: Use the runbook as a spec to write a script (e.g., in Python or Bash) that automates the procedure. Ensure the script is idempotent (can be run multiple times without adverse effects) and includes safety checks and a "dry-run" mode. Prioritize automating tasks that are frequent, risky, or time-consuming.
    • Build a Centralized Tooling Platform: As your library of automation scripts grows, consolidate them into a centralized platform or command-line tool. This makes them discoverable and easy to execute for the entire team. Integrate this tooling with your chat platform (e.g., a Slack bot) to enable "ChatOps," allowing engineers to trigger automated actions directly from their incident response channel.

    Key Insight: A runbook codifies "how we fix this." An automation script executes that codified knowledge flawlessly and at machine speed. The goal of SRE is to have a runbook for every alert, and to automate every runbook.

    Companies like LinkedIn and Netflix are pioneers in this domain. LinkedIn's "Dr. Elephant" automates the tuning of Hadoop and Spark jobs, reducing toil for data engineers. Netflix's automation for canary analysis and rollbacks is critical to its high-velocity deployment model, automatically detecting and stopping bad deployments based on real-time telemetry, without human intervention. These systems are the result of a relentless focus on engineering away operational burdens.

    8. Testing in Production and Chaos Engineering

    The SRE principle of "testing in production" acknowledges that no staging environment can perfectly replicate the complexity, scale, and emergent behaviors of a live production system. Chaos engineering is the most advanced form of this practice: it is the discipline of experimenting on a distributed system in order to build confidence in the system's capability to withstand turbulent conditions in production.

    Instead of trying to prevent all failures, chaos engineering aims to identify and remediate weaknesses before they manifest as systemic outages. It involves deliberately injecting controlled failures—such as terminating VMs, injecting latency, or partitioning the network—to verify that monitoring, alerting, and automated failover mechanisms work as expected. This practice builds antifragile systems that are hardened against real-world failures.

    How to Implement Testing in Production and Chaos Engineering

    Implementing these advanced testing strategies requires a mature observability stack and a culture that values learning from failure. It is the ultimate test of a system's resilience and a powerful way to harden it.

    • Start with "Game Days": Before automating chaos, run manual "game day" exercises. The team gathers (virtually or physically) and a designated person manually executes a failure scenario (e.g., kubectl delete pod <service-pod> --namespace=production). The rest of the team observes the system's response via dashboards to validate that alerts fire, traffic fails over, and SLOs are not breached.
    • Define Experiments with a Limited Blast Radius: A chaos experiment must be well-defined: state a clear hypothesis ("If we terminate a worker node, user requests should not see errors"), limit the potential impact ("blast radius") to a small subset of users or internal systems, and have a clear "stop" button.
    • Automate with Chaos Engineering Tools: Use tools like Gremlin or the open-source Chaos Mesh to automate fault injection. Start with low-impact experiments, such as injecting 100ms of latency into a non-critical internal API. Gradually increase the scope and severity of experiments as you build confidence. Integrate these chaos tests into your CI/CD pipeline to continuously validate the resilience of new code. To understand the principles in more depth, you can learn more about what chaos engineering is and how it works.

    Key Insight: Chaos engineering is not about breaking production. It is about using controlled, scientific experiments to proactively discover and fix hidden weaknesses in production before they cause a user-facing outage.

    Netflix pioneered this field with its "Chaos Monkey," a tool that randomly terminates instances in their production environment to enforce the development of fault-tolerant services. Similarly, Google conducts regular DiRT (Disaster Recovery Testing) exercises to test its readiness for large-scale failures. By embracing controlled failure, these companies build systems that are antifragile, growing stronger and more reliable with every experiment.

    9. Capacity Planning and Performance Optimization

    Capacity planning is the data-driven process of forecasting future resource requirements to ensure a service can handle its load while meeting performance SLOs. It is a proactive SRE practice that prevents performance degradation and capacity-related outages. By analyzing historical utilization trends, business growth forecasts, and application performance profiles, SREs can provision resources to meet demand without costly over-provisioning.

    This is a continuous cycle. Capacity plans must be regularly updated to reflect new features, changing user behavior, and software performance improvements. Effective planning requires a deep understanding of which resources are the primary constraints for a service (e.g., CPU, memory, I/O, or network bandwidth) and how the service behaves as it approaches those limits.

    How to Implement Capacity Planning

    Implementing a robust capacity planning process is crucial for maintaining performance and managing costs as your services scale. It requires a deep understanding of your system's behavior under various load conditions.

    • Establish Performance Baselines and Load Test: Use monitoring data to establish a baseline for resource consumption per unit of work (e.g., CPU cycles per 1000 requests). Conduct regular load tests to determine the maximum capacity of your current configuration and identify performance bottlenecks. This tells you how much headroom you have.
    • Forecast Demand Using Historical Data and Business Events: Extract historical usage metrics from your monitoring system (e.g., requests per second over the last 12 months). Use time-series forecasting models to project future growth. Crucially, enrich this data with business intelligence: collaborate with product and marketing teams to factor in upcoming launches, promotions, or seasonal peaks.
    • Automate Scaling and Continuously Profile: Use cloud auto-scaling groups or Kubernetes Horizontal Pod Autoscalers to handle short-term traffic fluctuations. For long-term growth, regularly use profiling tools (like pprof in Go or YourKit for Java) to identify and optimize inefficient code. A 10% performance improvement in a critical API can defer the need for a costly hardware upgrade for months.

    Key Insight: Capacity planning is a cycle of measure -> model -> provision -> optimize. Performance optimization is a key input, as making the software more efficient is often cheaper and more effective than adding more hardware.

    Cloud providers are experts in this domain. AWS, for instance, provides extensive documentation and tools like AWS Compute Optimizer and Trusted Advisor to help teams right-size their infrastructure. Similarly, companies like Uber use sophisticated demand forecasting models, analyzing historical trip data and city-specific events to dynamically scale their infrastructure globally, ensuring reliability during massive demand surges like New Year's Eve.

    10. Organizational Culture and Knowledge Sharing

    SRE is a cultural operating model, not just a technical role. A successful SRE culture prioritizes reliability as a core feature, learns from failure without blame, and systematically shares operational knowledge. It breaks down the silo between software developers and operations engineers, creating shared ownership of the entire service lifecycle, from architecture and coding to deployment and production support.

    This cultural foundation is a prerequisite for the other SRE best practices. Blameless postmortems cannot succeed without psychological safety. Shared ownership is impossible if developers "throw code over the wall" to a separate operations team. A strong SRE culture embeds reliability principles throughout the entire engineering organization, making it a collective responsibility.

    How to Implement a Strong SRE Culture

    Cultivating this mindset requires intentional effort from leadership and a commitment to new processes that encourage collaboration, transparency, and continuous improvement.

    • Champion Blameless Postmortems: Leadership must consistently reinforce that postmortems are for system improvement, not for punishing individuals. A manager's role in a postmortem review is to ask, "How can I provide the team with better tools, processes, and training to prevent this?"
    • Establish Formal Knowledge Sharing Rituals: Create structured forums for sharing operational knowledge. This includes holding a weekly "operations review" meeting to discuss recent incidents, publishing postmortems to a company-wide mailing list, and maintaining a centralized, version-controlled repository of runbooks and architectural decision records (ADRs).
    • Embed SREs within Product Teams: Instead of a centralized SRE team that acts as a gatekeeper, embed SREs directly into product development teams. This "embedded SRE" model allows reliability expertise to influence design and architecture decisions early in the development process and helps spread SRE principles organically.
    • Track and Reward Reliability Work: Make reliability work visible and valuable. Create dashboards that track metrics like toil reduction, SLO adherence, and the number of postmortem action items completed. Acknowledge and reward engineers who make significant contributions to system stability in performance reviews, on par with those who ship major features.

    Key Insight: You cannot buy SRE. You can hire SREs, but true Site Reliability Engineering is a cultural shift that must be adopted and championed by the entire engineering organization.

    Etsy is renowned for its influential work on building a just and blameless incident culture, which became fundamental to its operational stability and rapid innovation. Similarly, Amazon implements shared ownership through its rigorous Well-Architected Framework reviews, where teams across the organization collaboratively assess systems against reliability and operational excellence pillars. This approach ensures that knowledge and best practices are distributed widely, not hoarded within a single team.

    SRE Best Practices: 10-Point Comparison

    Item Implementation complexity Resource requirements Expected outcomes Ideal use cases Key advantages
    Error Budgets Moderate — requires SLO definition and tooling Monitoring, SLO tracking, cross-team alignment Balanced feature delivery and reliability decisions Services with defined user-impact SLOs Data-driven risk limits; prevents over‑engineering
    SLOs and SLIs Moderate–High — metric selection and ongoing tuning Instrumentation, measurement systems, stakeholder buy‑in Clear, measurable service targets; basis for policy Customer-facing APIs and critical services Objective success criteria; reduced alert noise
    On‑Call Rotations and Alerting Low–Medium to set up; ongoing tuning required Scheduling tools, alerting platform, runbooks, staffing Continuous coverage and faster incident response Services requiring 24/7 support Reduces MTTR; distributes responsibility
    Blameless Postmortems Low procedural; high cultural change Time, facilitation, documentation, leadership support Systemic fixes and organizational learning After incidents; improving incident culture Encourages reporting; uncovers systemic causes
    Infrastructure as Code (IaC) High — tooling, workflows, testing needed Dev effort, VCS, CI/CD, IaC tools (Terraform, etc.) Reproducible, auditable infrastructure and faster rollbacks Multi‑env deployments, scaling and DR Consistency, traceability, repeatable deployments
    Observability (Monitoring/Logging/Tracing) High — broad instrumentation and integration Storage, APM/observability tools, expert tuning Rapid diagnosis and insight into unknowns Distributed systems, microservices Deep visibility; faster root‑cause analysis
    Automation and Runbooks Medium–High — automation design and QA Engineering time, automation platforms, versioned runbooks Reduced toil and faster, consistent recoveries High-frequency operational tasks and incidents Scales operations; reduces human error
    Testing in Production & Chaos Engineering High — careful safety controls required Observability, feature flags, experiment tooling Validated resilience and discovered real-world weaknesses Mature systems with rollback/safety mechanisms Real-world confidence; exposes hidden dependencies
    Capacity Planning & Performance Optimization Medium — requires modeling and profiling Historical metrics, forecasting tools, load testing Fewer capacity-related outages and cost savings High-traffic or cost-sensitive services Prevents outages; optimizes resource costs
    Organizational Culture & Knowledge Sharing High — sustained leadership and change management Time, training, forums, incentives, documentation Sustainable reliability and faster team learning Organizations scaling SRE or reliability practices Long-term improvement, better collaboration and retention

    Final Thoughts

    We've journeyed through a comprehensive landscape of Site Reliability Engineering, deconstructing the core tenets that transform reactive IT operations into proactive, data-driven reliability powerhouses. This exploration wasn't just a theoretical exercise; it was a blueprint for building resilient, scalable, and efficient systems. By now, it should be clear that adopting these SRE best practices is not about implementing a rigid set of rules but about embracing a fundamental shift in mindset. It’s about viewing reliability as the most critical feature of any product.

    The practices we've covered, from defining precise Service Level Objectives (SLOs) and using Error Budgets as a currency for innovation, to codifying your entire infrastructure with IaC, are deeply interconnected. Strong SLOs are meaningless without the deep insights provided by a mature observability stack. Likewise, the most sophisticated chaos engineering experiments yield little value without the blameless postmortem culture needed to learn from induced failures. Each practice reinforces the others, creating a powerful feedback loop that continuously elevates your system's stability and your team's operational maturity.

    Your Path from Theory to Implementation

    The journey to SRE excellence is incremental. It begins not with a massive, all-or-nothing overhaul, but with small, strategic steps. The key is to start where you can make the most immediate impact and build momentum.

    Here are your actionable next steps:

    1. Start the SLO Conversation: You cannot protect what you do not measure. Convene a meeting with product managers and key stakeholders to define a single, critical user journey. From there, collaboratively define your first SLI and SLO. This initial exercise will be more valuable for the cross-functional alignment it creates than for the technical perfection of the metrics themselves.
    2. Automate One Painful Task: Identify the most frequent, manual, and toil-heavy task your on-call engineers perform. Is it a server restart? A cache flush? A database failover? Dedicate a sprint to automating it and documenting it in a runbook. This single act will provide immediate relief and serve as a powerful proof-of-concept for the value of automation.
    3. Conduct Your First Blameless Postmortem: The next time a minor incident occurs, resist the urge to simply "fix it and forget it." Instead, gather the involved parties and conduct a formal blameless postmortem. Focus intensely on the "how" and "why" of systemic failures, not the "who." Document the contributing factors and assign action items to address the underlying causes. This single cultural shift is foundational to all other SRE best practices.

    Reliability as a Competitive Advantage

    Mastering these concepts is more than just an engineering goal; it's a strategic business imperative. In a world where user expectations for uptime and performance are non-negotiable, reliability is your brand. An outage is not just a technical problem; it's a breach of customer trust. Systems built on SRE principles are not just more stable; they enable faster, safer feature deployment, reduce operational overhead, and free up your most talented engineers to build value instead of fighting fires.

    Ultimately, SRE is about building a sustainable operational model that scales with your ambition. It’s the engineering discipline that ensures the promises your product makes to its users are promises you can keep, day in and day out. By embarking on this journey, you are not just preventing failures; you are engineering success.


    Navigating the complexities of implementing these SRE best practices can be challenging, especially when you need to focus on core product development. If you're looking to accelerate your SRE adoption with expert guidance and hands-on support, OpsMoon provides dedicated, on-demand DevOps and SRE expertise. We help you build and manage resilient, scalable infrastructure so you can innovate with confidence. Learn more at OpsMoon.

  • A Practical Guide to the Kubernetes Audit Log for Enterprise Security

    A Practical Guide to the Kubernetes Audit Log for Enterprise Security

    The Kubernetes audit log is the definitive black box recorder for your cluster, capturing a security-oriented, chronological record of every request that hits the Kubernetes API server. This log is the authoritative source for answering the critical questions: who did what, when, and from where? From a technical standpoint, this log is an indispensable tool for security forensics, compliance auditing, and operational debugging.

    Why Audit Logs Are Non-Negotiable in Production

    In any production-grade Kubernetes environment, understanding the sequence of API interactions is a core requirement for security and stability. Because the audit log captures every API call, it creates an immutable, chronological trail of all cluster activities, making it a cornerstone for several critical operational domains.

    As Kubernetes adoption has surged, audit logs have become a primary control for governance and incident response. With the vast majority of organizations now running Kubernetes in production, robust auditing is a technical necessity.

    To understand the practical value of these logs, let's dissect the structure of a typical audit event.

    Anatomy of a Kubernetes Audit Event

    Each entry in the audit log is a JSON object detailing a single API request. Understanding these fields is key to effective analysis.

    Field Name Description Example Value
    auditID A unique identifier for the event, essential for deduplication and tracing. a1b2c3d4-e5f6-7890-1234-567890abcdef
    stage The stage of the request lifecycle when the event was generated (e.g., RequestReceived, ResponseStarted, ResponseComplete, Panic). ResponseComplete
    verb The HTTP verb corresponding to the requested action (create, get, delete, update, patch, list, watch). create
    user The authenticated user or service account that initiated the request, including group memberships. { "username": "jane.doe@example.com", "uid": "...", "groups": [...] }
    sourceIPs A list of source IP addresses for the request, critical for identifying the request's origin. ["192.168.1.100"]
    objectRef Details about the resource being acted upon, including its resource, namespace, name, and apiVersion. { "resource": "pods", "namespace": "prod", "name": "nginx-app" }
    responseStatus The HTTP status code of the response, indicating success or failure. { "metadata": {}, "code": 201 }
    requestObject The full body of the request object, logged at Request or RequestResponse levels. A complete JSON object, e.g., a Pod manifest.
    responseObject The full body of the response object, logged at the RequestResponse level. A complete JSON object, e.g., the state of a created Pod.

    Each event provides a rich data object, offering a complete forensic picture of every interaction with your cluster's control plane.

    Security Forensics and Incident Response

    During a security incident, the audit log is the primary source of truth. It allows security teams to reconstruct an attacker's lateral movements, identify compromised resources, and determine the blast radius of a breach.

    For instance, specific log queries can reveal:

    • Unauthorized Access: Search for events where responseStatus.code is 403 (Forbidden) against a sensitive resource like a Secret.
    • Privilege Escalation: An event where verb is create, objectRef.resource is clusterrolebindings, and the requestObject binds a user to the cluster-admin role.
    • Anomalous Behavior: A spike in delete verbs on Deployment or StatefulSet resources originating from an unknown IP in sourceIPs.

    Without this granular record, incident response becomes a high-latency process of conjecture, dramatically increasing the mean time to detect (MTTD) and remediate (MTTR).

    Regulatory Compliance and Governance

    Industries governed by frameworks like PCI-DSS, HIPAA, or SOX mandate detailed logging and auditing of system activities. A correctly configured Kubernetes audit log directly addresses these requirements by providing an immutable trail of evidence.

    A well-maintained audit trail is your non-repudiable proof to auditors that you have controls to monitor access to sensitive data and critical system configurations. It demonstrates that you can trace any change back to a specific user identity and timestamp.

    This capability is crucial for passing audits and avoiding significant financial penalties for non-compliance. It provides the concrete evidence of resource access and modification that underpins most compliance standards. For those new to these concepts, our Kubernetes tutorial for beginners offers a solid foundation.

    Operational Debugging and Troubleshooting

    Beyond security, audit logs are a powerful tool for debugging complex application and infrastructure issues. When a misconfiguration causes a service outage, the logs can pinpoint the exact API call responsible.

    For example, if a developer accidentally deletes a critical ConfigMap, a query for verb: "delete" and objectRef.resource: "configmaps" will immediately identify the user, timestamp, and the exact manifest of the deleted object (if logged at the Request level). This eliminates guesswork and drastically reduces MTTR.

    Configuring Audit Logging in Your Cluster

    Enabling Kubernetes audit logging requires modifying the startup configuration for the kube-apiserver component of the control plane. The implementation details vary based on the cluster's deployment model, but the core configuration flags are consistent.

    You will primarily use three flags to enable auditing:

    • --audit-policy-file: Points to a YAML file defining the audit policy rules—what to log and at what level of detail. This flag is mandatory; without it, no audit events are generated.
    • --audit-log-path: Specifies the file path where the API server will write log events. A common value is /var/log/audit.log. If not specified, logs are sent to standard output.
    • --audit-log-maxage: Sets the maximum number of days to retain old audit log files before they are automatically deleted, essential for managing disk space on control plane nodes.

    Self-Managed Clusters Using Kubeadm

    In a kubeadm-bootstrapped cluster, the kube-apiserver runs as a static pod defined by a manifest at /etc/kubernetes/manifests/kube-apiserver.yaml on control plane nodes. Enabling auditing requires editing this file directly.

    First, create an audit policy file on each control plane node. A minimal starting policy can be placed at /etc/kubernetes/audit-policy.yaml:

    # /etc/kubernetes/audit-policy.yaml
    apiVersion: audit.k8s.io/v1
    kind: Policy
    rules:
      # Log all requests at the Metadata level.
      - level: Metadata
    

    This policy logs the metadata for every request, providing a high-level overview without the performance overhead of logging request/response bodies.

    Next, edit the /etc/kubernetes/manifests/kube-apiserver.yaml manifest. Add the audit flags to the command section and define volumeMounts and volumes to expose the policy file and log directory to the container.

    # /etc/kubernetes/manifests/kube-apiserver.yaml
    spec:
      containers:
      - command:
        - kube-apiserver
        # ... other flags
        - --audit-policy-file=/etc/kubernetes/audit-policy.yaml
        - --audit-log-path=/var/log/kubernetes/audit.log
        - --audit-log-maxage=30
        volumeMounts:
        # ... other volumeMounts
        - mountPath: /etc/kubernetes/audit-policy.yaml
          name: audit-policy
          readOnly: true
        - mountPath: /var/log/kubernetes/
          name: audit-log
      volumes:
      # ... other volumes
      - name: audit-policy
        hostPath:
          path: /etc/kubernetes/audit-policy.yaml
          type: File
      - name: audit-log
        hostPath:
          path: /var/log/kubernetes/
          type: DirectoryOrCreate
    

    Upon saving these changes, the kubelet on the node will detect the manifest modification and automatically restart the kube-apiserver pod with the new audit configuration enabled.

    Managed Kubernetes Services (GKE and EKS)

    Managed Kubernetes providers abstract away direct control plane access, requiring you to use their specific APIs or UIs to manage audit logging.

    • Google Kubernetes Engine (GKE): GKE integrates audit logging with the Google Cloud operations suite. It's enabled by default and sends logs to Cloud Audit Logs. You can view logs in the Cloud Console's Logs Explorer and use the GKE API or gcloud CLI to configure the audit logging level.

    • Amazon Elastic Kubernetes Service (EKS): In EKS, you enable audit logging during cluster creation or via an update. You select the desired log types (audit, api, authenticator) which are then streamed to Amazon CloudWatch Logs. This is configured via the AWS Management Console, CLI, or Infrastructure as Code tools like Terraform.

    The trade-off with managed services is exchanging direct control for operational simplicity. The provider handles log collection and storage, but you are integrated into their ecosystem and must use their tooling for log analysis.

    Local Development with Minikube

    For local development and testing, Minikube allows you to pass API server flags directly during cluster startup.

    This command starts a minikube cluster with a basic audit configuration:

    minikube start --extra-config=apiserver.audit-policy-file=/etc/kubernetes/audit-policy.yaml \
    --extra-config=apiserver.audit-log-path=/var/log/audit.log \
    --extra-config=apiserver.audit-log-maxage=1
    

    You must first copy your audit-policy.yaml file into the Minikube VM using minikube cp audit-policy.yaml minikube:/etc/kubernetes/audit-policy.yaml. This provides a fast feedback loop for testing and refining audit policies before production deployment.

    Crafting a High-Impact Audit Policy

    The audit policy is the core of your Kubernetes logging strategy. It's a set of rules that instructs the API server on precisely what to record and what to ignore. A poorly designed policy will either log nothing useful or overwhelm your logging backend with low-value, high-volume data.

    The objective is to achieve a balance: capture all security-relevant actions while filtering out the benign chatter from system components and routine health checks.

    Your configuration path will vary depending on your environment, as illustrated by this decision flowchart.

    Flowchart illustrating Kubernetes audit log configuration steps based on cluster management type for various environments.

    As shown, self-managed clusters offer direct control over the audit policy file and API server flags, whereas managed services require you to work within their provided configuration interfaces.

    Understanding Audit Policy Structure and Levels

    An audit policy is a YAML file containing a list of rules. When a request hits the API server, it is evaluated against these rules sequentially. The first rule that matches determines the audit level for that event.

    There are four primary audit levels, each representing a trade-off between visibility and performance overhead.

    Audit Level Comparison and Use Cases

    Selecting the correct audit level is critical. Using RequestResponse indiscriminately will degrade API server performance, while relying solely on Metadata may leave blind spots during a security investigation. This table outlines each level's characteristics and optimal use cases.

    Audit Level Data Logged Performance Impact Recommended Use Case
    None No data is recorded for matching events. Negligible Essential for filtering high-frequency, low-risk requests like kubelet health checks (/healthz, /livez) or controller leader election leases.
    Metadata Logs user, timestamp, resource, and verb. Excludes request and response bodies. Low The ideal baseline for most read operations (get, list, watch) and high-volume system traffic that still requires tracking.
    Request Logs Metadata plus the full request body. Medium Captures the "what" of a change without the overhead of the response. Useful for logging the manifest of a newly created pod or other resources.
    RequestResponse The most verbose level. Logs metadata, request body, and response body. High Reserved for critical, sensitive write operations (create, update, delete, patch) on resources like Secrets, ClusterRoles, or Deployments.

    An effective policy employs a mix of all four levels, applying maximum verbosity to the most critical actions and silencing the noise from routine system operations.

    Building Practical Audit Policies

    Let's translate theory into actionable policy examples. These policies provide a robust starting point that can be adapted to your specific cluster requirements.

    A best-practice approach is to align the policy with established security benchmarks, such as the CIS Kubernetes Benchmark, to ensure comprehensive visibility without generating excessive log volume.

    # A baseline CIS-compliant audit policy example
    apiVersion: audit.k8s.io/v1
    kind: Policy
    rules:
      # Ignore high-volume, low-risk requests from system components and health checks.
      - level: None
        users: ["system:kube-proxy"]
        verbs: ["watch"]
        resources:
        - group: "" 
          resources: ["endpoints", "services"]
      - level: None
        userGroups: ["system:nodes"]
        verbs: ["get"]
        resources:
        - group: ""
          resources: ["nodes"]
      - level: None
        # Health checks are high-volume and low-value.
        nonResourceURLs:
        - "/healthz*"
        - "/version"
        - "/livez*"
        - "/readyz*"
    
      # Log sensitive write operations with full request/response details.
      - level: RequestResponse
        resources:
        - group: ""
          resources: ["secrets", "configmaps", "serviceaccounts"]
        - group: "rbac.authorization.k8s.io"
          resources: ["clusterroles", "clusterrolebindings", "roles", "rolebindings"]
        verbs: ["create", "update", "patch", "delete"]
    
      # Log metadata for all other requests as a catch-all to ensure nothing is missed.
      - level: Metadata
        omitStages:
          - "RequestReceived"
    

    This policy is strategically designed. It begins by explicitly ignoring high-frequency noise from kube-proxy and node health checks. It then applies RequestResponse logging to security-critical resources like Secrets and RBAC objects—precisely the data required for forensic analysis.

    Adopt a "log by default, ignore by exception" strategy. Start with a catch-all Metadata rule at the bottom of your policy. Then, add more specific None or RequestResponse rules above it to handle exceptions. This ensures you never inadvertently miss an event.

    Implementing a robust audit policy is a top priority for security teams. With a significant number of security incidents stemming from misconfigurations or exposed control planes, audit logs are the primary tool for detection and forensics. Red Hat's 2024 trends report found that nearly 89% of organizations experienced a container or Kubernetes security incident in the last year, and 53% faced project delays due to security issues, underscoring the critical role of audit logs in root cause analysis. For a deeper technical perspective, review this Kubernetes threat hunting analysis.

    Shipping and Storing Audit Logs at Scale

    Diagram illustrating a Kubernetes audit log pipeline from kube-api-server to a collector, then to Webhook or SIM.

    Generating detailed Kubernetes audit logs is the first step. To transform this raw data into actionable intelligence, you must implement a robust pipeline to transport logs from the control plane nodes to a centralized log analytics platform.

    The kube-apiserver provides two primary backends for this purpose: writing to a local log file or sending events to a remote webhook. Your choice of backend will fundamentally define your logging architecture.

    The Log File Backend with a Forwarder

    The most common and resilient method is to configure the API server to write audit events to a local file (--audit-log-path). This alone is insufficient; a log forwarding agent, typically deployed as a DaemonSet on the control plane nodes, is required to complete the pipeline.

    This agent tails the audit log file, parses the JSON-formatted events, and forwards them to a centralized log management system or SIEM.

    Popular open-source agents for this task include:

    • Fluentd: A highly extensible and mature log collector with a vast ecosystem of plugins for various output destinations.
    • Fluent Bit: A lightweight, high-performance log processor, designed for resource-constrained environments.
    • Vector: A modern, high-performance agent built in Rust, focusing on reliability and performance in observability data pipelines.

    This architecture decouples log collection from the API server's critical path. If the downstream logging endpoint experiences an outage, the agent can buffer logs locally on disk, preventing data loss.

    The Webhook Backend for Direct Streaming

    For a more direct, real-time approach, the API server can be configured to send audit events to an external HTTP endpoint via the webhook backend. This bypasses the need for a local log file and a separate forwarding agent on the control plane.

    With each audit event, the API server sends a POST request containing a batch of events to the configured webhook URL. This is a powerful method for direct integration with:

    • Custom log processing applications.
    • Serverless functions like AWS Lambda or Google Cloud Functions.
    • Real-time security tools like Falco that can consume and react to audit events instantly.

    A critical configuration detail for the webhook backend is its operational mode. The default batch mode is asynchronous and non-blocking, making it suitable for most use cases. However, the blocking mode forces the API server to wait for the webhook to respond before completing the original client request. Use blocking with extreme caution, as it can introduce significant latency and impact API server performance.

    This direct streaming approach is excellent for low-latency security alerting but creates a tight operational dependency. If the webhook receiver becomes unavailable, the API server may drop audit events, depending on its buffer configuration.

    Choosing the Right Architecture

    The choice between a log file forwarder and a webhook depends on the trade-offs between reliability, complexity, and real-time requirements.

    This table provides a technical comparison to guide your decision.

    Feature Log File + Forwarder Webhook Backend
    Reliability Higher. Decoupled architecture allows the agent to buffer logs on disk during backend outages, preventing data loss. Lower. Tightly coupled; dependent on the availability of the webhook endpoint and API server buffers.
    Complexity Higher. Requires deploying and managing an additional agent (DaemonSet) on control plane nodes. Lower. Simplifies the control plane architecture by eliminating the need for a separate agent.
    Performance Minimal impact on the API server, as it's an asynchronous local file write. Potential impact. Can add latency to API requests, especially in blocking mode.
    Real-Time Near real-time, with a slight delay introduced by the forwarding agent's buffer and flush interval. True real-time streaming, ideal for immediate threat detection and response.

    In practice, many large-scale environments adopt a hybrid approach. They use a log forwarder for durable, long-term storage and compliance, while simultaneously configuring a webhook to send a specific subset of critical security events to a real-time detection engine. This provides both comprehensive, reliable storage and immediate, actionable security alerts. For a broader view on this topic, review these log management best practices.

    Real-World Threat Detection Playbooks

    With a functional Kubernetes audit log pipeline, you can transition from passive data collection to proactive threat hunting. These technical playbooks provide actionable queries to detect specific, high-risk activities within your cluster. The queries are designed to be adaptable to any log analysis platform that supports JSON querying, such as Elasticsearch, Splunk, or Loki.

    This audit-driven detection approach is becoming an industry standard. Between 2022 and 2025, the use of automated detection and response based on audit logs has seen significant growth. Industry reports from observability and security vendors consistently show that integrating Kubernetes API server audit logs into detection pipelines dramatically reduces the mean time to detect (MTTD) and mean time to remediate (MTTR) for cluster-based security incidents.

    Playbook 1: Detecting Privileged Pod Creation

    Creating a pod with securityContext.privileged: true is one of the most dangerous operations in Kubernetes. It effectively breaks container isolation, granting the pod root-level access to the host node's kernel and devices. A compromised privileged pod is a direct path to host and cluster compromise.

    The Threat: A privileged pod can manipulate host devices (/dev), load kernel modules, and bypass nearly all container security mechanisms, facilitating a container escape.

    Detection Query:
    The objective is to identify any audit event where a pod was created or updated with the privileged flag set to true.

    • Target Fields:
      • verb: "create" OR "update"
      • objectRef.resource: "pods"
      • requestObject.spec.containers[*].securityContext.privileged: "true"

    Example (Loki LogQL Syntax):

    {job="kube-audit"} | json | verb=~"create|update" and objectRef_resource="pods" | line_format "{{ .requestObject }}" | json | spec_containers_securityContext_privileged="true"
    

    Playbook 2: Spotting Risky Exec Sessions

    The kubectl exec command, while essential for debugging, is a primary tool for attackers to gain interactive shell access within a running container. This access can be used to exfiltrate data, steal credentials, and pivot to other services within the cluster network.

    The Threat: An attacker can use an exec session to access service account tokens (/var/run/secrets/kubernetes.io/serviceaccount/token), explore the container's filesystem, and launch further attacks.

    Detection Query:
    Filter for events that represent the creation of an exec subresource on a pod. Monitoring the response code identifies successful attempts.

    • Target Fields:
      • verb: "create"
      • objectRef.resource: "pods"
      • objectRef.subresource: "exec"
      • responseStatus.code: 201 (Created) for successful connections

    Example (Elasticsearch KQL Syntax):

    verb: "create" AND objectRef.resource: "pods" AND objectRef.subresource: "exec" AND responseStatus.code: 201
    

    Playbook 3: Identifying Dangerous Role Bindings

    Privilege escalation is a primary attacker objective. In Kubernetes, a common technique is to create a ClusterRoleBinding that grants a user or service account powerful permissions, such as the omnipotent cluster-admin role.

    An alert on the creation of a binding to the cluster-admin role is a mandatory, high-severity detection rule for any production environment. This single action can grant an attacker complete administrative control over the entire cluster.

    The Threat: A malicious or accidental binding can instantly escalate a low-privilege identity to a cluster superuser. This level of auditing is a non-negotiable requirement in regulated environments, such as those subject to PSD2 Banking Integration.

    Detection Query:
    Hunt for the creation of any ClusterRoleBinding that references the cluster-admin ClusterRole.

    • Target Fields:
      • verb: "create"
      • objectRef.resource: "clusterrolebindings"
      • requestObject.roleRef.name: "cluster-admin"
      • requestObject.roleRef.kind: "ClusterRole"

    Example (Splunk SPL Syntax):

    index="k8s_audit" verb="create" objectRef.resource="clusterrolebindings" requestObject.roleRef.name="cluster-admin" | table user, sourceIPs, objectRef.name
    

    Building these detection capabilities is a cornerstone of a mature Kubernetes security posture. To further strengthen your defenses, review our comprehensive guide on Kubernetes security best practices. By transforming your audit logs into an active threat detection system, you empower your team to identify and neutralize threats before they escalate into incidents.

    Common Questions About Kubernetes Auditing

    When implementing Kubernetes audit logging, several practical questions consistently arise regarding performance, retention, and filtering. Addressing these correctly is crucial for creating a valuable and sustainable security tool.

    What's the Real Performance Hit from Enabling Audit Logging?

    The performance impact of audit logging is directly proportional to your audit policy's verbosity and the API server's request volume. There is no single answer.

    A poorly configured policy that logs all requests at the RequestResponse level will impose significant CPU and memory overhead on the kube-apiserver and increase API request latency. The key is to be strategic and surgical.

    A battle-tested strategy includes:

    • Use the Metadata level for high-frequency, low-risk requests, such as kubelet health checks or routine reads from system controllers.
    • Reserve RequestResponse logging for security-critical write operations: creating secrets, modifying RBAC roles, or deleting deployments.

    Technical advice: Always benchmark your cluster's performance (API request latency, CPU/memory usage of kube-apiserver) before and after deploying a new audit policy. This is the only way to quantify the real-world impact and ensure you have not introduced a new performance bottleneck.

    How Long Should I Actually Keep These Logs?

    The required retention period is dictated by your organization's specific compliance and security policies. However, industry standards provide a solid baseline.

    Many regulatory frameworks like PCI DSS mandate that logs be retained for at least one year, with a minimum of three months immediately accessible for analysis. For general security forensics and incident response, a retention period of 90 to 180 days in a hot, searchable storage tier is a common and effective practice.

    After this period, logs can be archived to cheaper, cold storage solutions for long-term retention. It is imperative to consult with your internal compliance and legal teams to establish an official data retention policy.

    Can I Just Audit Events from One Specific Namespace?

    Yes. Kubernetes audit policy rules are designed for this level of granularity. You can precisely target specific workloads by combining multiple attributes within a rule.

    For example, to implement heightened monitoring on a critical database namespace, you could create a specific rule like this in your audit policy:

    - level: RequestResponse
      verbs: ["create", "update", "patch", "delete"]
      resources:
      - group: "" # Core API group
        resources: ["secrets", "configmaps"]
      namespaces: ["production-db"]
    

    This rule logs the full request and response bodies for any modification to Secrets or ConfigMaps but only within the production-db namespace. This granular control is your most effective tool against log fatigue, allowing you to increase verbosity on sensitive areas while filtering out noise from less critical operations, resulting in a cleaner, more actionable security signal.


    Managing Kubernetes infrastructure requires deep expertise. At OpsMoon, we connect you with the top 0.7% of remote DevOps engineers to build, secure, and scale your cloud-native environments. Start with a free work planning session to map out your DevOps roadmap.

  • The 12 Best CI CD Tools for Engineering Teams in 2025: A Technical Deep Dive

    The 12 Best CI CD Tools for Engineering Teams in 2025: A Technical Deep Dive

    In a crowded market, selecting from the best CI/CD tools is more than a technical decision; it's a strategic one that directly impacts developer velocity, deployment frequency, and operational stability. The right automation engine streamlines your software delivery lifecycle, while the wrong one introduces friction, creating complex maintenance burdens and pipeline bottlenecks that frustrate engineers. A simple feature-to-feature comparison often misses the critical nuances of how a tool integrates with a specific tech stack, scales with a growing team, or aligns with an organization's security and compliance posture.

    This guide provides a deeply technical, actionable analysis to help you move beyond marketing claims and choose the right CI/CD platform for your specific needs. We dissect 12 leading tools, from fully managed SaaS solutions to powerful self-hosted orchestrators. For each tool, you will find:

    • Practical Use Cases: Scenarios where each platform excels or falls short.
    • Key Feature Analysis: A focused look at standout capabilities and potential limitations.
    • Implementation Guidance: Notes on setup complexity, migration paths, and ecosystem integration.
    • Example Pipeline Snippets: Concrete examples of YAML configurations or workflow structures.

    We evaluate options for startups needing speed, enterprises requiring robust governance, and teams considering a managed DevOps approach. Our goal is to equip you with the insights needed to make an informed choice that accelerates your development process. As you delve into selecting your automation engine, our guide on Choosing the Best CI/CD Platforms for DevOps offers valuable insights into core features and selection criteria. Let’s dive into the detailed comparisons.

    1. GitHub Actions

    GitHub Actions is a powerful, event-driven CI/CD platform built directly into the GitHub ecosystem. Its primary advantage is the seamless integration with the entire software development lifecycle, from code push and pull request creation to issue management and package publishing. This colocation of code and CI/CD significantly streamlines the developer experience, eliminating the context switching required by third-party tools.

    GitHub Actions

    The platform operates using YAML workflow files stored within your repository, making your CI/CD configuration version-controlled and auditable. Its standout feature is the vast GitHub Marketplace, offering thousands of pre-built "actions" that can be dropped into your workflows to handle tasks like logging into a cloud provider, scanning for vulnerabilities, or sending notifications. This rich ecosystem is a massive accelerator, reducing the need to write custom scripts for common operations. For a deeper dive into the foundational concepts, explore our guide on what continuous integration is.

    Key Differentiators & Use Cases

    • Ideal Use Case: Teams of any size whose source code is already hosted on GitHub and who want a deeply integrated, all-in-one platform for their DevOps pipeline. It excels at automating pull request checks, managing multi-environment deployments, and building container images.
    • Matrix Builds: Effortlessly test your code across multiple versions of languages, operating systems, and architectures with a simple matrix strategy in your workflow file. For example, you can test a Node.js application across versions 18, 20, and 22 on both ubuntu-latest and windows-latest runners with just a few lines of YAML.
    • Reusable Workflows: Drastically reduce code duplication by creating callable, reusable workflows (workflow_call trigger) that can be shared across multiple repositories, enforcing consistency and best practices for tasks like security scanning or deployment to a shared staging environment.

    Pricing

    GitHub Actions provides a generous free tier for public repositories and a set amount of free minutes and storage for private repositories. For teams with more extensive needs, paid plans (Team and Enterprise) offer significantly more build minutes and advanced features like protected environments, IP allow lists, and enterprise-grade auditing. Be mindful that macOS and Windows runners consume minutes at a higher rate (10x and 2x, respectively) than Linux runners, which is a critical factor for cost modeling.


    Website: https://github.com/features/actions

    2. GitLab CI/CD

    GitLab CI/CD is an integral component of the GitLab DevSecOps platform, offering a single application for the entire software development and delivery lifecycle. Its core strength lies in providing a unified, end-to-end solution that combines source code management, CI/CD pipelines, package management, and security scanning into one cohesive interface. This all-in-one approach minimizes toolchain complexity and improves collaboration between development, security, and operations teams.

    GitLab CI/CD

    Pipelines are defined in a .gitlab-ci.yml file within the repository, ensuring that your automation is version-controlled alongside your code. The platform's built-in container registry, security scanners (SAST, DAST, dependency scanning), and advanced deployment strategies like canary releases make it one of the most comprehensive CI/CD tools available. It tightly couples CI processes with deployment targets, a key concept you can explore in our guide on continuous deployment vs. continuous delivery.

    Key Differentiators & Use Cases

    • Ideal Use Case: Teams that want a single, unified platform for the entire DevOps lifecycle, especially those in regulated industries requiring strong security, compliance, and auditability features. It's excellent for organizations looking to consolidate their toolchain.
    • Auto DevOps: Accelerate your workflow with a pre-built, fully-featured CI/CD pipeline that automatically detects, builds, tests, deploys, and monitors applications with minimal configuration. This is particularly powerful for projects adhering to common frameworks and using Kubernetes as a deployment target.
    • Integrated Security: Perform comprehensive security scans directly within the pipeline without integrating third-party tools, shifting security left and catching vulnerabilities earlier in the development process. Results are surfaced directly in the merge request UI, providing developers immediate, actionable feedback.

    Pricing

    GitLab offers a robust free tier with 400 CI/CD minutes per month on GitLab-managed runners for private projects. Paid plans (Premium and Ultimate) unlock more minutes, advanced security and compliance features, portfolio management, and enterprise-grade support. A key consideration is its "bring your own runner" model, which allows you to connect self-hosted runners to any tier (including Free) for unlimited build minutes, providing a cost-effective path for compute-intensive workloads.


    Website: https://about.gitlab.com/

    3. CircleCI

    CircleCI is a mature, cloud-native CI/CD platform known for its performance, flexibility, and powerful caching mechanisms. It excels at accelerating development cycles for teams that rely heavily on containerized workflows. The platform is highly configurable, giving developers fine-grained control over their build environments and compute resources, which is a key reason it's considered one of the best CI/CD tools for performance-sensitive projects.

    CircleCI

    Configurations are managed via a .circleci/config.yml file within your repository, keeping pipelines version-controlled. CircleCI's standout feature is its "Orbs," which are shareable packages of CI/CD configuration. These reusable components can encapsulate complex logic for deploying to Kubernetes, running security scans, or integrating with third-party tools, dramatically simplifying pipeline setup. Its strong support for Docker Layer Caching and advanced caching strategies for dependencies can significantly reduce build times for container-heavy applications.

    Key Differentiators & Use Cases

    • Ideal Use Case: Teams prioritizing build speed for container-based applications. It is particularly effective for organizations that need powerful parallelism, matrix builds, and sophisticated caching to reduce feedback loops.
    • Performance and Parallelism: CircleCI offers exceptional control over test splitting and parallelism. Using the circleci tests split command, you can automatically distribute test files across multiple containers based on timing data from previous runs, ensuring each parallel job finishes at roughly the same time.
    • Configurable Compute: Choose from various resource classes (CPU and RAM) for each job, allowing you to allocate more power for resource-intensive tasks like compiling or image building while using smaller, cheaper resources for simple linting jobs. This granular control is crucial for optimizing cost-performance trade-offs.

    Pricing

    CircleCI operates on a credit-based model where you purchase credits and consume them based on the compute resource class and operating system used (Linux, Windows, macOS). It offers a generous free tier with a fixed number of credits per month, suitable for small projects. Paid plans (Performance, Scale, Server) provide more credits, higher concurrency, and advanced features like deeper insights and dedicated support. Teams must carefully plan their credit usage and monitor consumption, as complex or inefficient pipelines can lead to unexpected costs.


    Website: https://circleci.com

    4. Jenkins (open source)

    Jenkins is a veteran, open-source automation server that has been a cornerstone of CI/CD for years. Its core strength lies in its unparalleled flexibility and extensibility, allowing teams to build, test, and deploy across virtually any platform. As a self-hosted solution, it offers complete control over your CI/CD environment, which is a critical requirement for organizations with strict security protocols or unique infrastructure needs. This level of control makes it one of the best CI/CD tools for bespoke pipeline construction.

    Jenkins (open source)

    Jenkins operates with a controller-agent architecture and defines pipelines using a Groovy-based DSL, either in "Scripted" or "Declarative" syntax, stored in a Jenkinsfile within your repository. Its true power is unlocked through its massive plugin ecosystem, boasting over 1,800 community-contributed plugins for integrating everything from cloud providers and version control systems to static analysis tools. This extensibility ensures you can adapt Jenkins to nearly any workflow. For guidance on structuring these complex workflows, see our article on CI/CD pipeline best practices.

    Key Differentiators & Use Cases

    • Ideal Use Case: Enterprises and teams with complex, non-standard build processes, or those requiring full control over their infrastructure for security and compliance. It is a workhorse for intricate, multi-stage pipelines that integrate with a diverse, and often legacy, tech stack.
    • Ultimate Extensibility: The vast plugin library is Jenkins's defining feature. If a tool exists in the DevOps ecosystem, there is almost certainly a Jenkins plugin to integrate with it, eliminating the need for custom scripting. The Kubernetes plugin, for example, allows for dynamic, ephemeral build agents provisioned on-demand in a K8s cluster.
    • Self-Hosted Control: You manage the hardware, security, updates, and uptime. This is a double-edged sword, offering maximum control over Java versions, system libraries, and network access but also demanding significant maintenance overhead from your team or a partner like OpsMoon.

    Pricing

    As an open-source project, Jenkins is free to download and use, with no licensing costs. The total cost of ownership, however, comes from the infrastructure you run it on (cloud or on-premise servers) and the engineering time required for setup, maintenance, security hardening, plugin management, and scaling the system. This operational overhead is the primary "cost" of using Jenkins and must be factored into any decision.


    Website: https://www.jenkins.io

    5. Bitbucket Pipelines (Atlassian)

    Bitbucket Pipelines is Atlassian's native CI/CD service, fully integrated within Bitbucket Cloud. Its primary strength lies in its simplicity and seamless connection to the Atlassian ecosystem, offering a "configuration as code" approach directly inside your repository. For teams already committed to Bitbucket for source control and Jira for project management, Pipelines presents a unified and low-friction path to implementing continuous integration without leaving their familiar environment.

    Bitbucket Pipelines (Atlassian)

    The platform operates using a bitbucket-pipelines.yml file, where you define build steps that execute within Docker containers. This container-first approach simplifies dependency management and ensures a consistent build environment. While its feature set is less extensive than specialized CI-first platforms, it provides essential capabilities like caching, artifacts, and multi-step workflows, making it a strong contender for teams prioritizing integration and ease of use over advanced, complex pipeline orchestration.

    Key Differentiators & Use Cases

    • Ideal Use Case: Small to medium-sized teams deeply embedded in the Atlassian suite (Bitbucket, Jira, Confluence) who need a straightforward, integrated CI/CD solution for web applications and microservices.
    • Deep Atlassian Integration: Automatically link builds, deployments, and commits back to Jira issues, providing unparalleled visibility for project managers and stakeholders directly within their project tracking tool. Build statuses appear directly on the Jira ticket.
    • Simple Concurrency Model: Easily scale your build capacity by adding concurrent build slots or using your own self-hosted runners, offering predictable performance without complex runner management. Each step in a parallel configuration consumes one of the available concurrency slots.

    Pricing

    Bitbucket Pipelines includes a free tier with a limited number of build minutes per month, suitable for small projects. Paid plans (Standard and Premium) offer more build minutes, increased concurrency, and larger artifact storage. Additional build minutes can be purchased in blocks of 1,000, providing a simple way to scale as needed. Note that recent plan changes have tightened free tier limits on storage and log retention, which may be a consideration for teams with high-volume pipelines.


    Website: https://www.atlassian.com/software/bitbucket/features/pipelines

    6. Azure Pipelines (Azure DevOps)

    Azure Pipelines is Microsoft's language-agnostic CI/CD service, offering a robust platform for building, testing, and deploying to any cloud or on-premises environment. As part of the broader Azure DevOps suite, it provides deep integration with Azure services and enterprise-grade security controls. It excels in environments that heavily leverage the Microsoft ecosystem, particularly those with Windows and .NET workloads, but also offers first-class support for Linux, macOS, and containers.

    Azure Pipelines (Azure DevOps)

    The platform supports both YAML pipelines for version-controlled configuration-as-code and a classic visual UI editor, providing flexibility for teams with varying technical preferences. A key strength is its advanced release management capabilities, including deployment gates, staged rollouts, and detailed approval workflows, which are critical for maintaining stability in complex enterprise applications. This makes it one of the best CI/CD tools for organizations requiring stringent governance over their deployment processes.

    Key Differentiators & Use Cases

    • Ideal Use Case: Enterprises and teams deeply invested in the Microsoft Azure cloud or developing .NET applications. It is also a strong choice for organizations requiring complex, multi-stage release pipelines with sophisticated approval gates and compliance checks.
    • Hybrid Flexibility: Seamlessly use a mix of Microsoft-hosted agents for cloud builds and self-hosted agents on-premises or in other clouds, giving you complete control over your build environment and dependencies. Self-hosted agents can be installed as services or run interactively.
    • Release Gates: Implement powerful automated checks before promoting a release to the next stage. Gates can query Azure Monitor alerts, invoke external REST APIs, check for policy compliance via Azure Policy, or wait for approvals from Azure Boards work items, preventing flawed deployments.

    Pricing

    Azure Pipelines offers a free tier that includes one Microsoft-hosted CI/CD parallel job with 1,800 minutes per month and one self-hosted parallel job with unlimited minutes. For public projects, the allowance is more generous. Paid plans add more parallel jobs and are billed per job. Pricing can feel complex as it combines per-user licenses for the Azure DevOps suite with the cost of parallel jobs, requiring careful planning for larger teams.


    Website: https://azure.microsoft.com/products/devops

    7. AWS CodePipeline (with CodeBuild/CodeDeploy)

    AWS CodePipeline is a fully managed continuous delivery service that helps you automate your release pipelines for fast and reliable application and infrastructure updates. It acts as the orchestration layer within the AWS ecosystem, tying together services like AWS CodeBuild for compiling source code and running tests, and AWS CodeDeploy for deploying to various compute services. Its core strength lies in its profound integration with the AWS cloud, making it a default choice for teams heavily invested in Amazon's infrastructure.

    AWS CodePipeline (with CodeBuild/CodeDeploy)

    The service provides a visual workflow interface to model your release process from source to production, including stages for building, testing, and deploying. CodePipeline is event-driven, automatically triggering your pipeline on code changes from sources like AWS CodeCommit, GitHub, or Amazon S3. Its tight integration with IAM provides granular, resource-level security, ensuring that pipeline stages only have the permissions they explicitly need, which is a significant security advantage for enterprise environments.

    Key Differentiators & Use Cases

    • Ideal Use Case: Organizations whose entire application stack, from compute (EC2, Lambda, ECS) to storage (S3), resides on AWS. It excels at orchestrating complex, multi-stage deployments that leverage native AWS services.
    • Deep AWS Integration: Seamlessly connects to virtually every key AWS service, using IAM roles for authentication and CloudWatch for monitoring, which simplifies operations and security management significantly. For example, a CodeDeploy action can natively perform a blue/green deployment for an ECS service.
    • Flexible Orchestration: While it works best with CodeBuild and CodeDeploy, it can also integrate with third-party tools like Jenkins or TeamCity, acting as a central orchestrator for hybrid toolchains. A pipeline stage can invoke a Lambda function for custom validation logic.

    Pricing

    AWS CodePipeline follows a pay-as-you-go model. You are charged a small fee per active pipeline per month, with no upfront costs. You also pay for the underlying services your pipeline uses, such as CodeBuild compute minutes and CodeDeploy deployments. There is a generous free tier for AWS services, but be sure to model the costs for all integrated services, not just the pipeline itself, to get an accurate financial picture.


    Website: https://aws.amazon.com/codepipeline/

    8. Google Cloud Build

    Google Cloud Build is a fully managed, serverless CI/CD service that executes your builds on Google Cloud infrastructure. Its primary strength lies in its deep integration with the GCP ecosystem, providing native connections to services like Artifact Registry, Cloud Run, and Google Kubernetes Engine (GKE). This makes it an incredibly efficient choice for teams already committed to the Google Cloud platform, enabling streamlined container-based workflows.

    Google Cloud Build

    The service operates using a cloudbuild.yaml file, where you define build steps executed sequentially as Docker containers. This container-native approach provides excellent consistency and portability. Google Cloud Build stands out for its performance, offering fast startup times with powerful machine types (E2/N2D/C3) and SSD options available to accelerate demanding build jobs, making it a powerful contender among the best CI/CD tools for cloud-native applications.

    Key Differentiators & Use Cases

    • Ideal Use Case: Development teams deeply embedded in the Google Cloud ecosystem who need a fast, scalable, and cost-effective way to build, test, and deploy containerized applications to services like GKE or Cloud Run.
    • Private Pools: For enhanced security and performance, you can provision private worker pools within your VPC network, ensuring builds run in an isolated environment with access to internal resources (like databases or artifact servers) without traversing the public internet.
    • Container-Native Focus: Excels at multi-stage Docker builds using the integrated Docker daemon, vulnerability scanning with Container Analysis, and pushing images directly to the integrated Artifact Registry, creating a secure and efficient software supply chain.

    Pricing

    Google Cloud Build offers a compelling pricing model, including a generous free tier of 2,500 build-minutes per month per billing account. Beyond the free tier, it uses a per-second billing model, ensuring you only pay for the exact compute time you consume. While the build time itself is cost-effective, remember to account for associated costs from networking (e.g., Cloud NAT for egress traffic from private pools), logging (Cloud Logging), and artifact storage (Artifact Registry) when modeling your total CI/CD expenditure.


    Website: https://cloud.google.com/build

    9. Travis CI

    Travis CI is one of the pioneering hosted CI/CD services, known for its simplicity and strong historical ties to the open-source community. It simplifies the process of testing and deploying projects by integrating directly with source control systems like GitHub and Bitbucket. The platform is configured via a single .travis.yml file in the root of the repository, making pipeline definitions easy to version and manage alongside the application code.

    Travis CI

    While many modern tools have entered the market, Travis CI remains a solid choice, particularly for its broad operating system support and specialized hardware options. It offers a straightforward user experience that helps teams get their first build running in minutes. This focus on ease-of-use and clear configuration makes it an accessible option among the best CI/CD tools for teams that don't require overly complex pipeline orchestration.

    Key Differentiators & Use Cases

    • Ideal Use Case: Open-source projects or teams that need to test across a diverse matrix of operating systems, including FreeBSD, or require GPU-accelerated builds for machine learning or data processing tasks. Its on-premises offering also suits organizations requiring full control over their build environment.
    • Multi-OS & GPU Support: Travis CI stands out with its native support for Linux, macOS, Windows, and FreeBSD. It also offers various VM sizes, including GPU-enabled instances, a critical feature for AI/ML pipelines that is less common in other hosted platforms. This is essential for running CUDA-dependent tests.
    • Build Stages: Organize complex pipelines by grouping jobs into sequential stages. This allows you to set up dependencies, such as running all static analysis and unit test jobs in a Test stage before proceeding to a Deploy stage, providing better control flow and early failure detection.

    Pricing

    Travis CI operates on a credits-based pricing model, where builds consume credits based on the operating system and VM size used. Free plans are available for open-source projects. For private projects, paid plans start with a Free tier offering a limited number of credits and scale up through various tiers (e.g., Core, Pro) that provide more credits, increased concurrency, and premium features like larger instance sizes and GPU access. An enterprise plan is available for its self-hosted server solution.


    Website: https://www.travis-ci.com/pricing

    10. TeamCity (JetBrains)

    TeamCity by JetBrains is an enterprise-grade CI/CD server known for its powerful build management and deep test intelligence, making it a strong contender among the best CI/CD tools. Available as both a self-hosted On-Premises solution and a managed TeamCity Cloud (SaaS) offering, it provides flexibility for different operational models. Its core strength lies in providing unparalleled visibility and control over complex build processes, especially within large, polyglot monorepos.

    TeamCity (JetBrains)

    The platform is designed for intricate dependency management and advanced testing scenarios. Developers and DevOps engineers appreciate its highly customizable build configurations, which can be defined through a user-friendly UI or using Kotlin-based "configuration as code". This dual approach caters to teams transitioning towards GitOps practices while still needing the immediate accessibility of a graphical interface for complex pipeline visualization and debugging.

    Key Differentiators & Use Cases

    • Ideal Use Case: Large enterprises or teams managing complex monorepos with diverse technology stacks (e.g., Java, .NET, C++) that require sophisticated test analysis, advanced build chains, and robust artifact management. It is also excellent for organizations requiring a hybrid approach with both on-premises and cloud build agents.
    • Build Chains & Dependencies: Visually construct and manage complex build chains where one build's output (artifact dependency) becomes another's input. TeamCity intelligently optimizes the entire chain, running independent builds in parallel and reusing build results from suitable, already-completed builds to maximize efficiency.
    • Test Intelligence: Automatically re-runs only the tests that failed, quarantines flaky tests to prevent them from breaking the main build, and provides rich historical test data and reports. This feature is invaluable for maintaining high velocity in projects with massive test suites by avoiding unnecessary full test runs.

    Pricing

    TeamCity's pricing model differs significantly between its Cloud and On-Premises versions. TeamCity Cloud uses a subscription model based on the number of committers and includes a pool of build credits, with a free tier available for small teams. TeamCity On-Premises follows a traditional licensing model based on the number of build agents you need, with a free Professional license that includes 3 agents. Organizations should carefully evaluate both models against their projected usage and infrastructure strategy.


    Website: https://www.jetbrains.com/teamcity

    11. Bamboo (Atlassian Data Center)

    Bamboo is Atlassian's self-hosted continuous integration and continuous delivery server, designed for enterprises deeply invested in the Atlassian ecosystem. Its primary strength lies in its native, out-of-the-box integration with other Atlassian products like Jira Software and Bitbucket Data Center. This tight coupling provides unparalleled traceability, allowing teams to link code changes, builds, and deployments directly back to Jira issues, offering a unified view of the development lifecycle.

    Bamboo (Atlassian Data Center)

    The platform organizes work into "plans" with distinct stages and jobs, which can run on dedicated remote "agents." This architecture provides fine-grained control over execution environments and concurrency. Bamboo’s deployment projects are a standout feature, offering a structured way to manage release environments, track versioning, and control promotions from development to production, making it one of the best CI/CD tools for regulated industries requiring strict audit trails.

    Key Differentiators & Use Cases

    • Ideal Use Case: Enterprises standardized on Atlassian's on-premise or Data Center products (Jira, Bitbucket, Confluence) that require a self-hosted CI/CD solution with strong governance, predictable performance, and end-to-end traceability from issue creation to deployment.
    • Plan Branches: Automatically creates and manages CI plans for new branches in your Bitbucket or Git repository, inheriting the configuration from a master plan. This simplifies testing of feature branches without manual pipeline setup, though it lacks the full flexibility of modern YAML-based dynamic pipelines.
    • Data Center High Availability: For large-scale operations, Bamboo Data Center can be deployed in a clustered configuration, providing active-active high availability and resilience against node failure. This is a critical feature for enterprises that cannot tolerate CI/CD downtime.

    Pricing

    Bamboo is licensed based on the number of remote agents (concurrent builds) rather than by users, starting with a flat annual fee for a small number of agents. The Data Center pricing model is designed for enterprise scale and includes premier support. Potential buyers should be aware that the self-hosted model incurs operational costs for infrastructure and maintenance, and that Atlassian has announced price increases for its Data Center products.


    Website: https://www.atlassian.com/software/bamboo

    12. Harness CI

    Harness CI is a modern, developer-centric component of the broader Harness Software Delivery Platform. Its core strength lies in providing an intuitive, visual pipeline builder while being deeply integrated with other platform modules like Continuous Delivery (CD), Feature Flags, and Cloud Cost Management. This creates a cohesive, end-to-end ecosystem that simplifies the complexities of software delivery, from code commit to production monitoring, all under a single pane of glass.

    Harness CI

    The platform is designed for efficiency, offering features like Test Intelligence, which intelligently runs only the tests impacted by a code change, drastically reducing build times. Pipelines are configured as code using YAML but are also fully manageable through a visual drag-and-drop interface, catering to both engineers who prefer code and those who need a clearer visual representation. This dual approach, combined with reusable steps and templates, makes it one of the best CI/CD tools for standardizing pipelines across large organizations.

    Key Differentiators & Use Cases

    • Ideal Use Case: Enterprises and scaling startups already invested in or considering the broader Harness ecosystem for a unified delivery platform. It excels in environments that require strong governance, security, and visibility across CI, CD, and cloud costs.
    • Test Intelligence: A standout feature that accelerates build cycles by mapping code changes to specific tests, selectively running only the relevant subset. For large monorepos with extensive test suites, this can reduce test execution time from hours to minutes.
    • Unified Platform: The seamless integration with Harness CD, GitOps, and Feature Flags provides a powerful, consolidated toolchain. For example, a CI pipeline can build an artifact, which then triggers a CD pipeline that performs a canary deployment managed by a feature flag, all within the same UI and configuration model.

    Pricing

    Harness CI offers a free-forever tier suitable for small teams and projects. Paid plans are modular and scale based on the number of developers and the specific modules required (CI, CD, etc.). While the pricing for the free and team tiers is public, the Enterprise plan is custom-quoted and sales-led. The platform's true value is most apparent when multiple modules are adopted, as it creates a flywheel of efficiency, but this can also represent a significant investment compared to standalone CI tools.


    Website: https://www.harness.io/pricing

    Top 12 CI/CD Tools Comparison

    Platform Key features Developer experience Best for / Target audience Pricing model
    GitHub Actions Deep GitHub integration; marketplace of reusable actions; hosted & self-hosted runners Seamless in-repo workflows, PR checks, reusable workflows Teams with code on GitHub wanting integrated CI/CD Minutes-based usage; free tier; macOS/Windows minutes bill; self-hosted runner fee (from 2026)
    GitLab CI/CD (GitLab.com) Full DevSecOps (pipelines, security scanners, Auto DevOps); cloud or self-managed Unified planning→deploy experience; strong compliance tooling Teams wanting single platform for planning, security, and CI/CD Tiered cloud/self-managed pricing; advanced features often in higher tiers
    CircleCI Selectable compute sizes; strong Docker support; caching & parallelism Fast builds for containerized workflows; mature insights dashboards Container-heavy teams needing performance and control Credits-based billing with selectable compute; requires cost planning
    Jenkins (open source) Self-hosted Declarative/Scripted pipelines; 1,800+ plugins; agent flexibility Extremely flexible but higher maintenance and setup effort Teams needing maximum customization and on-prem control Free OSS; operational/infra costs for hosting, scaling, security
    Bitbucket Pipelines YAML pipelines integrated with Bitbucket; Docker builds; minutes included Simple setup for Bitbucket repos; Atlassian product integration Teams using Bitbucket and Atlassian stack Minutes included by plan; extra minutes purchasable; tightened free limits (2025)
    Azure Pipelines (Azure DevOps) Microsoft-hosted/self-hosted agents; approvals/gates; enterprise identity Excellent Windows/.NET support; integrated governance Azure/.NET-centric organizations and enterprises Mix of user licenses and pipeline concurrency; pricing can be complex
    AWS CodePipeline Event-driven pipelines; IAM & VPC integration; native CodeBuild/CodeDeploy ties Native AWS tooling and observability; best inside AWS ecosystem Teams running primarily on AWS needing tight cloud integration Pay-as-you-go; orchestration often paired with other AWS build services
    Google Cloud Build Serverless & private pools; Artifact Registry integration; per-second billing Cost-efficient, fast startup for container builds on GCP GCP-focused teams building container images Per-second billing; free build minutes (2,500/month); networking/storage costs may apply
    Travis CI Multi-OS support (Linux/Windows/FreeBSD); GPU VM options; YAML config Easy to start; historically strong OSS support Open-source projects and teams needing straightforward pipelines Credits-based usage; hosted and on-prem/server options
    TeamCity (JetBrains) Build chains, flaky test detection, test intelligence; SaaS & on‑prem Excellent visibility for large monorepos and test suites Enterprises with complex build/test needs Cloud (committer-based + credits) and on-prem licensing; differing pricing models
    Bamboo (Atlassian Data Center) Self-hosted agents, plan branches, deployment projects; Data Center HA Deep Jira/Bitbucket traceability; self-hosting requires ops work Atlassian-centric enterprises standardizing on on‑prem stack Self-hosted licensing; Data Center pricing increased across Atlassian products
    Harness CI Visual pipelines; test intelligence; modular delivery platform integration Developer-friendly visual flows; reusable modules for efficiency Organizations buying into an end-to-end delivery platform Sales-led pricing; best value when using multiple Harness modules

    Making the Right Choice: From Evaluation to Expert Implementation

    Navigating the landscape of the best CI/CD tools can feel overwhelming. We've explored a dozen powerful platforms, from the tightly integrated ecosystems of GitHub Actions and GitLab CI/CD to the unparalleled flexibility of Jenkins and the enterprise-grade power of Azure DevOps and TeamCity. Each tool presents a unique combination of features, pricing models, and operational philosophies. The right choice is not about finding a single "best" tool, but about identifying the optimal solution for your team's specific context.

    Your decision matrix must extend beyond a simple feature comparison. It requires a deep, technical evaluation of how a tool aligns with your existing technology stack, your team's skillset, and your long-term scalability requirements. The perfect tool for a small startup prioritizing speed and minimal overhead (like CircleCI or Bitbucket Pipelines) is fundamentally different from the one needed by a large enterprise that requires granular control, robust security, and complex compliance workflows (often leading to Jenkins, Harness, or Bamboo).

    Key Takeaways and Your Next Steps

    Reflecting on the tools we've analyzed, several core themes emerge. Cloud-native solutions are simplifying setup but can introduce vendor lock-in. Self-hosted options offer ultimate control but demand significant maintenance overhead. The most effective choice often hinges on a few critical factors:

    • Source Control Integration: How tightly does the tool integrate with your version control system? A native solution like GitHub Actions, GitLab CI/CD, or Bitbucket Pipelines offers a seamless developer experience, reducing context switching and simplifying configuration.
    • Runner and Agent Management: Will you use managed, cloud-hosted runners, or will you self-host them for better performance, security, and cost control? This decision directly impacts your operational burden and infrastructure costs, especially at scale.
    • Configuration as Code (CaC): Does the tool treat pipeline definitions as code (e.g., YAML files) that can be versioned, reviewed, and templated? This is a non-negotiable for modern DevOps practices, enabling reproducibility and preventing configuration drift.
    • Ecosystem and Extensibility: How robust is the plugin or extension marketplace? The ability to easily integrate with security scanners, artifact repositories, and cloud providers is critical for building a comprehensive software delivery lifecycle.

    Your immediate next step is to create a shortlist. Select two or three tools from our list that best match your high-level requirements. From there, initiate a proof-of-concept (PoC). Task a small team with building a representative pipeline for one of your core services on each candidate platform. This hands-on evaluation is the only way to truly understand the nuances of a tool's workflow, its performance characteristics, and its developer experience.

    Beyond the Tool: The Implementation Challenge

    Remember, selecting a tool is only the beginning. The real value is unlocked through expert implementation, and this is where many teams falter. The transition involves more than just rewriting a YAML file; it requires a strategic approach to migration, security, and optimization.

    Consider these critical implementation questions: How will you securely manage secrets and credentials? What is your strategy for optimizing container build times and caching dependencies to keep pipelines fast? How will you design reusable pipeline components or templates to enforce consistency across dozens or hundreds of microservices? Answering these questions correctly is the difference between a CI/CD platform that accelerates development and one that becomes a bottleneck. This is precisely where specialized expertise becomes a force multiplier, ensuring your investment in one of the best CI/CD tools yields the maximum return.


    Choosing the right tool is step one; implementing it for maximum impact is the real challenge. The elite, pre-vetted DevOps and Platform Engineers at OpsMoon specialize in designing, migrating, and optimizing complex CI/CD pipelines to accelerate your software delivery. Book a free work planning session with OpsMoon to get an expert roadmap for building a world-class CI/CD infrastructure.

  • A Technical Guide to Terraform Infrastructure Automation

    A Technical Guide to Terraform Infrastructure Automation

    Terraform enables infrastructure automation by defining cloud and on-prem resources in human-readable configuration files known as HashiCorp Configuration Language (HCL). This Infrastructure as Code (IaC) approach replaces manual, error-prone console operations with a version-controlled, repeatable, and auditable workflow. The objective is to programmatically provision and manage the entire lifecycle of complex infrastructure environments, ensuring consistency and enabling reliable deployments at scale.

    Building Your Terraform Automation Foundation

    Before writing any HCL, architecting the foundational framework for your automation is critical. This initial setup dictates how you manage code, state, and dependencies, directly impacting collaboration, scalability, and long-term maintainability.

    Hand-drawn diagram illustrating a workflow from a repository through a secured state to storage and packaries.

    A robust foundation prevents technical debt and streamlines operations as your infrastructure and team grow. This stage is not about defining specific resources but about engineering the operational patterns for managing the code that defines them.

    A prerequisite is a solid understanding of Infrastructure as a Service (IaaS) models. Terraform excels at managing IaaS primitives, translating declarative code into provisioned resources like virtual machines, networks, and storage.

    Structuring Your Code Repositories

    The monorepo vs. multi-repo debate is central to structuring IaC projects. For enterprise-scale automation, a monorepo often provides superior visibility and simplifies dependency management. It centralizes the entire infrastructure landscape, which is invaluable when executing changes that span multiple services or environments.

    Conversely, a multi-repo approach offers granular access control and clear ownership boundaries, making it suitable for large, federated organizations. A hybrid model is also common: a central monorepo for shared modules and separate repositories for environment-specific root configurations.

    Selecting a State Management Backend

    The Terraform state file (terraform.tfstate) is the canonical source of truth for your managed infrastructure. Proper state management is non-negotiable for collaborative environments. Local state files are suitable only for isolated development and are fundamentally unsafe for team-based or automated workflows.

    A remote backend with state locking is mandatory for production use. State locking prevents concurrent terraform apply operations from corrupting the state file. Two prevalent, production-grade options are:

    • Terraform Cloud/Enterprise: Offers a managed, integrated solution for remote state storage, locking, execution, and collaborative workflows. It abstracts away the backend configuration complexity and provides a UI for inspecting runs and state history.
    • Amazon S3 with DynamoDB: A common self-hosted pattern on AWS. An S3 bucket stores the encrypted state file, and a DynamoDB table provides the locking mechanism. This pattern offers greater control but requires explicit configuration of the bucket, table, and associated IAM permissions.

    Key Takeaway: A remote backend ensures a centralized, durable location for the state file and provides a locking mechanism to serialize write operations. This is the cornerstone of safe, collaborative Terraform execution.

    Designing a Scalable Directory Layout

    A logical directory structure is your primary defense against configuration sprawl. It promotes code reusability and accelerates onboarding. An effective pattern separates environment-specific configurations from reusable, abstract modules.

    Consider the following layout:

    ├── environments/
    │   ├── dev/
    │   │   ├── main.tf
    │   │   ├── backend.tf
    │   │   └── dev.tfvars
    │   ├── staging/
    │   │   ├── main.tf
    │   │   ├── backend.tf
    │   │   └── staging.tfvars
    │   └── prod/
    │       ├── main.tf
    │       ├── backend.tf
    │       └── prod.tfvars
    ├── modules/
    │   ├── vpc/
    │   │   ├── main.tf
    │   │   ├── variables.tf
    │   │   └── outputs.tf
    │   └── ec2_instance/
    │       ├── main.tf
    │       ├── variables.tf
    │       └── outputs.tf
    

    In this model, the environments directories contain root modules, each with its own state backend configuration (backend.tf). These root modules instantiate reusable modules from the modules directory, injecting environment-specific parameters via .tfvars files. This separation of concerns—reusable logic vs. specific configuration—is fundamental to building a modular, testable, and maintainable infrastructure codebase.

    Mastering Reusable Terraform Modules

    While a logical directory structure provides organization, true scalability in infrastructure automation is achieved through well-designed, reusable Terraform modules.

    Modules are logical containers for multiple resources that are used together. They serve as custom, version-controlled building blocks. Instead of repeatedly defining the resources for a web application stack (e.g., EC2 instance, security group, EBS volume), you encapsulate them into a single web-app module that can be instantiated multiple times. A poorly designed module, however, can introduce more complexity than it solves, leading to configuration drift and maintenance overhead.

    Effective module design balances standardization with flexibility. The key is defining a clear public API through input variables and outputs, abstracting away the implementation details.

    Defining Clean Module Interfaces

    A module's interface is its contract, defined exclusively by variables.tf (inputs) and outputs.tf (outputs). A well-designed interface is explicit and minimal, exposing only the necessary configuration options and result values.

    • Input Variables (variables.tf): Employ descriptive names (e.g., instance_type instead of itype). Provide sane, non-destructive defaults where possible to simplify usage. Use variable validation blocks to enforce constraints on input values. For example, a VPC module might default to 10.0.0.0/16 but allow overrides.
    • Outputs (outputs.tf): Expose only the essential attributes required by downstream resources. For an RDS module, this would typically include the database endpoint, port, and ARN. Avoid exposing internal resource details unless they are part of the module's public contract.

    The primary objective is abstraction. A developer using your S3 bucket module should not need to understand the underlying IAM policies or logging configurations. They should only need to provide a bucket name and receive its ARN and domain name as outputs. This encapsulation of complexity accelerates development.

    A powerful pattern is module composition, where smaller, single-purpose modules are combined to create larger, more complex systems. You could have a base ec2-instance module that provisions a single virtual machine. A web-server module could then consume this ec2-instance module, layering on a user_data script to install Nginx and composing it with a separate security-group module to open port 443. This hierarchical approach maximizes code reuse and minimizes duplication.

    Managing the Provider Ecosystem

    Modules rely on Terraform providers to interact with target APIs. Managing these provider dependencies is as critical as managing the HCL code itself.

    The Terraform Registry hosts over 3,000 providers, but a small subset dominates usage. By 2025, it's projected that just 20 providers will account for roughly 85% of all downloads. The AWS provider has already surpassed 5 billion installations.

    This concentration means that most production environments depend on a core set of highly active providers. A single breaking change in a major provider can have a cascading impact across hundreds of modules. Consequently, provider lifecycle management has become a primary challenge in scaling IaC.

    Version pinning is therefore a non-negotiable practice for maintaining stable and predictable infrastructure. Always define explicit version constraints within a required_providers block.

    terraform {
      required_providers {
        aws = {
          source  = "hashicorp/aws"
          version = "~> 5.0"
        }
      }
    }
    

    The pessimistic version constraint operator (~>) is a best practice. It permits patch-level updates (e.g., 5.0.1 to 5.0.2), which typically contain bug fixes, while preventing minor or major version upgrades (e.g., to 5.1.0 or 6.0.0) that may introduce breaking changes.

    Finally, every module must include a README.md file that documents its purpose, input variables (including types, descriptions, and defaults), and all outputs. A clear usage example is essential for adoption.

    For a deeper dive into structuring your modules for maximum reuse, check out our complete guide on Terraform modules best practices.

    Automating Deployments with CI/CD Pipelines

    Effective terraform infrastructure automation is not achieved by running CLI commands from a developer's workstation. It is realized by integrating Terraform execution into a version-controlled, auditable, and fully automated CI/CD pipeline. Transitioning from manual terraform apply commands to a GitOps workflow is the single most critical step toward scaling infrastructure management reliably and securely.

    This shift centralizes Terraform execution within a controlled automation server, establishing a single, secure path for all infrastructure modifications where every Git commit triggers a predictable, auditable deployment workflow.

    The foundation for a successful pipeline is a well-structured, modular codebase. Clear module interfaces, composition, and strict versioning are prerequisites for the automation that follows.

    Flowchart illustrating the Terraform module process: define, compose, and version steps with icons.

    Designing the Core Pipeline Stages

    A production-grade Terraform CI/CD pipeline is a multi-stage process where each stage acts as a quality gate, identifying issues before they impact production environments.

    The initial gate must be static analysis. Upon code commit, the pipeline should execute jobs that require no cloud credentials, providing fast, low-cost feedback to developers.

    • Linting with tflint: Performs static analysis to detect potential errors, enforce best practices, and flag deprecated syntax in HCL code.
    • Security Scanning with tfsec: Scans the infrastructure code for common security misconfigurations, such as overly permissive security group rules or unencrypted S3 buckets, preventing vulnerabilities from being provisioned.

    Only after the code successfully passes these static checks should the pipeline proceed to interact with the cloud provider's API. This is when the terraform plan stage executes, generating a speculative execution plan that details the exact changes to be applied.

    GitOps Workflows: Pull Requests vs. Main Branch

    The critical decision is determining the trigger for terraform apply. Two primary patterns define team workflows:

    1. Plan on Pull Request, Apply on Merge to Main: This is the industry-standard model. A terraform plan is automatically generated and posted as a comment on every pull request. This allows for peer review of the proposed infrastructure changes alongside the code. Upon PR approval and merge, a separate pipeline job executes terraform apply against the main branch.
    2. Apply from Feature Branch (with Approval): In some high-velocity environments, terraform apply may be executed directly from a feature branch after a plan is reviewed and approved. This can accelerate delivery but requires stringent controls and state locking to prevent conflicts between concurrent apply operations.

    My Recommendation: For 99% of teams, the "plan on PR, apply on merge" model provides the optimal balance of velocity, safety, and auditability. It integrates seamlessly with standard code review practices and creates a linear, immutable history of infrastructure changes in the main branch.

    The following table outlines the logical stages and common tooling for a Terraform CI/CD pipeline.

    Terraform CI/CD Pipeline Stages and Tooling

    Pipeline Stage Purpose Example Tools
    Static Analysis Catch code quality, style, and security issues before execution. tflint, tfsec, Checkov
    Plan Generation Create a speculative plan showing the exact changes to be made. terraform plan -out=tfplan
    Plan Review Allow for human review and approval of the proposed infrastructure changes. GitHub Pull Request comments, Atlantis, GitLab Merge Requests
    Apply Execution Safely apply the approved changes to the target environment. terraform apply "tfplan"

    These stages create a progressive validation workflow, building confidence at each step before any stateful changes are made to the live infrastructure.

    Securely Connecting to Your Cloud

    CI/CD runners require credentials to execute changes in your cloud environment. This is a critical security boundary. Never store long-lived static credentials as repository secrets. Instead, leverage dynamic, short-lived credentials via workload identity federation.

    The recommended best practice is to use OpenID Connect (OIDC). Configure a trust relationship between your CI/CD platform and your cloud provider. Create a dedicated IAM role (AWS), service principal (Azure), or service account (GCP) with the principle of least privilege. The pipeline runner can then securely assume this role via OIDC to obtain temporary credentials that are valid only for the duration of the job, eliminating the need to store any static secrets.

    For a deeper dive into pipeline security and more advanced workflows, our guide on CI/CD pipeline best practices covers these concepts in greater detail.

    Actionable Pipeline Snippets

    The following are conceptual YAML snippets demonstrating these stages for popular CI/CD platforms.

    GitHub Actions Example (.github/workflows/terraform.yml)

    jobs:
      terraform:
        runs-on: ubuntu-latest
        steps:
          - name: Checkout
            uses: actions/checkout@v3
    
          - name: Setup Terraform
            uses: hashicorp/setup-terraform@v2
    
          - name: Terraform Format
            run: terraform fmt -check
    
          - name: Terraform Init
            run: terraform init -backend-config=backend.tfvars
    
          - name: Terraform Validate
            run: terraform validate
    
          - name: Terraform Plan
            # Only runs on Pull Requests
            if: github.event_name == 'pull_request'
            run: terraform plan -input=false -no-color -out=tfplan
    
          - name: Terraform Apply
            # Only runs on merges to the main branch
            if: github.ref == 'refs/heads/main' && github.event_name == 'push'
            run: terraform apply -auto-approve -input=false tfplan
    

    This workflow separates planning from application based on the GitHub event trigger, creating a secure and automated promotion path from commit to deployment. Note the use of tfplan to ensure that what is planned is exactly what is applied.

    Advanced Security and State Management

    Once a CI/CD pipeline is operational, scaling terraform infrastructure automation introduces advanced challenges in security and state management. The focus must shift from basic execution to proactive, policy-driven governance and robust secrets management to secure the infrastructure lifecycle.

    This means embedding security controls directly into the automation workflow, rather than treating them as a post-deployment validation step.

    Securing Credentials with External Secrets Management

    Hardcoding secrets (API keys, database passwords, certificates) in .tfvars files or directly in HCL is a critical security vulnerability. Such values are persisted in version control history and plaintext in the Terraform state file, creating a significant attack surface.

    The correct approach is to externalize secrets management. Terraform configurations should be designed to fetch credentials at runtime from a dedicated secrets management system, ensuring they never exist in the codebase or state file.

    Key tools for this purpose include:

    In practice, the Terraform configuration uses a data source to retrieve a secret by its name or path. The CI/CD execution role is granted least-privilege IAM permissions to read only the specific secrets required for a given deployment. For deeper insights, review established secrets management best practices.

    Enforcing Rules with Policy as Code

    To prevent costly or non-compliant infrastructure from being provisioned, organizations must implement programmatic guardrails. Policy as code (PaC) is the technique for codifying organizational rules regarding security, compliance, and cost.

    PaC frameworks integrate into the CI/CD pipeline, typically executing after terraform plan. The framework evaluates the plan against a defined policy set. If a proposed change violates a rule (e.g., creating a security group with an ingress rule of 0.0.0.0/0), the pipeline fails, preventing the non-compliant change from being applied.

    Key Insight: Policy as code shifts governance from a manual, reactive review process to an automated, proactive enforcement mechanism. It acts as a safety net, ensuring best practices are consistently applied to every infrastructure modification.

    The two dominant frameworks in this space are:

    • Sentinel: HashiCorp's proprietary PaC language, tightly integrated with Terraform Cloud and Enterprise.
    • Open Policy Agent (OPA): An open-source, general-purpose policy engine that supports a wide range of tools, including Terraform, through tools like Conftest.

    For example, a simple OPA policy written in Rego can enforce that all EC2 instances must have a cost-center tag. Any plan attempting to create an instance without this tag will be rejected.

    Detecting and Remediating Configuration Drift

    Configuration drift occurs when the actual state of deployed infrastructure diverges from the state defined in the HCL code. This is often caused by emergency manual changes made directly in the cloud console.

    Drift undermines the integrity of IaC as the single source of truth and can lead to unexpected or destructive outcomes on subsequent terraform apply executions.

    A mature terraform infrastructure automation strategy must include drift detection. Platforms like Terraform Cloud offer scheduled scans to detect discrepancies between the state file and real-world resources. Once drift is identified, remediation follows one of two paths:

    1. Revert: Execute terraform apply to overwrite the manual change and enforce the configuration defined in the code.
    2. Import: If the manual change is desired, first update the HCL code to match the new configuration. Then, use the terraform import command to bring the modified resource back under Terraform's management, reconciling the state file without destroying the resource.

    Practical Rollback and Recovery Strategies

    When a faulty deployment occurs, rapid recovery is critical. The simplest rollback mechanism for IaC is a git revert of the last commit, followed by a re-trigger of the CI/CD pipeline. Terraform will then apply the previous, known-good configuration.

    For more complex failures, advanced state manipulation may be necessary. The terraform state command suite is a powerful but dangerous tool for experts. Commands like terraform state rm can manually remove a resource from the state file, but misuse can easily de-synchronize state and reality. This should be a last resort.

    A safer, architecturally-driven approach is to design for failure using patterns like blue/green deployments. A new version of the infrastructure (green) is deployed alongside the existing version (blue). After validating the green environment, traffic is switched via a load balancer or DNS. A rollback is as simple as redirecting traffic back to the still-running blue environment.

    Of course, security in Terraform is just one piece of the puzzle. A holistic approach involves mastering software development security best practices across your entire engineering organization.

    Improving Observability and Team Collaboration

    An operational CI/CD pipeline is a significant milestone, but mature terraform infrastructure automation requires more. True operational excellence is achieved through deep observability into post-deployment infrastructure behavior and streamlined, multi-team collaboration workflows.

    Without deliberate focus on these areas, infrastructure becomes an opaque system that hinders velocity and increases operational risk.

    Hand-drawn diagram showing a central cloud receiving data from various cost, tags, and service management components.

    Effective infrastructure management is as much about human systems as it is about technology. It requires creating feedback loops that connect deployed resources back to engineering teams, providing the visibility needed for informed decision-making.

    Baking Observability into Your Resources

    Observability is not a feature to be added post-deployment; it must be an integral part of the infrastructure's definition in code.

    A disciplined resource tagging strategy is a simple yet powerful technique. Consistent tagging provides the metadata backbone for cost allocation, security auditing, and operational management. Enforce a standard tagging scheme programmatically using a default_tags block in the provider configuration. This ensures that a baseline set of tags is applied to every resource managed by Terraform.

    provider "aws" {
      region = "us-east-1"
    
      default_tags {
        tags = {
          ManagedBy   = "Terraform"
          Environment = var.environment
          Team        = "backend-services"
          Project     = "api-gateway"
        }
      }
    }
    

    This configuration makes the infrastructure instantly queryable and filterable. Finance teams can generate cost reports grouped by the Team tag, while operations can filter monitoring dashboards by Environment.

    Beyond tagging, provision monitoring and alerting resources directly within Terraform. For example, define AWS CloudWatch metric alarms and SNS notification topics alongside the resources they monitor, or use the Datadog provider to create Datadog monitors as part of the same application module.

    Making Team Collaboration Actually Work

    As multiple teams contribute to a shared infrastructure codebase, clear governance is required to prevent conflicts and maintain stability. Ambiguous ownership and inconsistent review processes lead to configuration drift and production incidents.

    The following practices establish secure and scalable multi-team collaboration workflows:

    • Standardize Pull Request Reviews: Mandate that every pull request (PR) must include the terraform plan output as a comment. This allows reviewers to assess the exact impact of code changes without having to locally check out the branch and execute a plan themselves.
    • Define Clear Ownership with CODEOWNERS: Utilize a CODEOWNERS file in the repository's root to programmatically assign required reviewers based on file paths. For example, any change within /modules/networking/ can automatically require approval from the network engineering team.
    • Use Granular Permissions for Access: Implement the principle of least privilege in the CI/CD system. Create distinct deployment pipelines or jobs for each environment, protected by different credentials and approval gates. A developer may have permissions to apply to a sandbox environment, but a deployment to production should require explicit approval from a senior team member or lead.

    Adopting these practices transforms a Git repository from a code store into a collaborative platform that codifies team processes, making them repeatable, auditable, and secure.

    The choice of tooling also significantly impacts collaboration. While Terraform remains the dominant IaC tool, the State of IaC 2025 report indicates a growing trend toward multi-tool strategies as platform engineering teams evaluate tradeoffs between Terraform's ecosystem and the developer experience of newer tools.

    Common Terraform Automation Questions

    As you implement Terraform infrastructure automation, several common practical challenges emerge. Addressing these correctly from the outset is key to building a stable and scalable system.

    Anticipating these questions and establishing standard patterns will prevent architectural dead-ends and reduce long-term maintenance overhead.

    How Should We Handle Multiple Environments?

    The most robust and scalable method for managing distinct environments (e.g., dev, staging, production) is a directory-based separation approach.

    This pattern involves creating a separate root module directory for each environment (e.g., /environments/dev, /environments/prod). Each of these directories contains its own main.tf and a unique backend configuration, ensuring complete state isolation. They instantiate shared, reusable modules from a common modules directory, passing in environment-specific configuration through dedicated .tfvars files.

    This structure is superior to using Terraform Workspaces for managing complex, dissimilar environments because it provides strong isolation. It allows for different provider versions, backend configurations, and even different module versions per environment, guaranteeing that a misconfiguration in staging cannot affect production.

    What Is the Best Way to Manage Breaking Changes in Providers?

    Uncontrolled provider updates can introduce breaking changes, leading to pipeline failures or production outages. The primary defense is proactive provider version pinning.

    Within the required_providers block of your modules and root configurations, use a pessimistic version constraint, such as version = "~> 5.1". This allows for non-breaking patch updates while preventing Terraform from automatically adopting a new minor or major version.

    When an upgrade is necessary, treat it as a deliberate migration process:

    1. Create a dedicated feature branch for the provider upgrade.
    2. Update the version constraint in the required_providers block.
    3. Run terraform init -upgrade.
    4. Execute terraform plan extensively across all relevant configurations to identify required code changes and potential impacts.
    5. Thoroughly validate the changes in a non-production environment before merging to main and applying to production.

    Can Terraform Manage Manually Created Infrastructure?

    Yes, this is a common scenario when adopting IaC for existing environments. The terraform import command is designed to bring existing, manually-created resources under Terraform's management without destroying them.

    The process involves two steps:

    1. Write a resource block in your HCL code that describes the existing resource.
    2. Execute the terraform import command, providing the address of the HCL resource block and the cloud provider's unique ID for the resource.

    Crucial Tip: After an import, the attributes defined in your HCL code must precisely match the actual configuration of the imported resource. Any discrepancy will be identified as "drift" by Terraform. The next terraform apply will attempt to modify the resource to match the code, potentially causing an unintended and destructive change. Always run terraform plan immediately after an import to ensure no changes are pending.


    Ready to move past these common hurdles and really accelerate your infrastructure delivery? OpsMoon connects you with the top 0.7% of DevOps experts who live and breathe this stuff. We build and scale secure, automated Terraform workflows every day. Whether you need project-based delivery or just hourly support, we have flexible options to get your team the expertise it needs. Start with a free work planning session to map out your automation goals. Learn more at https://opsmoon.com.

  • Kubernetes Tutorial for Beginners: Quick Start to Deploy, Scale, and Monitor

    Kubernetes Tutorial for Beginners: Quick Start to Deploy, Scale, and Monitor

    A Kubernetes tutorial for beginners should feel more like pairing with a teammate than reading dry docs. You’ll learn how to launch a local cluster, apply your YAML manifests, open services, and then hit those endpoints in your browser. Minikube mirrors the hands-on flow of a small startup running microservices on a laptop before shifting to a cloud provider. We’ll also cover how to enable metrics-server and Ingress addons to prepare for autoscaling and routing.

    Developer setting up a Kubernetes cluster locally

    Kickoff Your Kubernetes Tutorial Journey

    Before you type a single command, let’s sketch out the journey ahead. You’ll:

    • Spin up a local cluster with Minikube or kind
    • Apply YAML files to create Pods, ConfigMaps and Deployments
    • Expose your app via Services, Ingress, and RBAC
    • Enable metrics-server for autoscaling
    • Validate endpoints and inspect resource metrics
    • Spot common hiccups like context mix-ups, CrashLoopBackOff or RBAC denials

    Deploying microservices in Minikube turns abstract terms into something you can click and inspect. One early adopter I worked with stood up a Node.js API alongside a React frontend, then reproduced the exact same setup on GKE. That early local feedback loop caught misconfigured CPU limits before they ever hit production.

    Real-World Setup Scenario

    Here’s what our team actually did:

    • Started Minikube with a lightweight VM and enabled addons:
      minikube start --cpus 2 --memory 4096 --driver=docker
      minikube addons enable ingress metrics-server
      
    • Built and tagged custom Docker images with local volume mounts
    • Applied Kubernetes manifests for Deployments, Services, ConfigMaps and Secrets

    “Testing locally with Minikube shaved days off debugging networking configs before pushing to production.”

    Whether you pick Minikube or kind hinges on your needs. Minikube gives you a full VM—perfect for testing PersistentVolumes or Ingress controllers. kind spins clusters in Docker containers, which is a real winner if you’re automating tests in CI.

    Hands-on tutorials often stumble on the same few issues:

    • Forgetting to switch your kubectl context (kubectl config use-context)
    • Overlooking default namespaces and hitting “not found” errors
    • Skipping resource requests and limits, leading to unexpected restarts

    Calling out these pitfalls early helps you sidestep them.

    Tool Selection Tips

    • Verify your laptop can handle 2 CPUs and 4GB RAM before you choose a driver
    • Install metrics-server for HPA support:
      kubectl apply -f https://github.com/kubernetes-sigs/metrics-server/releases/latest/download/components.yaml
      
    • Pick kind for lightweight, ephemeral clusters in CI pipelines
    • Pin your cluster version to match production:
      minikube start --kubernetes-version=v1.24.0
      
    • Install kubectx for fast context and namespace switching
    • Consider CRI-O or containerd as alternative runtimes for parity with managed clouds

    These small prep steps smooth out cluster spins and cut down on frustrating errors.

    Next up, we’ll explore core Kubernetes objects—Pods, Services, Deployments, ConfigMaps, and RBAC—with concrete examples.

    Understanding Kubernetes Core Concepts

    Every Kubernetes cluster relies on a handful of core objects to keep workloads running smoothly. Think of them as the foundation beneath a media streaming service: they coordinate video transcoders, balance traffic, and spin up resources on demand. Grasping these abstractions will set you on the right path as you build out your own Kubernetes tutorial for beginners.

    A Pod is the smallest thing you can deploy—it packages one or more containers with a shared network and storage namespace. Because pods share the host kernel, they launch in seconds and consume far fewer resources than virtual machines.

    Your cluster is made up of Nodes, the worker machines that run pods. The Control Plane then decides where each pod should land, keeping an eye on overall health and distributing load intelligently.

    • Pods: Group containers that need to talk over localhost
    • Nodes: Physical or virtual machines providing CPU and memory
    • ReplicaSets: Keep a desired number of pods alive at all times
    • Deployments: Declarative rollouts and rollbacks around ReplicaSets
    • Services: Offer stable IPs and DNS names for pod sets
    • ConfigMaps: Inject configuration data as files or environment variables
    • Secrets: Store credentials and TLS certs securely
    • ServiceAccounts & RBAC: Control API access

    Pod And Node Explained

    Pods have largely replaced the old VM-centric model for container workloads. In our streaming pipeline, for instance, we launch separate pods hosting transcoder containers for 720p, 1080p, and 4K streams. Splitting them this way lets us scale each resolution independently, without booting up full operating systems.

    Behind the scenes, nodes run the kubelet agent to report pod health back to the control plane. During a live event with sudden traffic spikes, we’ve seen autoscaling add nodes in minutes—keeping streams running without a hitch.

    During peak traffic, rolling updates kept our transcoding service online without dropping frames.

    Controls And Abstractions

    When you need to update your application, Deployments wrap ReplicaSets so rollouts and rollbacks happen gradually. You declare the desired state—and Kubernetes handles the rest—avoiding full-scale outages when you push a new version.

    Namespaces let you carve up a cluster for different teams, projects, or environments. In our lab, “dev” and “prod” namespaces live side by side, each with its own resource quotas and access controls.

    Define resource limits on pods:

    resources:
      requests:
        cpu: "200m"
        memory: "512Mi"
      limits:
        cpu: "500m"
        memory: "1Gi"
    

    Label workloads clearly for quick filtering and monitoring.

    Since Google open-sourced Kubernetes on June 6, 2014, it’s become the de facto container orchestrator. By 2025, over 60% of enterprises worldwide will rely on it, with adoption rates soaring to 96% according to CNCF surveys. Explore the full research on ElectroIQ.

    Networking With Services

    Rather than hard-coding pod IPs, Services give you stable endpoints. You can choose:

    • ClusterIP for internal-only traffic
    • NodePort to expose a service on each node’s port
    • LoadBalancer to tie into your cloud provider’s load balancer
    • ExternalName for DNS aliases

    In our streaming setup, a LoadBalancer Service made the transcoder API accessible to external clients, routing traffic seamlessly through updates. When you work locally with Minikube, switching to NodePort lets you test that same setup on your laptop.

    For HTTP routing, Ingress steps in with host- and path-based rules. Pair it with an Ingress controller—NGINX, for example—to direct requests to the right service in a multi-tenant environment.

    Comparison Of Kubernetes Core Objects

    Object Type Purpose When To Use Example Use Case
    Pod Encapsulate one or more containers Single-instance or tightly coupled Streaming transcoder
    ReplicaSet Maintain a stable set of pod replicas Ensure availability after failures Auto-recover crashed pods
    Deployment Manage ReplicaSets declaratively Rolling updates and safe rollbacks Versioned microservice launches
    Service Expose pods through stable endpoints Connect clients to backend pods External API via LoadBalancer

    With this comparison in hand, you can:

    • Scope pods for simple tasks
    • Rely on ReplicaSets for resilience
    • Use deployments to handle versioning safely
    • Expose endpoints through services without worrying about pod churn

    Next up, we’ll deploy a sample app—putting these fundamentals into practice and solidifying your grasp of Kubernetes core concepts.

    Setting Up A Local Kubernetes Cluster

    Creating a sandbox on your laptop is where the tutorial truly comes alive. You’ll need either Docker or a hypervisor driver (VirtualBox, HyperKit, Hyper-V or WSL2) to host Minikube or kind. By matching macOS, Linux or Windows to your production setup, you reduce surprises down the road.

    Before you jump in, gather these essentials:

    • Docker running as your container runtime
    • A hypervisor driver (VirtualBox, HyperKit, Hyper-V or WSL2) enabled
    • kubectl CLI at version v1.24 or higher
    • 2 CPUs and 4 GB RAM allocated
    • Metrics-server
    • kubectx (optional) for lightning-fast context switching

    With those in place, the same commands work whether you’re on Homebrew (macOS), apt/yum (Linux) or WSL2 (Windows).

    Cluster Initialization Examples

    Spinning up Minikube gives you a VM-backed node that behaves just like production:

    minikube start --cpus 2 --memory 4096 --driver=docker
    minikube addons enable ingress metrics-server
    

    Enable the dashboard and ingress:

    minikube addons enable dashboard
    minikube addons enable ingress
    

    kind, on the other hand, runs control-plane and worker nodes as Docker containers. Here’s a snippet you can tweak to mount your code and pin the K8s version:

    kind: Cluster
    apiVersion: kind.x-k8s.io/v1alpha4
    nodes:
    - role: control-plane
      extraMounts:
      - hostPath: ./app
        containerPath: /app
    

    Mounting your local directory means you’ll see code changes inside pods instantly—no image rebuild required.

    Once the YAML is saved as kind.yaml, launch the cluster:

    kind create cluster --config kind.yaml
    

    Infographic about kubernetes tutorial for beginners

    This diagram walks you through how a Pod moves into a Deployment and then exposes itself via a Service—exactly what you’ll see in a live environment.

    Minikube Versus kind Comparison

    Picking the right local tool often comes down to isolation, startup speed and how you load your code. Here’s a quick look:

    Feature Minikube kind Best For
    Isolation Full VM with a hypervisor Docker container environment Ingress & PV testing
    Startup Time ~20 seconds ~5 seconds CI pipelines
    Local Code Mounting Limited hostPath support Robust volume mounts Rapid dev feedback loops
    Version Flexibility Yes Yes Cluster version experiments

    Use Minikube when you need VM-like fidelity for Ingress controllers or PersistentVolumes. kind shines when you want near-instant spins for CI and rapid iteration.

    Optimizing Context And Resource Usage

    Once both clusters are live, juggling contexts takes two commands:

    kubectl config use-context minikube  
    kubectl config use-context kind
    

    Validate everything with:

    kubectl cluster-info  
    kubectl get nodes  
    kubectl top nodes
    

    And when something breaks, these are your first stops:

    minikube logs  
    kind get logs
    

    Common Initialization Troubleshooting

    Boot errors usually trace back to resource constraints or driver mismatches. Try these fixes:

    • driver not found → confirm Docker daemon is running
    • port conflict → adjust ports with minikube config set
    • CrashLoopBackOff in init containers → run kubectl describe pod

    Deleting old clusters (minikube delete or kind delete cluster) often clears out stubborn errors and stale state.

    Performance Optimization Tips

    Tune CPU/memory to your laptop’s profile:

    minikube start --memory 2048 --cpus 1
    

    Slow image pulls? A local registry mirror slashes wait time. And to test builds instantly:

    kind load docker-image my-app:latest
    

    As of 2025, the United States represents 52.4% of Kubernetes users—that’s 17,914 organizations running mission-critical workloads. Grasping that scale will help you manage real-world kubectl operations on clusters of any size. Learn more about Kubernetes adoption findings on EdgeDelta.

    Read also: Check out our guide on Docker Container Tutorial for Beginners on OpsMoon.

    Deploy A Sample App Using Kubectl

    Deploying a Node.js microservice on Kubernetes is one of the best ways to see how real-world CI pipelines operate. We’ll package your app into a Docker image, write a Deployment manifest in YAML, and use a handful of kubectl commands to spin everything up. By the end, you’ll feel confident navigating typical kubectl workflows used in both startups and large enterprises.

    Writing The Deployment Manifest

    Save your YAML in a file called deployment.yaml and define a Deployment resource:

    apiVersion: apps/v1
    kind: Deployment
    metadata:
      name: node-deployment
      labels:
        app: node-microservice
    spec:
      replicas: 3
      selector:
        matchLabels:
          app: node-microservice
      template:
        metadata:
          labels:
            app: node-microservice
        spec:
          serviceAccountName: node-sa
          containers:
          - name: node-container
            image: my-node-app:latest
            ports:
            - containerPort: 3000
            resources:
              requests:
                cpu: "200m"
                memory: "512Mi"
              limits:
                cpu: "500m"
                memory: "1Gi"
            envFrom:
            - configMapRef:
                name: node-config
    

    Create a ConfigMap for environment variables:

    kubectl create configmap node-config --from-literal=NODE_ENV=production
    

    Define a ServiceAccount and minimal RBAC:

    apiVersion: v1
    kind: ServiceAccount
    metadata:
      name: node-sa
    ---
    apiVersion: rbac.authorization.k8s.io/v1
    kind: Role
    metadata:
      name: pod-reader
    rules:
    - apiGroups: [""]
      resources: ["pods"]
      verbs: ["get","watch","list"]
    ---
    apiVersion: rbac.authorization.k8s.io/v1
    kind: RoleBinding
    metadata:
      name: read-pods-binding
    subjects:
    - kind: ServiceAccount
      name: node-sa
    roleRef:
      kind: Role
      name: pod-reader
      apiGroup: rbac.authorization.k8s.io
    

    Launching The Deployment

    Apply your manifest with:

    kubectl apply -f deployment.yaml
    kubectl apply -f serviceaccount-and-rbac.yaml
    

    Monitor pods as they start:

    kubectl get pods -l app=node-microservice -w
    

    Once READY reads “1/1” and STATUS shows “Running,” your microservice is live.

    Pro Tip
    Filter resources quickly by label:
    kubectl get pods -l app=node-microservice

    If a pod enters CrashLoopBackOff, run kubectl describe pod and kubectl logs [pod] to inspect startup events and stdout/stderr.

    Rolling Updates And Rollbacks

    Kubernetes updates Deployments without downtime by default. To push a new version:

    kubectl set image deployment/node-deployment node-container=my-node-app:v2
    kubectl rollout status deployment/node-deployment
    

    If issues arise, revert instantly:

    kubectl rollout undo deployment/node-deployment
    

    Integrate these commands into a CI pipeline to enable automatic rollbacks whenever health checks fail.

    Exposing The App With A Service

    Define a Service in service.yaml:

    apiVersion: v1
    kind: Service
    metadata:
      name: node-service
      annotations:
        maintainer: dev-team@example.com
    spec:
      type: NodePort
      ports:
      - port: 80
        targetPort: 3000
        nodePort: 30080
      selector:
        app: node-microservice
    

    Apply it:

    kubectl apply -f service.yaml
    kubectl get svc node-service
    

    Access your service via:

    minikube service node-service --url
    # or on kind
    kubectl port-forward svc/node-service 8080:80
    

    Kubernetes security, valued at USD 1,195 billion in 2022 and projected to hit USD 10.7 billion by 2031 at a 27.6% CAGR, highlights why mastering kubectl apply -f on a simple Deployment matters. It’s the same flow 96% of teams use to scale, even though 91% must navigate complex setups. Explore Kubernetes security statistics on Tigera

    Handover Tips For Collaboration

    Document key details directly in your YAML to help cross-functional teams move faster:

    • maintainer: who owns this Deployment
    • revisionHistoryLimit: how many old ReplicaSets you can revisit
    • annotations: version metadata, runbook links, or contact info
    • Use kubectl diff -f deployment.yaml to preview changes before applying

    With these notes in place, troubleshooting and ownership handoffs become much smoother.

    You’ve now built your Docker image, deployed it with kubectl, managed rolling updates and rollbacks, and exposed the service. Next up: exploring Ingress patterns and autoscaling to optimize traffic flow and resource usage. Happy deploying!

    Configuring Services Ingress And Scaling

    Application reaching clients through LoadBalancer and Ingress

    Exposing your application means picking the right Service type for internal or external traffic. ClusterIP, NodePort, LoadBalancer and ExternalName each come with distinct network paths, cost implications, and operational trade-offs.

    Small teams often lean on ClusterIP to keep services hidden inside the cluster. Switch to NodePort when you want a quick-and-dirty static port on each node. Moving to a LoadBalancer taps into your cloud provider’s managed balancing and SSL features. And ExternalName lets you map a Kubernetes DNS name to remote legacy services without touching your pods.

    Comparison Of Service Types

    Service Type Default Port External Access Use Case
    ClusterIP 8080 Internal only Backend microservices
    NodePort 30000–32767 Node.IP:Port on each node Local testing and demos
    LoadBalancer 80/443 Cloud provider’s load balancer Public-facing web applications
    ExternalName N/A DNS alias to an external service Integrate external dependencies

    With this comparison in hand, you can match cost, access scope, and complexity to your project’s needs.

    Deploy Ingress Controller

    An Ingress gives you host- and path-based routing without provisioning dozens of load balancers. Install NGINX Ingress Controller:

    kubectl apply -f https://raw.githubusercontent.com/kubernetes/ingress-nginx/controller-v1.2.1/deploy/static/provider/cloud/deploy.yaml
    

    Your minimal Ingress resource:

    apiVersion: networking.k8s.io/v1
    kind: Ingress
    metadata:
      name: app-ingress
      annotations:
        nginx.ingress.kubernetes.io/rewrite-target: /
    spec:
      rules:
      - host: myapp.example.com
        http:
          paths:
          - path: /
            pathType: Prefix
            backend:
              service:
                name: frontend-service
                port:
                  number: 80
    

    Apply and verify:

    kubectl apply -f ingress.yaml  
    kubectl get ingress
    

    Ingress consolidates entry points and cuts down on public IP sprawl.

    Implement Autoscaling

    Horizontal Pod Autoscaler (HPA) watches your workload and adjusts replica counts based on metrics. First, ensure metrics-server is running:

    kubectl get deployment metrics-server -n kube-system
    

    Then enable autoscaling:

    kubectl autoscale deployment frontend --cpu-percent=60 --min=2 --max=10
    

    To see it in action, fire off a load test:

    hey -z 2m -q 50 -c 5 http://myapp.example.com/
    

    Track behavior live:

    kubectl get hpa -w
    

    Dive deeper into fine-tuning strategies in our guide on Kubernetes autoscaling.

    Key Insight
    Autoscaling cuts costs during lulls and protects availability under traffic spikes.

    Rolling Updates Under Traffic

    Zero-downtime upgrades depend on readiness and liveness probes. For instance:

    readinessProbe:
      httpGet:
        path: /healthz
        port: 80
      initialDelaySeconds: 5
      periodSeconds: 10
    livenessProbe:
      httpGet:
        path: /healthz
        port: 80
      initialDelaySeconds: 15
      periodSeconds: 20
    

    Trigger the rollout:

    kubectl set image deployment/frontend frontend=myapp:v2  
    kubectl rollout status deployment/frontend
    

    If anything misbehaves, rollback is just as simple:

    kubectl rollout undo deployment/frontend
    

    Best Practices For Resilience

    • Define readiness probes to keep traffic away from unhealthy pods
    • Set clear requests and limits to avoid eviction storms
    • Use a rolling update strategy with maxSurge: 1 and maxUnavailable: 1
    • Label pods with version metadata for rapid filtering and diagnostics

    Load Testing Scenario

    A team managing a high-traffic web front end hit trouble during a flash sale. They pushed 500 RPS using Apache Bench for 5 minutes, watching 95th percentile latency climb. With pods at 200m CPU, performance creaked once they hit 250 RPS.

    After bumping CPU requests to 400m and memory limits to 512Mi, they reran the test. Latencies fell by 60%, and the setup held 500 RPS rock solid. Those metrics then informed production resource allocations, balancing cost and performance.

    Balancing Service types, Ingress rules, autoscaling and readiness probes will set you up for reliable, scalable deployments. You’ve now got concrete steps to expose your services, route traffic efficiently, and grow on demand.

    Happy scaling and deploying!

    Monitoring And Troubleshooting Common Issues

    Keeping an eye on your cluster’s health isn’t optional—it’s critical. I’ve seen clusters collapse because teams lacked basic visibility into pods, nodes, and services.

    I usually kick things off by installing the Prometheus Node Exporter on every node. That gives me real-time CPU, memory, and filesystem metrics to work with.

    Next, I set up ServiceMonitors so Prometheus knows exactly which workloads to scrape. This step ties your app metrics into the same observability pipeline.

    You might be interested in our detailed guide on Prometheus service monitoring: Check out our Prometheus Service Monitoring guide

    Once metrics flow in, I install Grafana and start molding dashboards that map:

    • Pod CPU and memory usage patterns (kubectl top pods)
    • Request and error rates for each service
    • Node-level resource consumption (kubectl top nodes)
    • Alert rules keyed to threshold breaches

    These visual panels make it easy to link a sudden CPU spike with an application update in real time.

    Building Dashboards And Alerts

    I treat dashboards as living documents. When a deployment or outage happens, I drop a quick annotation so everyone understands the context.

    Organizing panels under clear, descriptive tags helps teams find the data they need in seconds. No more hunting through 20 graphs to spot a trend.

    Alerts deserve the same attention. I aim for alerts that fire only when something truly matters, avoiding the dreaded “alert fatigue.”

    I typically configure:

    1. Pod restarts above 5 in 10 minutes
    2. Node disk usage over 80%
    3. HTTP error rates exceeding 2% within a 5-minute window

    Effective alerting reduces incident fatigue and speeds up response times.

    Embedding runbook links and ownership details right into Grafana panels has saved our on-call team countless minutes during incidents.

    The Prometheus web UI above shows a handful of time series graphs highlighting CPU and memory usage across nodes. It’s a quick way to spot resource bottlenecks before they turn into problems.

    Debugging CrashLoopBackOff And Image Pull Errors

    Pods stuck in CrashLoopBackOff always start with a kubectl describe pod. It surfaces recent events and hints at what went wrong.

    I follow up with kubectl logs against both the main container and any init containers. Often, the error message there points me straight to a misconfigured startup script.

    For ImagePullBackOff, double-check your registry credentials and confirm image tags haven’t changed. Those typos slip in more often than you’d think.

    If your service or Ingress isn’t responding, I hop into a pod with kubectl exec and run curl to validate DNS and port definitions. That simple test can save hours of head-scratching.

    Handling Networking Misconfigurations And RBAC Denials

    Network policies can be deceptively silent when they block traffic between namespaces. I list everything with:

    kubectl get networkpolicy -A
    

    Then I tweak the YAML to open only the specific port ranges or CIDR blocks that each service needs.

    RBAC issues usually show up as Forbidden responses. I inspect roles and bindings with:

    kubectl get clusterrolebindings,rolebindings --all-namespaces
    

    From there, I tighten or expand permissions to ensure a service account has precisely the privileges it needs—no more, no less.

    Log Aggregation And Event Inspection

    Centralized logs are a game-changer when you need to trace an error path across pods and nodes. I often recommend pairing Fluentd or Grafana Loki with Prometheus for a unified observability stack.

    Filtering events by labels makes targeted troubleshooting a breeze:

    kubectl get events -l app=my-service
    

    Single pane of glass observability reduces context switching during critical incidents.

    Personal Tips For Team Collaboration

    Dashboards become shared knowledge when you annotate them with notes on spikes, planned maintenance, or post-mortem learnings.

    I maintain a shared incident log inside our observability platform so ad-hoc discoveries aren’t lost. It’s a lifesaver when on-boarding new team members.

    Consistent labels like team, env, and tier let everyone slice data the same way. And I revisit alert thresholds every quarter to keep noise in check.

    With these practices, you’ll end up with a monitoring setup that’s both robust and intuitive.

    Common Troubleshooting Commands

    Command Purpose
    kubectl describe pod [name] Show pod events and status details
    kubectl logs [pod] View container logs
    kubectl get events –sort-by='.lastTimestamp' List events by time
    kubectl top pods Display pod resource usage
    kubectl top nodes Display node resource usage

    Practice these commands until they’re second nature. You’ll thank yourself when downtime strikes.

    Happy monitoring and debugging your cluster!

    Frequently Asked Questions

    When you’re just starting with Kubernetes, certain roadblocks pop up again and again. Here are answers to the questions I see most often—so you can move forward without the guesswork.

    What Is Kubernetes Used For, And How Does It Differ From Docker Alone?
    Kubernetes handles orchestration across clusters—automating scaling, scheduling, and container recovery—while Docker focuses on running containers on a single node. In practice, Kubernetes schedules pods, balances traffic, and restarts services when they fail.

    To recap, the core differences are:

    • Scaling Automatically spins pods up or down based on demand
    • Recovery Self-heals by restarting crashed containers
    • Networking Built-in Services and Ingress controllers manage load and routing

    How Do You Reset Or Delete A Local Cluster Safely?
    Cleaning up a local environment is straightforward. Run one of these commands, and you’ll wipe the cluster state without touching your host settings:

    minikube delete
    kind delete cluster --name=my-cluster
    

    You can wrap these in your CI cleanup jobs to keep pipelines tidy.

    Essential Kubectl Commands

    When a pod misbehaves, these commands are my go-to for a quick diagnosis:

    • kubectl describe pod [POD_NAME] to review events and conditions
    • kubectl logs [POD_NAME] for container output and error messages
    • kubectl get events --sort-by='.lastTimestamp' to see the latest cluster activities
    • kubectl exec -it [POD] -- /bin/sh to dive into a running container

    Together, they form the backbone of any rapid-fire troubleshooting session.

    What Commands Expose Applications Externally?
    If you need to test an app over HTTP, create a Service or forward a port:

    kubectl expose deployment web --type=NodePort --port=80
    kubectl port-forward svc/web 8080:80
    

    This maps your local port to the cluster, making hits to localhost:8080 land inside your pod.

    “Filtering errors with describe and logs shaves hours off debugging.”

    How Does Kubernetes Differ From Docker Compose?
    Docker Compose excels for single-host prototypes. Kubernetes steps up when you need multi-node scheduling, rolling updates, health checks, and self-healing across your fleet.

    Key distinctions:

    • Docker Compose Great for local stacks
    • Kubernetes Built for production-scale clusters

    Where Can Beginners Head Out Next?

    • Official docs, interactive labs, forums
    • Experiment with ConfigMaps and Secrets for dynamic configuration
    • Try Helm charts for packaging applications

    Ready to accelerate your Kubernetes journey? Connect with experienced DevOps engineers at OpsMoon now.

  • The Ultimate 2025 Software Deployment Checklist Template Roundup

    The Ultimate 2025 Software Deployment Checklist Template Roundup

    Shipping code is easy. Shipping code reliably, safely, and repeatedly is where the real engineering begins. A haphazard deployment process, riddled with manual steps, forgotten environment variables, and last-minute IAM role chaos, inevitably leads to downtime, frantic rollbacks, and eroded user trust. The antidote is not more heroism; it is a robust, battle-tested checklist. A great software deployment checklist template transforms a high-stakes art into a repeatable science. It enforces rigor, ensures accountability, and provides a single source of truth when pressure is highest.

    This process excellence is not confined to just the deployment phase. To achieve flawless deployments, it is crucial to understand the broader utility of structured planning; for instance, comprehensive work plan templates can serve as your project's blueprint, ensuring alignment long before code is ready to ship. By standardizing procedures from project inception to final release, you create a culture of predictability and control, which is the foundation of modern DevOps.

    This guide cuts through the noise to showcase seven production-grade software deployment checklist template solutions, from collaborative canvases in Miro to version-controlled Markdown files in GitHub. We will dissect their strengths, weaknesses, and ideal use cases, helping you find the perfect framework to standardize your releases. Each entry includes direct links and screenshots to help you quickly assess its fit for your team's workflow. Our goal is to equip you with a tangible asset to eliminate deployment anxiety for good.

    1. Atlassian Confluence Templates (DevOps/ITSM Runbooks)

    For teams already embedded in the Atlassian ecosystem, leveraging Confluence for a software deployment checklist template is a natural and powerful choice. Instead of a standalone spreadsheet or document, Confluence offers structured, reusable page templates specifically designed as DevOps and ITSM runbooks. This approach integrates deployment documentation directly into the workflows where development, planning, and incident management already live.

    Atlassian Confluence Templates (DevOps/ITSM Runbooks)

    The key advantage is context. A deployment checklist in Confluence can be directly linked from a Jira Software epic or a Jira Service Management change request ticket, providing a seamless "single source of truth." This tight integration ensures that the pre-deployment approvals, the deployment steps, and the post-deployment validation are all tied to the specific work item being delivered.

    Core Features and Technical Integration

    Confluence templates are more than just text documents; they are dynamic pages with rich formatting capabilities. You can embed diagrams, code blocks with syntax highlighting, and tables to structure your checklist.

    • Purpose-Built Structure: The official DevOps runbook template includes pre-defined sections for system architecture, operational procedures, communication plans, and rollback steps. This provides a battle-tested starting point that ensures critical information is not overlooked.
    • Version Control and Permissions: Every change to a runbook is versioned, providing a clear audit trail. You can see who modified a step and when, which is crucial for incident post-mortems and process improvement. Access controls allow you to restrict editing rights to specific teams, such as SREs or senior engineers.
    • Jira Integration: The standout feature is the native link to Jira. You can embed Jira issue macros directly into your checklist, showing real-time status updates for related tasks or incidents. This turns a static checklist into a dynamic dashboard for a deployment.
    • Collaboration: Teams can comment directly on checklist items, @-mention colleagues to assign tasks or ask questions, and collaboratively edit the document in real time. This is invaluable during a high-stakes deployment where clear communication is essential.

    Pro Tip: Create a master "Deployment Runbook Template" and use Confluence's "Create from template" macro on a team's overview page. This allows engineers to instantly spin up a new, standardized checklist for each release, ensuring consistency across all deployments.

    The platform's design supports various software deployment strategies, allowing you to customize templates for canary, blue-green, or rolling deployments. While it requires a Confluence subscription (with a free tier for up to 10 users), the value for established Atlassian users is immense, centralizing operational knowledge and streamlining execution.

    Website: Atlassian Confluence DevOps Runbook Template

    2. Asana Templates – Software & System Deployment

    For teams that prioritize project management and cross-functional coordination, Asana offers a pre-built software deployment checklist template that excels at providing visibility for both technical and non-technical stakeholders. Unlike developer-centric tools, Asana frames the deployment process as a manageable project, with clear tasks, assignees, and deadlines. This approach is ideal for releases that require significant coordination with marketing, sales, and support teams.

    Asana Templates – Software & System Deployment

    The primary advantage of using Asana is its ability to centralize communication and track progress in a universally understood format. While a developer might execute a script, the Asana task "Run database migration script on production" can be checked off, automatically notifying the product manager and support lead. This makes it an excellent tool for orchestrating the entire release lifecycle, not just the technical execution.

    Core Features and Technical Integration

    Asana’s template is designed for action-oriented project management, translating a complex deployment into a series of assignable tasks. The platform's strength lies in its visualization and automation capabilities, which help keep multifaceted rollouts on track.

    • Pre-built Task Structure: The "Software and System Deployment" template comes with pre-populated sections for Pre-Deployment, Deployment Day, and Post-Deployment. This provides a logical framework that teams can immediately customize with their specific technical steps and validation checks.
    • Automation Rules: On paid plans, you can create rules to streamline workflows. For example, marking a "Code Freeze" task as complete can automatically move the project to the "Pre-Deployment Testing" stage and assign QA engineers their verification tasks.
    • Cross-functional Visibility: Features like Timeline (Gantt chart), Workload, and Dashboards provide high-level views of the deployment schedule and resource allocation. This is invaluable for CTOs and project managers who need to communicate release status to leadership.
    • Robust Integrations: Asana connects with over 100 tools. You can link a deployment project to a specific Slack channel for real-time updates, attach Google Docs with technical notes, or even create tasks directly from Zendesk tickets related to the new release.

    Pro Tip: Use Asana Forms to create a standardized "Release Request" intake process. When a team submits a new release through the form, it can automatically generate a new deployment project from your customized template, pre-filling key details and assigning the initial planning tasks.

    While Asana isn't a substitute for a CI/CD pipeline or a technical runbook, it serves as the coordinating layer on top. It's particularly effective for complex rollouts involving multiple teams. The platform operates on a per-seat pricing model, which can become costly as teams grow, and some users have noted friction during plan upgrades, so it’s wise to review plan details carefully.

    Website: Asana Software and System Deployment Template

    3. Miro + Miroverse (Deployment Plan and Checklist boards)

    For teams that thrive on visual collaboration, Miro presents a dynamic and interactive alternative to traditional document-based checklists. Instead of linear text files, Miro provides an infinite canvas where a software deployment checklist template becomes a collaborative, living dashboard. The Miroverse community library contains numerous pre-built deployment plan templates that serve as excellent starting points, designed for real-time coordination during go-live events, war rooms, and deployment rehearsals.

    Miro + Miroverse (Deployment Plan and Checklist boards)

    The primary advantage of Miro is its ability to facilitate simultaneous input from cross-functional teams. During a high-pressure deployment, engineers, QAs, product managers, and communication specialists can all view and update the same board in real-time. This visual approach helps to instantly clarify dependencies, track progress with virtual sticky notes, and centralize all operational communication in one place, moving beyond static spreadsheets or documents.

    Core Features and Technical Integration

    Miro’s canvas-based templates are highly adaptable, allowing teams to build complex workflows that mirror their specific deployment processes. The platform combines visual planning with powerful integrations to connect the checklist to underlying development tools.

    • Visual and Flexible Structure: Community templates often include swimlanes for pre-deployment checks, a runbook with sequential steps, communication plans, and rollback procedures. Tasks can be represented as cards, which can be dragged and dropped between stages like "To Do," "In Progress," and "Done."
    • Real-Time Collaboration: The platform excels at live, synchronous editing. Multiple users can co-edit the board, leave comments, use @-mentions to tag team members for specific tasks, and use virtual pointers to guide discussions during a deployment call. This is invaluable for remote or distributed teams.
    • Jira and Azure DevOps Integration: Miro boards can be supercharged with two-way integrations. You can import Jira issues or Azure DevOps work items directly onto the canvas as cards. Updating a card's status in Miro can automatically update the corresponding ticket in Jira, bridging the gap between high-level planning and the source-of-truth ticketing system.
    • Extensive Template Library (Miroverse): The Miroverse offers a wide range of community-created templates. While this provides great variety, it's important to vet these templates and adapt them to your organization's specific compliance and operational standards before adoption.

    Pro Tip: Use Miro's timeline or dependency mapping features to visually chart out the sequence of deployment tasks. This helps identify potential bottlenecks and critical path activities, which is especially useful when rehearsing a complex migration or a multi-service release.

    Miro offers a free plan with limited boards, making it accessible for small teams to try. Paid plans unlock unlimited boards and advanced features. The canvas format may feel less structured for those accustomed to rigid spreadsheets, but for teams needing a collaborative hub for live deployment coordination, it is an exceptionally powerful tool.

    Website: Miro Deployment Plan Templates

    4. ClickUp Templates (checklist templates and release management)

    For teams seeking an all-in-one productivity platform, ClickUp offers a highly flexible and customizable way to build a software deployment checklist template. Rather than being a dedicated DevOps tool, ClickUp’s strength lies in its ability to integrate deployment checklists directly into the project management fabric where tasks, sprints, and documentation are already managed. This approach allows engineering teams to treat deployments as structured, repeatable tasks within their existing workflows.

    ClickUp Templates (checklist templates and release management)

    The key advantage of ClickUp is its modularity. You can create a simple checklist within a task, a detailed procedure in a ClickUp Doc, or a full-blown release management pipeline using Lists and Board views. This adaptability makes it suitable for teams of all sizes, from startups standardizing their first deployment process to larger organizations looking for a unified platform to manage complex release cycles.

    Core Features and Technical Integration

    ClickUp templates are not just static documents; they are powerful, automatable building blocks for creating robust operational workflows. You can save checklists, tasks, Docs, and entire project spaces as templates for instant reuse.

    • Layered Template System: ClickUp allows you to create templates at multiple levels. You can have a simple "Pre-Deployment Checklist" template for subtasks, a "Deployment Runbook" Doc template with rich text and embedded tasks, or a full "Release Sprint" List template that includes all stages from QA to production.
    • Automation: This is a standout feature. You can create rules like, "When a task is moved to the 'Ready for Deployment' status, automatically apply the 'Production Deployment Checklist' template." This enforces process consistency and eliminates manual setup, ensuring no steps are missed.
    • Custom Fields and Statuses: You can add custom fields to your deployment tasks to track things like the release version, target environment (e.g., staging, production), or the lead engineer. Custom statuses allow you to create a visual pipeline (e.g., "Pre-Flight Checks," "Deployment in Progress," "Post-Deploy Monitoring") that perfectly matches your team's process.
    • Dependencies and Task Relationships: You can set dependencies between checklist items, ensuring that, for example, "Run Database Migrations" must be completed before "Switch DNS" can begin. This is critical for orchestrating complex deployments with ordered steps.

    Pro Tip: Use ClickUp's Forms to create a "New Release Request" form. When submitted, it can automatically create a new deployment task and apply your standardized checklist template, pre-populating details like the version number and requested deployment window from the form.

    The platform is designed to be a central hub, and its flexibility supports the entire process to deploy to production in a structured manner. While you may need to assemble your ideal checklist from scratch using ClickUp's components, the power to automate and integrate it into your core project management is a significant advantage. The free plan is very generous, with checklist templates available to all users, making it an accessible starting point.

    Website: ClickUp Templates

    5. Smartsheet (Template Gallery and project templates)

    For teams where project management offices (PMOs) or change management leaders drive the deployment process, Smartsheet offers a powerful, spreadsheet-centric approach. Instead of a documentation-focused tool, Smartsheet treats deployment as a project plan, making it ideal for managing dependencies, tracking progress against timelines, and providing high-level stakeholder reporting. While there isn't one official "software deployment checklist template," its robust template gallery provides numerous project plans that are easily adapted for go-live activities.

    Smartsheet (Template Gallery and project templates)

    The primary advantage of Smartsheet is its ability to blend the familiarity of a spreadsheet with advanced project management capabilities. Each checklist item can have assigned owners, start/end dates, dependencies, and status fields. This structured data then feeds into multiple views like Gantt charts for timeline visualization, Kanban boards for task management, and calendars for scheduling, all derived from the same source sheet. This makes it exceptionally strong for coordinating complex cutovers with many moving parts and communicating status to non-technical stakeholders.

    Core Features and Technical Integration

    Smartsheet excels at transforming a static checklist into an interactive, automated project plan. The platform is designed for cross-functional visibility, making it a favorite for enterprise-level change control and release management.

    • Multi-View Functionality: A single sheet containing your deployment checklist can be instantly rendered as a Gantt chart to visualize critical path dependencies, a card view to track tasks through stages (e.g., "To Do," "In Progress," "Complete"), or a calendar view for key milestones.
    • Automation and Alerts: You can build automated workflows directly into your checklist. For example, automatically notify the QA lead via Slack or Teams when all pre-deployment checks are marked "Complete," or create an alert if a critical task becomes overdue. This reduces manual overhead and ensures timely communication.
    • Dashboards and Reporting: Smartsheet’s dashboarding feature is a key differentiator. You can create real-time "Go-Live Readiness" dashboards that pull data from your checklist, showing overall progress, blocking issues, and RAG (Red/Amber/Green) status for key phases. This provides executives with a clear, at-a-glance view without needing to dive into the technical details.
    • Forms for Data Intake: Use Smartsheet Forms to standardize requests for deployment or to collect post-deployment validation results. Submitted forms automatically populate new rows in your checklist sheet, ensuring all necessary information is captured consistently.

    Pro Tip: Start with a "Project with Gantt & Dependencies" template. Customize the columns to include fields like "Assigned Engineer," "Validation Method," "Rollback Procedure," and "Status." Save this customized sheet as a new company-specific template named "Standard Software Deployment Plan" to ensure all teams follow the same rigorous process.

    While Smartsheet's strength is project orchestration rather than deep technical integration like CI/CD triggers, its structured approach is invaluable for regulated industries or large enterprises. The pricing model is per-user and can become costly for extensive engineering teams, but for coordinating deployments across business, IT, and engineering, its value in clear communication and tracking is significant.

    Website: Smartsheet Template Gallery

    6. Template.net – Application Deployment Checklist

    For teams that require a traditional, document-based software deployment checklist template, Template.net offers a straightforward and rapid solution. Instead of integrating with a complex ecosystem like Jira or GitHub, this platform provides professionally formatted, downloadable documents in various formats like Microsoft Word, Google Docs, and PDF. This approach is ideal for organizations that rely on formal documentation for change management approvals, compliance audits, or stakeholder communication where a static, printable artifact is required.

    Template.net – Application Deployment Checklist

    The primary advantage of Template.net is speed and simplicity. It serves as the fastest route from needing a checklist to having a polished document ready to be filled out and attached to a change request ticket in a system like ServiceNow or Remedy. This is particularly useful for teams that are not deeply integrated into a specific project management tool or for one-off projects where setting up a complex template system would be overkill.

    Core Features and Technical Integration

    Template.net focuses on providing editable, well-structured document templates that can be quickly customized and exported. While it lacks the dynamic integration of other platforms, its strength lies in its universal compatibility and ease of use for creating offline or standalone records.

    • Multiple File Formats: The platform provides its Application Deployment Checklist in universally accessible formats, including .docx (Word), Google Docs, .pdf, and Apple Pages. This ensures anyone on the team, regardless of their preferred software, can access and edit the checklist.
    • Pre-Formatted Structure: The templates come with a logical, pre-built structure that includes sections for project details, pre-deployment checks (e.g., code merge, environment sync), deployment steps, and post-deployment validation. This provides a solid baseline that covers essential phases of a release cycle.
    • Online Editor and Customization: Users can make quick edits directly in Template.net’s web-based editor before downloading. This allows for immediate customization, such as adding company branding, modifying checklist items specific to an application, or assigning roles without needing to open a separate word processor first.
    • Print-Ready Design: The templates are designed to be immediately printable or shareable as a PDF attachment. The clean layout ensures that the checklist is easy to read and follow during a manual deployment process or when reviewed by a change advisory board (CAB).

    Pro Tip: Download the checklist in your preferred format (e.g., Google Docs) and use it as a master template. For each new release, make a copy and save it in a shared team drive folder named after the release version. This creates a simple, file-based audit trail for all deployments.

    While the service offers a vast library of templates, it operates on a subscription model. It's crucial for teams to carefully review the subscription terms and user reviews, as the platform is geared toward document creation rather than dynamic, integrated DevOps workflows. It excels at fulfilling the need for a formal, static document trail.

    Website: Template.net Application Deployment Checklist

    7. GitHub – Open-source Deployment/Production-Readiness Checklists

    For development teams that live and breathe Git, using GitHub to host a software deployment checklist template is a powerful, code-centric approach. Instead of a separate tool, GitHub repositories and Gists offer Markdown-based checklists that can be version-controlled, forked, and integrated directly into the pull request and release workflows. This method treats your operational readiness documentation as code ("Docs-as-Code"), making it auditable and collaborative.

    GitHub – Open-source Deployment/Production-Readiness Checklists

    The primary advantage is workflow alignment. A Markdown checklist template can be included in a pull request template, forcing developers to confirm that their changes meet production standards before merging. This shifts quality and operational checks "left," making deployment readiness a core part of the development cycle, not an afterthought. The open-source nature means you can adopt and adapt battle-tested checklists from the wider engineering community.

    Core Features and Technical Integration

    Markdown on GitHub is surprisingly dynamic, allowing for more than just static text. Checklists can be interactive and integrated with project management tooling.

    • Markdown Checklists as Code: Using standard Markdown syntax (- [ ]), you can create interactive checklists. When embedded in a pull request description or an issue, these become tickable items, providing a clear visual indicator of completed steps.
    • Version Control with Git: Every change to your checklist is a commit. This creates an immutable, auditable history of your deployment procedures. You can see who changed a rollback step and why, which is invaluable for process refinement and compliance.
    • Pull Request & Issue Integration: By creating a .github directory in your repository, you can define standard pull request and issue templates that automatically include your deployment checklist. This ensures no new feature is merged without passing critical pre-deployment checks.
    • Community-Driven Templates: GitHub is home to countless open-source repositories offering comprehensive checklists. These often cover specific domains like microservices, security hardening, or infrastructure as code, providing an excellent starting point that can be forked and customized. Many organizations use a thorough production readiness checklist to ensure services are observable, reliable, and scalable before they go live.

    Pro Tip: Create a central repository in your organization named engineering-templates or runbooks. Store your master deployment checklist there. Use GitHub Actions to automatically create a new issue with the checklist content whenever a release tag is pushed, assigning it to the on-call engineer.

    The platform is entirely free for public repositories and included in paid plans for private ones. While the quality of community checklists varies and requires curation, the benefit of integrating your operational processes directly into your codebase is a significant advantage for modern DevOps teams.

    Website: Microservice Production Readiness Checklist on GitHub

    Deployment Checklist Template Comparison — Top 7

    Item Implementation Complexity Resource Requirements Expected Outcomes Ideal Use Cases Key Advantages
    Atlassian Confluence Templates (DevOps/ITSM Runbooks) Low–Medium (requires Confluence setup and template adoption) Confluence license, Jira/JSM integration, admin setup Standardized, versioned runbooks tied to incidents/changes Enterprise DevOps/ITSM, on‑call runbooks, change records Purpose‑built structure, strong Jira integration, access/version controls
    Asana Templates – Software & System Deployment Low (ready-to-use checklist workflow) Asana seats (paid features for automations/reports), integrations Task-based deployment plans with owners, milestones and reports Cross‑functional release coordination, PM-led rollouts Easy for non‑technical stakeholders, robust reporting and assignment
    Miro + Miroverse (Deployment Plan boards) Low–Medium (board setup and facilitation) Miro license, visual facilitation, optional integrations (Jira/Azure) Visual, collaborative runbooks for rehearsals and live cutovers War rooms, go‑live rehearsals, cross‑team coordination Highly collaborative visual canvas, real‑time co‑editing and annotation
    ClickUp Templates (checklist & release management) Medium (compose templates and automations) ClickUp subscription, configuration time for automations/templates Flexible checklist-driven release workflows with automations Teams needing configurable release workflows and automation Flexible task/doc structure, automations, competitive pricing
    Smartsheet (Template Gallery & project templates) Medium (adapt sheets, set dependencies and dashboards) Smartsheet seats, template adaptation, reporting/dashboard setup Spreadsheet-style deployment plans with dependencies and dashboards PMOs, change managers, stakeholder reporting during cutovers Spreadsheet familiarity, strong dashboards and portfolio rollups
    Template.net – Application Deployment Checklist Very Low (download and customize document) Subscription/purchase, manual distribution, editor access Printable/attachable static deployment checklists in common formats Formal documentation attachments, compliance or offline distribution Fastest to produce printable checklists, multiple file formats
    GitHub – Open-source Deployment/Production-Readiness Checklists Medium (select, adapt, and maintain repos) Free hosting, developer time to fork/integrate and maintain Version-controlled Markdown checklists integrated into code workflows Developer-centric teams that manage releases via Git/PRs Free, highly customizable, integrates directly with code and PRs

    From Checklist to Culture: Automating Your Path to Reliable Deployments

    Throughout this guide, we've explored a range of powerful tools and provided a comprehensive, downloadable software deployment checklist template to standardize your release process. From the collaborative, documentation-centric approach of Atlassian Confluence to the project management prowess of Asana and ClickUp, and the visual planning capabilities of Miro, each tool offers a structured way to manage the complexities of shipping code. Similarly, open-source checklists on GitHub provide a battle-tested foundation crowdsourced from the global engineering community.

    These templates are the essential first step, transforming abstract best practices into concrete, repeatable actions. They introduce discipline, create shared accountability, and ensure that critical steps-from pre-flight validation and security scans to post-deployment monitoring and rollback planning-are never missed. Adopting a checklist is the single most effective way to move from chaotic, high-stress releases to predictable, reliable deployments.

    Beyond the Document: The Evolution to Automation

    The true power of a software deployment checklist template, however, is not in the document itself but in the cultural shift it inspires. The ultimate goal is to make the checklist obsolete by embedding its principles directly into your automated pipelines. A manual checklist, no matter how thorough, is still a safety net for a manual process. The next evolutionary step is to eliminate the need for the net.

    Consider the core components of our template:

    • Pre-Deployment Checks: Items like linting, static code analysis (SAST), and dependency vulnerability scans shouldn't be manually ticked off. They should be mandatory, automated stages in your CI pipeline that block a merge or build if they fail.
    • Testing Gates: Unit, integration, and end-to-end tests are not just checklist items; they are automated quality gates. A pull request that doesn't meet the defined test coverage threshold or fails critical tests should never even be considered for deployment.
    • Infrastructure Validation: Instead of manually verifying Terraform plans or Kubernetes manifest integrity, these checks can be automated using tools like terraform validate, conftest, or kubeval as part of your GitOps workflow. This ensures infrastructure changes are safe and syntactically correct before they are ever applied.
    • Post-Deployment Verification: Automated health checks, synthetic monitoring, and canary analysis should replace the "manual check of production logs." These systems can automatically validate the success of a deployment and trigger an automated rollback if key performance indicators (KPIs) like error rates or latency degrade beyond acceptable thresholds.

    By systematically converting each manual checklist item into an automated, non-negotiable step in your CI/CD pipeline, you are not just improving efficiency; you are building a culture of intrinsic quality and reliability. The deployment process becomes self-policing, ensuring that best practices are followed by default, not by chance. This transition from a documented process to an automated workflow is the hallmark of a mature DevOps organization. It's how you scale reliability, reduce cognitive load on your engineers, and accelerate your ability to deliver value to users safely.


    Ready to transform your checklist into a fully automated, resilient delivery pipeline? The experts at OpsMoon specialize in building the robust CI/CD, IaC, and observability foundations that turn checklist goals into automated realities. Schedule a free consultation to map your journey from manual processes to flawless, automated deployments.

  • A Technical Guide to Managed Kubernetes Services

    A Technical Guide to Managed Kubernetes Services

    Managed Kubernetes services provide the full declarative power of the Kubernetes API without the immense operational burden of building, securing, and maintaining the underlying control plane infrastructure.

    From a technical standpoint, this means you are delegating the lifecycle management of etcd, the kube-apiserver, kube-scheduler, and kube-controller-manager to a provider. This frees up your engineering teams to focus exclusively on application-centric tasks: defining workloads, building container images, and configuring CI/CD pipelines.

    Unpacking the Managed Kubernetes Model

    Illustration contrasting complex self-managed server infrastructure with simplified managed service by experts.

    At its core, Kubernetes is an open-source container orchestration engine. A self-managed or "DIY" deployment forces your team to manage the entire stack, from provisioning bare-metal servers or VMs to the complex, multi-step process of bootstrapping a highly available control plane and managing its lifecycle. This includes everything from TLS certificate rotation to etcd backups and zero-downtime upgrades.

    Managed Kubernetes services abstract this complexity. A cloud provider or specialized firm assumes full operational responsibility for the Kubernetes control plane. The control plane acts as the brain of the cluster, maintaining the desired state and making all scheduling and scaling decisions.

    This creates a clear line of demarcation known as a shared responsibility model, defining exactly where the provider's duties end and yours begin.

    Provider Responsibilities: The Heavy Lifting

    With a managed service, the provider is contractually obligated to handle the most complex and failure-prone aspects of running a production-grade Kubernetes cluster.

    Their core responsibilities include:

    • Control Plane Availability: Ensuring the high availability of the kube-apiserver, kube-scheduler, and kube-controller-manager components, typically across multiple availability zones and backed by a financially binding Service Level Agreement (SLA).
    • etcd Database Management: The cluster's key-value store, etcd, is its single source of truth. The provider manages its high availability, automated backups, restoration procedures, and performance tuning. An etcd failure is a catastrophic cluster failure.
    • Security and Patching: Proactively applying security patches to all control plane components to mitigate known Common Vulnerabilities and Exposures (CVEs), often with zero downtime to the API server.
    • Version Upgrades: Executing the complex, multi-step process of upgrading the Kubernetes control plane to newer minor versions, handling potential API deprecations and component incompatibilities seamlessly.

    By offloading these responsibilities, you eliminate the need for a dedicated in-house team of platform engineers who would otherwise be consumed by deep infrastructure maintenance.

    In essence, a managed service abstracts away the undifferentiated heavy lifting. Your team interacts with a stable, secure, and up-to-date Kubernetes API endpoint without needing to manage the underlying compute, storage, or networking for the control plane itself.

    Your Responsibilities: The Application Focus

    With the control plane managed, your team's responsibilities shift entirely to the data plane and the application layer. You retain full control over the components that define your software's architecture and behavior.

    This means you are still responsible for:

    • Workload Deployment: Authoring and maintaining Kubernetes manifest files (YAML) for Deployments, StatefulSets, DaemonSets, Services, and Ingress objects.
    • Container Images: Building, scanning, and managing OCI-compliant container images stored in a private registry.
    • Configuration and Secrets: Managing application configuration via ConfigMaps and sensitive data like API keys and database credentials via Secrets.
    • Worker Node Management: While the provider manages the control plane, you manage the worker nodes (the data plane). This includes selecting instance types, configuring operating systems, and setting up autoscaling groups (e.g., Karpenter or Cluster Autoscaler).

    This model enables a higher developer velocity, allowing engineers to deploy code frequently and reliably, backed by the assurance of a stable, secure platform managed by Kubernetes experts.

    The Strategic Benefits of Adopting Managed Kubernetes

    Adopting managed Kubernetes is a strategic engineering decision, not merely an infrastructure choice. It's about optimizing where your most valuable engineering resources—your people—invest their time. By offloading control plane management, you enable your engineers to shift their focus from infrastructure maintenance to building features that deliver business value.

    This pivot directly accelerates the software delivery lifecycle. When developers are not blocked by infrastructure provisioning or debugging obscure etcd corruption issues, they can iterate on code faster. This agility is the key to reducing the concept-to-production time from months to days.

    Slashing Operational Overhead and Costs

    A self-managed Kubernetes cluster is a significant operational and financial drain. It requires a full-time, highly specialized team of Site Reliability Engineers (SREs) or platform engineers. These are the individuals responsible for responding to 3 AM kube-apiserver outages and executing the delicate, high-stakes procedure of a manual control plane upgrade.

    Managed services eliminate the vast majority of this operational toil, which directly reduces your Total Cost of Ownership (TCO). While there is a management fee, it is almost always significantly lower than the fully-loaded cost of hiring, training, and retaining an in-house platform team.

    The cost-benefit analysis is clear:

    • Reduced Staffing Needs: Avoid the high cost and difficulty of hiring engineers with deep expertise in distributed systems, networking, and Kubernetes internals.
    • Predictable Budgeting: Costs are typically based on predictable metrics like per-cluster or per-node fees, making financial forecasting more accurate.
    • Elimination of Tooling Costs: Providers often bundle or deeply integrate essential tools for monitoring, logging, and security, which you would otherwise have to procure, integrate, and maintain.

    The industry has standardized on Kubernetes, which holds over 90% market share in container orchestration. The shift to managed services is a natural evolution. Some platforms even offer AI-driven workload profiling that can reduce CPU requests by 20–25% and memory by 15–20% through intelligent right-sizing—a direct efficiency gain.

    Gaining Superior Reliability and Security

    Cloud providers offer financially backed Service Level Agreements (SLAs) that guarantee high uptime for the control plane. A 99.95% SLA is a contractual promise of API server availability. Achieving this level of reliability with a self-managed cluster is a significant engineering challenge, requiring a multi-region architecture and robust automated failover mechanisms.

    This guaranteed uptime translates to higher application resiliency. Even a small team can leverage enterprise-grade reliability that would otherwise be cost-prohibitive to build and maintain.

    Your security posture is also significantly enhanced. Managed providers are responsible for patching control plane components against the latest CVEs. They also maintain critical compliance certifications like SOC 2, HIPAA, or PCI DSS, a process that can take years and substantial investment for an organization to achieve independently. This provides a secure-by-default foundation for your applications.

    To see how these benefits apply to other parts of the modern data stack, like real-time analytics, check out a practical guide to Managed Flink.

    Choosing Your Path: Self-Managed vs. Managed Kubernetes

    The decision between a self-managed cluster and a managed service is a critical infrastructure inflection point. This choice defines not only your architecture but also your team's operational focus, budget, and velocity. It's the classic trade-off between ultimate control and operational simplicity.

    A proper evaluation requires a deep analysis of the total cost of ownership (TCO), the day-to-day operational burden, and whether your use case genuinely requires low-level, kernel-deep customization.

    Deconstructing the Total Cost of Ownership

    The true cost of a self-managed Kubernetes cluster extends far beyond the price of the underlying VMs. The most significant and often hidden cost is the specialized engineering talent required for 24/7 operations. You must fund a dedicated team of platform or SRE engineers with proven expertise in distributed systems to build, secure, and maintain the cluster.

    This introduces numerous, often underestimated costs:

    • Specialized Salaries: Six-figure salaries for engineers capable of confidently debugging and operating Kubernetes in a production environment.
    • 24/7 On-Call Rotations: The operational burden of responding to infrastructure alerts at 3 a.m. leads to engineer burnout and high attrition rates.
    • Tooling and Licensing: You bear the full cost of procuring and integrating essential software for monitoring, logging, security scanning, and disaster recovery—tools often included in managed service fees.

    Managed services consolidate these operational costs into a more predictable, consumption-based pricing model. You pay a management fee for the service, not for the entire operational apparatus required to deliver it.

    This decision tree illustrates the common technical and business drivers that lead organizations to adopt managed Kubernetes, from accelerating deployment frequency to reducing TCO and improving uptime.

    Decision tree illustrating business benefits of new technology, showing paths to faster deployment, lower TCO, improved efficiency, and higher uptime.

    As shown, delegating infrastructure management provides a direct route to enhanced operational efficiency and tangible business outcomes.

    The Relentless Grind of DIY Kubernetes Operations

    With a self-managed cluster, your team is solely responsible for a perpetual list of complex, high-stakes operational tasks that are completely abstracted away by managed services.

    A self-managed cluster makes your team accountable for every single component. A control plane upgrade can become a multi-day, high-stress event requiring careful sequencing and rollback planning. With a managed service, this is often reduced to a few API calls or clicks in a console.

    Consider just a few of the relentless operational duties:

    • Managing etcd: You are solely responsible for backup/restore procedures, disaster recovery planning, and performance tuning for the cluster's most critical component, the etcd database.
    • Zero-Downtime Upgrades: Executing seamless upgrades of control plane components (e.g., kube-apiserver, kube-scheduler) is a complex procedure where a misstep can lead to a full cluster outage.
    • Troubleshooting CNI Plugins: When pod-to-pod networking fails or NetworkPolicies are not enforced, it is your team's responsibility to debug the intricate workings of the Container Network Interface (CNI) plugin without vendor support.

    The industry trend is clear. Reports estimate that managed offerings now constitute 40–63% of all Kubernetes deployments, as organizations prioritize stability and developer velocity. The market valuation is projected to reach $7–10+ billion by 2030, underscoring this shift.

    The following table provides a technical breakdown of the key differences.

    Managed Kubernetes vs. Self-Managed Kubernetes: A Technical Breakdown

    Choosing between these paths involves weighing different operational realities. This table offers a side-by-side comparison to clarify the technical trade-offs.

    Consideration Managed Kubernetes Services Self-Managed Kubernetes
    Control Plane Management Fully handled by the provider (upgrades, security, patching). Your team is 100% responsible for setup (e.g., using kubeadm), upgrades, and maintenance.
    Node Management Simplified node provisioning and auto-scaling features. Provider handles OS patching for managed node groups. You manage the underlying OS, patching, kubelet configuration, and scaling mechanisms yourself.
    Security Shared responsibility model. Provider secures the control plane; you secure workloads and worker nodes. Your responsibility from the ground up, including network policies, RBAC, PodSecurityPolicies/Admission, and etcd encryption.
    High Availability Built-in multi-AZ control plane redundancy, backed by an SLA. You must design, implement, and test your own HA architecture for both etcd and API servers.
    Tooling & Integrations Pre-integrated with cloud services (IAM, logging, monitoring) out of the box. Requires manual integration of third-party tools for observability, security, and networking.
    Cost Model Predictable, consumption-based pricing. Pay for nodes and a management fee. High upfront and ongoing costs for specialized engineering talent, tooling licenses, and operational overhead.
    Expertise Required Focus on application development, Kubernetes workload APIs, and CI/CD. Deep expertise in Kubernetes internals, networking (CNI), storage (CSI), and distributed systems is essential.

    Ultimately, the choice comes down to a strategic decision: do you want your team building application features or becoming experts in infrastructure management?

    When to Choose Each Path

    Despite the clear operational benefits of managed services, certain specific scenarios necessitate a self-managed approach. The decision hinges on unique requirements for control, compliance, and operating environment.

    Choose Self-Managed Kubernetes When:

    • You operate in a completely air-gapped environment with no internet connectivity, precluding access to a cloud provider's API endpoints.
    • Your application requires extreme kernel-level tuning or custom-compiled kernel modules on the control plane nodes themselves.
    • You are bound by strict data sovereignty or regulatory mandates that prohibit the use of public cloud infrastructure.

    Choose Managed Kubernetes Services When:

    • Your primary objective is to accelerate application delivery and reduce time-to-market for new features.
    • You want to reduce operational overhead and avoid the cost and complexity of building and retaining a large, specialized platform team.
    • Your business requires high availability and reliability backed by a financially guaranteed SLA.

    For most organizations, the mission is to deliver software, not to master the intricacies of container orchestration. If you need expert guidance, exploring options like specialized Kubernetes consulting services can provide clarity. To refine your resourcing model, it's also valuable to spend time understanding the distinction between staff augmentation and managed services.

    How to Select the Right Managed Kubernetes Provider

    Selecting a managed Kubernetes provider is a foundational architectural decision with long-term operational and financial implications. It impacts platform stability, budget, and developer velocity. A rigorous, technical evaluation is necessary to see past marketing claims.

    The choice between major providers like Amazon Elastic Kubernetes Service (EKS), Google Kubernetes Engine (GKE), and Azure Kubernetes Service (AKS) requires a deep dive into their specific implementations of Kubernetes to find the best technical fit for your team and workloads.

    Evaluate Core Technical Capabilities

    First, you must analyze the core Kubernetes offering under the hood. This goes beyond a simple feature checklist. You need to understand the service's architecture and lifecycle management policies.

    Key technical questions to ask include:

    • Supported Kubernetes Versions: How quickly do they offer support for new Kubernetes minor releases? A significant lag can prevent access to crucial features and security patches.
    • Upgrade Cadence and Control: How are cluster upgrades managed? Is it a forced, automatic process, or do you have a flexible window to initiate and control the rollout to different environments (e.g., dev, staging, prod)? Can you control node pool upgrades independently from the control plane?
    • Control Plane Configuration: What level of access is provided to core component configurations? Can you enable specific API server feature gates or configure audit log destinations and formats to meet stringent compliance requirements?

    A provider that offers stable, recent Kubernetes versions with a predictable and user-controlled upgrade path is essential for maintaining a healthy production environment.

    Dissecting SLAs and Uptime Guarantees

    Service Level Agreements (SLAs) are the provider's contractual commitment to reliability. However, the headline number, such as 99.95% uptime, often requires careful scrutiny of the fine print.

    Typically, the SLA for a managed Kubernetes service covers only the availability of the control plane's API server endpoint. It does not cover your worker nodes, your applications, or the underlying cloud infrastructure components like networking and storage.

    A provider's SLA is a promise about the availability of the Kubernetes API, not your application's overall uptime. This distinction is critical for designing resilient application architectures and setting realistic operational expectations.

    When reviewing an SLA, look for clear definitions of "outage," the specific remedy (usually service credits), and the process for filing a claim. A robust SLA is a valuable safety net, but your application's resilience is ultimately determined by your own architecture (e.g., multi-AZ deployments, pod disruption budgets). For a deeper look, you might want to review some different Kubernetes cluster management tools that can provide greater visibility and control.

    Security and Compliance Certifications

    Security must be an integral part of the platform, not an afterthought. Your managed Kubernetes provider must meet the compliance standards relevant to your industry, as a missing certification can be an immediate disqualifier.

    Look for essential certifications such as:

    • PCI DSS: Mandatory for processing credit card data.
    • HIPAA: Required for handling protected health information (PHI).
    • SOC 2 Type II: An audit verifying the provider's controls for security, availability, and confidentiality of customer data.

    The provider is responsible for securing the control plane, but you remain responsible for securing your workloads, container images, and IAM policies. Ensure the provider offers tight integration with their native Identity and Access Management system to enable the enforcement of the principle of least privilege through mechanisms like IAM Roles for Service Accounts (IRSA) on AWS.

    Analyzing Cost Models and Ecosystem Maturity

    Finally, you must deconstruct the provider's pricing model to avoid unexpected costs. The total cost is more than the advertised per-cluster or per-node fees. Significant costs are often hidden in data transfer (egress) fees between availability zones or out to the internet. Model your expected network traffic patterns to generate a realistic cost projection.

    Equally important is the maturity of the provider's ecosystem. A mature platform offers seamless integrations with the tools your team uses daily for:

    • Monitoring and Logging: Native support for exporting metrics to services like Prometheus or native cloud observability suites.
    • CI/CD Pipelines: Smooth integration with CI/CD tools to automate build and deployment workflows.
    • Storage and Networking: A wide variety of supported and optimized CSI (Container Storage Interface) and CNI (Container Network Interface) plugins.

    A rich ecosystem reduces the integration burden on your team, allowing them to leverage a solid foundation rather than building everything from scratch.

    Navigating the Challenges and Limitations

    While managed Kubernetes services dramatically simplify operations, they are not a panacea. Adopting them without understanding the inherent trade-offs can lead to future architectural and financial challenges. Acknowledging these limitations allows you to design more resilient and portable systems.

    The most significant challenge is vendor lock-in. Cloud providers compete by offering proprietary features, custom APIs, and deep integrations with their surrounding ecosystem. While convenient, these features create dependencies that increase the technical complexity and financial cost of migrating to another provider or an on-premise environment.

    Another challenge is the "black box" nature of the managed control plane. Abstraction is beneficial for daily operations, but during a complex incident, it can become an obstacle. You lose the ability to directly inspect control plane logs or tune low-level component parameters, which can hinder root cause analysis and force reliance on provider support.

    Proactively Managing Costs and Complexity

    The ease of scaling with managed Kubernetes can be a double-edged sword for your budget. A single kubectl scale command can provision dozens of new nodes, and without strict governance, this can lead to significant cost overruns. Implementing FinOps practices is not optional; it is a required discipline.

    Even with a managed service, Kubernetes itself remains a complex system. Networking, security, and storage are still significant challenges for many teams. Studies show that approximately 28% of organizations encounter major roadblocks in these areas. This has spurred innovation, with over 60% of new enterprise Kubernetes deployments now using AI-powered monitoring to optimize resource utilization and maintain uptime. You can explore these trends in market reports on the growth of Kubernetes solutions.

    Strategies for Mitigation

    These potential pitfalls can be mitigated with proactive engineering discipline. The goal is to leverage the convenience of managed Kubernetes while maintaining architectural flexibility and financial control.

    Vendor lock-in is not inevitable; it is the result of architectural choices. By designing for portability from the outset, you retain strategic freedom and keep future options open.

    Here are concrete technical strategies to maintain control:

    • Embrace Open-Source Tooling: Standardize on open-source, cloud-agnostic tools wherever possible. Use Prometheus for monitoring, Istio or Linkerd for a service mesh, and ArgoCD or Jenkins for CI/CD. This minimizes dependencies on proprietary provider services.
    • Design for Portability with IaC: Use Infrastructure-as-Code (IaC) tools like Terraform or OpenTofu. Defining your entire cluster configuration—including node groups, VPCs, and IAM roles—in code creates a repeatable, version-controlled blueprint that is less coupled to a specific provider's console or CLI.
    • Implement Rigorous FinOps Practices: Enforce Kubernetes resource requests and limits on every workload as a mandatory CI check. Utilize cluster autoscalers effectively to match capacity to demand. Implement detailed cost allocation using labels and configure budget alerts to detect spending anomalies before they escalate.

    By integrating these practices into your standard operating procedures, you can achieve the ideal balance: a powerful, managed platform that provides developer velocity without sacrificing architectural control or financial discipline.

    Your Technical Checklist for Migration and Adoption

    A handwritten 'Migration checklist' flowchart outlining five steps: Assessment, Environment, Phase 2, Migration, and Day-2.

    Migrating to a managed Kubernetes service is a structured engineering project, not an ad-hoc task. This checklist provides a methodical, phase-based approach to guide you from initial planning through to production operations.

    A rushed migration inevitably leads to performance bottlenecks, security vulnerabilities, and operational instability. Following a structured plan is the most effective way to mitigate risk and build a robust foundation for your applications.

    Phase 1: Assessment and Planning

    This initial phase is dedicated to discovery and strategic alignment. Before writing any YAML, you must perform a thorough analysis of your application portfolio and define clear, measurable success criteria.

    Begin with an application readiness assessment. Categorize your services: are they stateless or stateful? This distinction is critical. Stateful workloads like databases require a more complex migration strategy involving PersistentVolumeClaims, StorageClasses, and potentially a specialized operator for lifecycle management.

    Next, define your success metrics with quantifiable Key Performance Indicators (KPIs). For example:

    • Reduce CI/CD deployment time from 45 minutes to 15 minutes.
    • Achieve a Service Level Objective (SLO) of 99.95% application uptime.
    • Reduce infrastructure operational costs by 20% year-over-year.

    Finally, select a pilot application. Choose a low-risk, stateless service that is complex enough to be a meaningful test but not so critical that a failure would impact the business. This application will serve as your proving ground for a new toolchain and operational model.

    Phase 2: Environment Configuration

    With a plan in place, the next step is to build the foundational infrastructure on your chosen managed Kubernetes service. This phase focuses on networking, security, and automation.

    Start by defining your network architecture. This includes designing Virtual Private Clouds (VPCs), subnets, and security groups or firewall rules to enforce network segmentation and control traffic flow. A well-designed network topology is your first line of defense.

    This is the point where Infrastructure as Code (IaC) becomes non-negotiable. Using a tool like Terraform to define your entire environment makes your setup repeatable, version-controlled, and auditable from day one. It's a game-changer.

    Once the network is defined, configure Identity and Access Management (IAM). Adhere strictly to the principle of least privilege. Create specific IAM roles with fine-grained permissions for developers, CI/CD systems, and cluster administrators, and map them to Kubernetes RBAC roles. This is the most effective way to prevent unauthorized access and limit the blast radius of a potential compromise. For a practical look at this, check out our guide on Terraform with Kubernetes.

    Phase 3: Application Migration

    Now you are ready to migrate your pilot application. This phase involves the hands-on technical work of containerizing the application, building automated deployment pipelines, and implementing secure configuration management.

    First, containerize the application by creating an optimized, multi-stage Dockerfile. The objective is to produce a minimal, secure container image. Store this image in a private container registry such as Amazon ECR or Google Artifact Registry.

    Next, build your CI/CD pipeline. This workflow should automate static code analysis, unit tests, vulnerability scanning (e.g., with Trivy or Snyk), image building, and deployment to the cluster. Tools like ArgoCD for GitOps or Jenkins are commonly used. For secrets management, use a dedicated secrets store like HashiCorp Vault or the cloud provider's native secrets manager, injecting secrets into pods at runtime rather than storing them in Git.

    Phase 4: Day-2 Operations

    Deploying the pilot application is a major milestone, but the project is not complete. The focus now shifts to ongoing Day-2 operations: monitoring, optimization, and incident response.

    First, implement robust autoscaling policies. Configure the Horizontal Pod Autoscaler (HPA) to scale application pods based on metrics like CPU utilization or custom metrics (e.g., requests per second). Simultaneously, configure the Cluster Autoscaler to add or remove worker nodes from the cluster based on aggregate pod resource requests. This combination ensures both performance and cost-efficiency.

    Next, establish a comprehensive observability stack. Deploy tools to collect metrics, logs, and traces to gain deep visibility into both application performance and resource consumption. This data is essential for performance tuning and cost optimization.

    Finally, create an operational runbook. This document should detail common failure scenarios, step-by-step troubleshooting procedures, and clear escalation paths. A well-written runbook is invaluable during a high-stress incident.

    Let's address some common technical questions that arise during the evaluation of managed Kubernetes services.

    How Do Managed Services Handle Security Patching?

    The provider assumes full responsibility for patching the control plane components (kube-apiserver, etcd, etc.) for known CVEs. This is typically done automatically and with zero downtime to the control plane API.

    For worker nodes, the provider releases patched node images containing the latest OS and kernel security fixes. It is then your responsibility to trigger a rolling update of your node pools. This process safely drains pods from old nodes and replaces them with new, patched ones, ensuring no disruption to your running services.

    This is a clear example of the shared responsibility model in action. The provider handles the complex patching of the cluster's core, while you retain control over the timing of updates to your application fleet.

    The key takeaway here is that the most complex, high-stakes patching is handled for you. Your job shifts from doing the risky manual work to simply scheduling the rollout to your application fleet.

    Can I Use Custom CNI Or CSI Plugins?

    The answer depends heavily on the provider. The major cloud providers—Amazon EKS, Google Kubernetes Engine (GKE), and Azure Kubernetes Service (AKS)—ship with their own tightly integrated CNI (Container Network Interface) and CSI (Container Storage Interface) plugins that are optimized for their respective cloud environments.

    Some services offer the flexibility to install third-party plugins like Calico or Cilium for advanced networking features. However, using a non-default plugin can introduce complexity, and the provider may not offer technical support for issues related to it.

    It is critical to verify that any required custom plugins are officially supported by the provider before committing to the platform. This is a common technical "gotcha" that can derail a migration if not addressed early in the evaluation process.

    What Happens If The Managed Control Plane Has An Outage?

    Even with a highly available, multi-AZ control plane, outages are possible. If the control plane (specifically the API server) becomes unavailable, your existing workloads running on the worker nodes will continue to function normally.

    The data plane (where your applications run) is decoupled from the control plane. However, during the outage, all cluster management operations that rely on the Kubernetes API will fail:

    • You cannot deploy new applications or update existing ones (kubectl apply will fail).
    • Autoscaling (both HPA and Cluster Autoscaler) will not function.
    • You cannot query the cluster's state using kubectl.

    The provider's Service Level Agreement (SLA) defines their contractual commitment to restoring control plane functionality within a specified timeframe.

    How Much Control Do I Actually Lose?

    By opting for a managed service, you are trading direct, low-level control of the control plane infrastructure for operational simplicity and reliability. You will not have SSH access to control plane nodes, nor can you modify kernel parameters or core component flags directly.

    However, you are not left with an opaque black box. Most providers expose key configuration options via their APIs, allowing you to customize aspects like API server audit logging or enable specific Kubernetes feature gates. You are essentially trading root-level access for the significant operational advantage of not having to manage, scale, or repair that critical infrastructure yourself.


    Ready to accelerate your software delivery without the infrastructure headache? OpsMoon connects you with the top 0.7% of remote DevOps engineers to build, manage, and scale your Kubernetes environment. Start with a free work planning session to map your roadmap to success. Learn more about how OpsMoon can help.

  • A Technical Guide on How to Get SOC 2 Certification

    A Technical Guide on How to Get SOC 2 Certification

    Getting your SOC 2 certification is a rigorous engineering undertaking, but it's a non-negotiable requirement for any B2B SaaS company handling customer data. Treat it less like a compliance checkbox and more as a verifiable trust signal in a competitive market. For engineering and security teams, this journey transcends policy documents and dives deep into the technical architecture and operational security of your systems.

    The demand for this level of assurance is growing exponentially. The market for SOC reporting services reached USD 5,392 million in 2024 and is projected to nearly double by 2030, a clear indicator of its critical importance. For detailed data, Sprinto offers valuable insights on the SOC reporting market.

    This guide is a technical, actionable roadmap. We’ll deconstruct the strategic decisions required upfront to ensure a streamlined and successful audit engagement.

    We'll cover:

    • Audit Scoping: How to select the right Trust Services Criteria (TSC) based on your service commitments and system architecture.
    • Report Selection: The technical and business implications of choosing a Type I vs. a Type II report.
    • Technical Implementation: Concrete, actionable steps for implementing and evidencing your security posture using modern DevOps practices.

    The entire process hinges on a few critical decisions made at the outset.

    A three-step SOC 2 roadmap illustrating defining scope, selecting report, and building trust.

    As illustrated, building verifiable trust is the objective. This starts with a meticulous definition of your audit scope and selecting the appropriate report type. Correctly architecting these foundational components will prevent significant technical debt and costly remediation down the line.

    Defining Your Scope and Conducting a Gap Analysis

    Before writing a single policy or configuring a new security control, you must define the audit's precise boundaries. For SOC 2, this is a technical exercise, not a formality. Mis-scoping can lead to wasted engineering cycles, inflated audit costs, and a final report that fails to meet customer requirements.

    Your primary objective is to produce a "system description" that provides the auditor with an unambiguous, technically detailed view of the in-scope systems, data flows, and personnel.

    The process begins with selecting the applicable Trust Services Criteria (TSCs). Security is the mandatory, non-negotiable foundation for every SOC 2 report, often referred to as the Common Criteria. This TSC covers fundamental controls such as logical and physical access, system operations, change management, and risk mitigation.

    A simplified timeline illustrating the SOC 2 certification process with steps: scope, gap analysis, controls, audit, and maintain.

    Choosing Your Trust Services Criteria

    Beyond the Security TSC, you must select additional criteria only if they align with explicit or implicit commitments made to your customers. Avoid the temptation to over-scope by adding all TSCs; this exponentially increases the audit's complexity, evidence requirements, and cost.

    Make your selection based on technical function and service level agreements (SLAs):

    • Availability: Is a specific uptime percentage guaranteed in your customer contracts (e.g., 99.9% uptime)? If your platform's downtime results in financial or operational impact for customers, this TSC is mandatory. Think load balancers, auto-scaling groups, and disaster recovery plans.
    • Processing Integrity: Does your service perform critical computations or transactions? Examples include financial transaction processing, data analytics platforms, or e-commerce order fulfillment. This TSC focuses on the completeness, validity, accuracy, and timeliness of data processing.
    • Confidentiality: Do you handle sensitive, non-public data that is protected by non-disclosure agreements (NDAs) or other contractual obligations? This includes intellectual property, M&A data, or proprietary algorithms. Key controls include data encryption (in transit and at rest) and strict access controls.
    • Privacy: This criterion applies specifically to the handling of Personally Identifiable Information (PII) and is distinct from Confidentiality. It aligns with privacy frameworks like GDPR and CCPA, covering how PII is collected, used, retained, disclosed, and disposed of. If you process user data, Privacy is almost certainly required.

    Once you've finalized your TSCs, map them to the specific components of your service architecture. This includes your production infrastructure (e.g., specific AWS VPCs, GCP Projects, Kubernetes clusters), the applications and microservices involved, the databases and data stores, and the key personnel and third-party vendors with system access. This mapping defines your formal audit boundary.

    Executing a Technical Gap Analysis

    With a defined scope, execute a rigorous, control-level gap analysis. This involves comparing your current security posture against the specific points of focus within your chosen TSCs. Adopting a modern compliance risk management framework is essential for structuring this analysis and clearly defining the audit boundaries.

    This analysis requires creating a detailed control inventory, typically within a GRC tool or a version-controlled spreadsheet, mapping every applicable SOC 2 criterion to your existing technical implementation.

    Technical Note: Treat the gap analysis as a pre-audit simulation. Be ruthlessly objective. A gap identified internally is a JIRA ticket; a gap identified by your auditor is a qualified opinion or an "exception" in your final report, which can be a deal-breaker for customers.

    For example, when evaluating CC6.2 (related to user access), you must document the exact technical mechanisms for identity and access management.

    • How are IAM roles and permissions provisioned? Is it automated via an IdP like Okta using SCIM, or a manual process?
    • How do you enforce the principle of least privilege in your cloud environment (e.g., AWS IAM policies)?
    • What is the mean time to de-provision access upon employee termination? Is this process automated via API hooks into your HRIS?

    If the answer to any of these is "ad-hoc," you've identified a gap. Remediation requires not just a written policy but an implemented technical control, such as an automated de-provisioning script triggered by your HR system's offboarding webhook.

    The output of your gap analysis is a prioritized backlog of remediation tasks. This backlog becomes your technical roadmap to compliance. To gain a deeper understanding of auditor expectations, review the detailed SOC 2 requirements. This technical backlog is your execution plan for entering the formal audit with a high degree of confidence.

    With your gap analysis complete and a prioritized remediation backlog, it's time for implementation. This is where you translate abstract policies into tangible, automated controls within your cloud and DevOps workflows.

    For a modern technology company, SOC 2 compliance is not achieved through manual checklists. It's about engineering security into the core of your infrastructure and software delivery lifecycle (SDLC).

    The primary objective is to build systems that are auditable by design. This means the evidence required for an audit is a natural, immutable byproduct of standard engineering operations, rather than something that must be manually gathered later. Your most critical tool in this endeavor is Infrastructure as Code (IaC).

    Codifying Security with Infrastructure as Code

    Infrastructure as Code (IaC) is the practice of managing and provisioning your entire infrastructure through machine-readable definition files, using tools like Terraform, CloudFormation, or Pulumi.

    For SOC 2, IaC is a transformative technology. It converts abstract security policies into concrete, version-controlled, and peer-reviewed code artifacts.

    Consider a fundamental SOC 2 control: network access restriction (part of the Security TSC). The legacy approach involved manual configuration of firewall rules through a cloud console—a process prone to human error and difficult to audit. With IaC, these rules are defined declaratively in code.

    # Example Terraform code for a restrictive AWS security group
    resource "aws_security_group" "web_server_sg" {
      name        = "web-server-security-group"
      description = "Allow inbound TLS traffic"
      vpc_id      = aws_vpc.main.id
    
      ingress {
        description = "HTTPS from anywhere"
        from_port   = 443
        to_port     = 443
        protocol    = "tcp"
        cidr_blocks = ["0.0.0.0/0"]
      }
    
      egress {
        from_port   = 0
        to_port     = 0
        protocol    = "-1"
        cidr_blocks = ["0.0.0.0/0"]
      }
    
      tags = {
        Owner = "security-team"
        SOC2-Control = "CC6.6"
      }
    }
    

    This code block becomes immutable, auditable evidence. It demonstrates precisely how network controls are enforced. Any proposed change must be submitted as a pull request, reviewed by a qualified peer, and is automatically logged in the Git history. This provides a complete, verifiable audit trail for change management. You can learn more about how to check IaC security to ensure configurations are secure from inception.

    Integrating Security into CI/CD Pipelines

    Your CI/CD pipeline is the automated pathway for deploying code to production. It is the ideal chokepoint for enforcing security controls and identifying vulnerabilities early in the development lifecycle (a practice known as "shifting left").

    This DevSecOps approach embeds security directly into the engineering workflow.

    Here are specific, actionable controls to integrate into your pipeline for SOC 2:

    • Static Application Security Testing (SAST): Integrate tools like Snyk or Veracode to scan source code for vulnerabilities (e.g., SQL injection, XSS) on every commit.
    • Software Composition Analysis (SCA): Use tools like Dependabot or OWASP Dependency-Check to scan open-source dependencies for known CVEs. Supply chain security is a major focus for auditors.
    • Secret Scanning: A non-negotiable control is implementing GitHub Secret Scanning or a similar tool. This prevents the accidental commit of secrets like API keys and database credentials by automatically blocking any pull request containing them.
    • IaC Policy Enforcement: Before applying any Terraform or CloudFormation changes, use policy-as-code tools like Open Policy Agent (OPA) or Checkov to scan the code for misconfigurations (e.g., publicly exposed S3 buckets, unrestricted security groups).

    By building these automated gates into your pipeline, you create a system that programmatically enforces security policies, providing auditors with a wealth of evidence demonstrating secure development practices.

    Enforcing Least Privilege with RBAC

    Identity and Access Management (IAM) is a cornerstone of any SOC 2 audit. Auditors will rigorously examine how you manage access, focusing on the principle of least privilege: users and systems should only have the minimum permissions necessary to perform their functions.

    Role-Based Access Control (RBAC) is the standard mechanism for implementing this principle. Instead of assigning permissions to individual users, you define roles with specific permission sets (e.g., "ReadOnlyDeveloper," "DatabaseAdmin," "Auditor") and assign users to these roles.

    Key Takeaway: Your IAM strategy must be declarative and auditable. Define your RBAC policies as code using your IaC tool. This simplifies access reviews; you can point an auditor to a Git repository containing the canonical definition of all roles and permissions.

    For instance, you can define a Terraform IAM role that grants read-only access to specific S3 buckets for debugging purposes, preventing developers from being able to modify or delete production data. This programmatic approach eliminates manual permission drift and establishes a single source of truth for access control.

    Establishing Comprehensive Logging and Monitoring

    Effective security requires comprehensive visibility. A critical component of SOC 2 is demonstrating robust logging and monitoring to detect and respond to security incidents.

    Your implementation plan must address multiple layers of telemetry:

    1. Infrastructure Logging: Enable and configure native cloud provider logging services like AWS CloudTrail or Azure Monitor to capture every API call within your environment.
    2. Application Logging: Instrument your applications to produce structured logs (e.g., JSON format) for key security events, such as user authentication attempts, permission changes, and access to sensitive data.
    3. Centralized Log Aggregation: Ingest logs from all sources into a centralized Security Information and Event Management (SIEM) system like an ELK stack, Datadog, or Splunk. Centralization is essential for effective incident correlation and investigation.

    Once logs are centralized, you must implement automated monitoring and alerting. Use tools like Prometheus for metrics and Grafana for dashboards to configure alerts for anomalous activity. An auditor will expect to see evidence of alerts for events such as multiple failed login attempts from a single IP address or unauthorized API calls, proving your incident response plan is an active, automated system.

    Automating Evidence Collection and Selecting an Auditor

    You've engineered and deployed your technical controls. Now, your focus shifts from implementation to demonstration. An auditor will not simply accept that your systems are secure; they require verifiable, objective evidence for every single control in scope. This phase demands a systematic and, ideally, automated approach to evidence collection.

    Attempting to gather this evidence manually is an inefficient, error-prone process. The manual collection of user access lists, system configuration screenshots, change management tickets, and security scan reports is a direct path to audit fatigue and failure.

    A hand-drawn diagram illustrating cloud processes with CI, database, transactions, and IAM.

    Streamlining with Automation and GRC Platforms

    The only scalable method is to automate evidence collection. This strategy is not merely about convenience; it's about creating a continuously auditable system where evidence generation is an inherent function of your operational processes.

    Governance, Risk, and Compliance (GRC) platforms are designed for this purpose. They integrate directly with your technology stack via APIs—connecting to your cloud provider (AWS, GCP, Azure), source control (GitHub, GitLab), and IdP (Okta, Azure AD)—to automatically collect and organize evidence.

    Consider these practical examples of automated evidence collection:

    • Quarterly Access Reviews: A GRC tool can connect to your cloud provider's IAM service, automatically generate a list of all users with access to production environments, create tickets in Jira or Slack for the designated system owners to review, and record the timestamped approval as evidence.
    • Vulnerability Scans: Your CI/CD pipeline's vulnerability scanner (e.g., Snyk) can be configured via API to push scan results directly to a central evidence repository, providing an immutable record that every deployment is scanned.
    • Infrastructure Changes: By integrating with GitHub, you can automatically collect evidence for every merged pull request that modifies your Terraform code, creating a perfect audit trail for your change management controls.

    Your engineering goal should be to transition from a "pull" model of evidence collection (manual requests) to a "push" model (automated, event-driven collection). This transforms audit preparation from a multi-week, high-stress event into a routine, low-friction process.

    This automated posture is also critical for meeting the increasing demand for continuous assurance. A single annual report is no longer sufficient for many enterprise customers. According to recent data, 92% of organizations now perform two or more audits annually, with 58% conducting four or more. This trend toward "always-on" auditing makes automation a necessity. More data on this trend can be found at cgcompliance.com.

    How to Choose the Right Auditor

    Selecting an audit firm is a critical decision. A technically proficient auditor acts as a partner, understanding your architecture and providing valuable guidance. An ill-suited firm can lead to a frustrating and expensive engagement. Crucially, only an AICPA-accredited CPA firm is authorized to issue a SOC 2 report.

    Plan to interview a minimum of three to five firms. Your evaluation should prioritize technical competency over cost.

    Key Questions to Ask a Potential SOC 2 Auditor

    1. Describe your experience with our specific technology stack (e.g., Kubernetes, serverless, Terraform). An auditor fluent in modern cloud-native technologies will conduct a more efficient and relevant audit. Request redacted report examples from companies with a similar technical profile.
    2. Provide the credentials and experience of the specific individuals who will be assigned to our engagement. You need to assess the technical depth of the team performing the fieldwork, not just the sales partner. Inquire about their certifications (CISA, CISSP, AWS/GCP certs) and hands-on experience.
    3. What is your methodology for evidence collection and communication? Do they use a modern portal with API integrations, or do they rely on email and spreadsheets? A firm that has invested in a streamlined evidence management platform will significantly reduce your team's administrative burden.
    4. Can you provide references from companies of a similar size and stage? The audit methodology for a large enterprise is often ill-suited for a 50-person startup. Ensure their approach is pragmatic and risk-based, not a rigid, one-size-fits-all checklist.

    While core audit procedures are standardized, elements like scope definition, timing, and evidence format are often negotiable. A good partner will work with you to define an audit that is both rigorous and relevant to your specific business context.

    Navigating the Audit Process and Timelines

    You've implemented controls and automated evidence collection. The next phase is the formal audit engagement, where an independent CPA firm validates the design and operational effectiveness of your controls.

    Understanding the audit lifecycle is crucial for managing internal expectations regarding timelines, team involvement, and cost. The process typically includes a readiness assessment, the primary "fieldwork" (testing), and concludes with the issuance of the final SOC 2 report.

    Flowchart showing automated audit evidence collection, audit readiness, and an automated final step.

    Preparing for Auditor Fieldwork

    Fieldwork is the most intensive phase of the audit, involving direct testing of your controls. This includes technical interviews, documentation review, system walkthroughs, and formal evidence requests, known as Requests for Information (RFIs).

    Your objective is to make this process as efficient as possible.

    • Designate a Single Point of Contact (SPOC): Assign one person, typically from the security or engineering team, to manage all communications with the audit team. This prevents miscommunication and ensures RFIs are tracked and resolved systematically.
    • Prepare Technical Subject Matter Experts (SMEs): Your engineers will be interviewed about the controls they own. Coach them to provide direct, factual answers limited to their area of expertise. Speculation can lead to unnecessary audit trails.
    • Organize Evidence Proactively: Using a GRC platform is ideal. If managing manually, establish a centralized, access-controlled repository (e.g., a secure SharePoint site or Confluence space) for all evidence, organized by control number.

    An organized, responsive approach demonstrates a mature security program and builds credibility with the audit team, often expediting the entire process.

    Auditor Insight: Auditors follow a structured testing procedure for each control. If an RFI seems ambiguous, do not guess. Ask for clarification on the specific attribute they are testing and the type of evidence required to satisfy their test plan.

    Understanding Timelines and Cost Factors

    "How long will this take, and what will it cost?" are critical planning questions. The answers depend significantly on your organization's compliance maturity and system complexity.

    The timeline and cost for how to get SOC 2 certification are key business considerations. A typical engagement can range from 3 to 12 months with costs between $7,500 and $60,000. This wide range reflects a rapidly growing market, projected to reach $10.47 billion by 2030. This demand has made SOC 2 a baseline requirement for SaaS companies, driving the overall compliance market toward a valuation of $51.62 billion by 2025. You can explore the SOC reporting market growth for more details.

    The primary factors influencing your position on this spectrum are:

    • Company Size and System Complexity: A larger organization with a more complex, multi-cloud, or microservices-based architecture will have a broader audit scope, increasing the auditor's testing hours.
    • Number of TSCs in Scope: The baseline cost covers the mandatory Security (Common Criteria) TSC. Each additional TSC (Availability, Confidentiality, Processing Integrity, Privacy) adds a significant number of controls to be tested, increasing the cost.
    • Audit Readiness: This is the most significant variable. An organization with mature, well-documented, and automated controls will experience a much faster and more affordable audit than one starting from a low level of maturity.

    A SOC 2 Type I report provides an opinion on the design of your controls at a single point in time and is a quicker, less expensive option. The SOC 2 Type II report is the industry standard, providing an opinion on the operational effectiveness of your controls over a period of time (typically 3 to 12 months). It requires a much larger investment but offers significantly greater assurance to your customers.

    So You're Certified. Now What? Maintaining Continuous Compliance

    Obtaining your first SOC 2 report is not the end of the compliance journey. Viewing it as a one-time project is a strategic error that leads to significant technical debt and a high-stress "fire drill" for your next annual audit.

    The real objective is to transition from a project-based approach to a state of continuous compliance, where security and audit readiness are embedded into your organization's operational DNA.

    This next phase focuses on operationalizing the controls you've implemented. The goal is to maintain a state of being audit-ready, 24/7/365. This not only builds sustainable trust with customers but, more importantly, fosters a genuinely resilient security posture.

    Establish a Compliance Cadence

    To operationalize compliance, you must establish a regular, predictable cadence for key control activities. These are not one-time tasks but recurring processes that ensure your controls remain effective over time.

    Implement these routines immediately:

    • Quarterly Access Reviews: Automate the generation of user access reports for all critical systems. Every 90 days, system owners must receive an automated ticket or notification requiring them to review and re-certify these permissions. The completion of this task serves as the audit evidence.
    • Annual Risk Assessments: Formally reconvene your risk management committee annually to review and update your risk assessment. Document changes in the threat landscape, technology stack, and business objectives.
    • Ongoing Security Awareness Training: A single annual training session is insufficient. Implement a continuous program that includes monthly automated phishing simulations and regular security bulletins to maintain a high level of security awareness.

    A SOC 2 report is not a permanent certification. It is a point-in-time attestation that your controls were effective during the audit period. Maintaining that effectiveness is a continuous operational responsibility.

    From Manual Checks to Real-Time Monitoring

    The most effective method for maintaining compliance is to automate the monitoring of your control environment. You need systems that can detect and alert on deviations from your established security policies in real time.

    This approach is the essence of continuous monitoring.

    For example, implement automated configuration drift detection in your cloud environment using native tools (e.g., AWS Config) or third-party CSPM (Cloud Security Posture Management) solutions. If a developer inadvertently modifies a security group to allow unrestricted ingress, a system should detect this policy violation, generate a high-priority alert in your security channel, and, in a mature environment, automatically trigger a remediation script to revert the unauthorized change.

    This proactive, automated posture fundamentally changes the nature of compliance, transforming it from a reactive, evidence-gathering exercise into a core, value-driven component of your security operations. For a deeper technical dive, read our guide on what is continuous monitoring.

    Got Questions About SOC 2? We've Got Answers

    Here are answers to common technical questions about the SOC 2 framework.

    Is There a SOC 2 Compliance Checklist I Can Just Follow?

    No, not in the prescriptive sense of frameworks like PCI DSS. SOC 2 is a principles-based framework. The AICPA provides the criteria (the "what") but intentionally does not prescribe the how.

    For example, criterion CC6.2 addresses the management of user access. The implementation is technology-agnostic. You could satisfy this with automated SCIM provisioning from an IdP, RBAC policies defined in Terraform, or another mechanism. The auditor's role is to validate that your chosen implementation is designed appropriately and operates effectively to meet the criterion's objective.

    How Often Do I Need to Renew My SOC 2 Report?

    A SOC 2 Type II report must be renewed annually. Each new report covers the preceding 12-month period, providing continuous assurance to customers that your controls remain effective over time.

    It is common for a company's initial Type II audit to cover a shorter observation period, such as six months, to secure a critical customer contract. Following this initial report, the organization typically transitions to the standard 12-month annual cycle.

    What’s the Difference Between SOC 2 and ISO 27001?

    These are often confused but serve distinct purposes. SOC 2 is an attestation report, governed by the AICPA's Trust Services Criteria, and is the predominant standard for service organizations in the U.S. market. Its focus is on the operational effectiveness of controls related to specific services.

    ISO 27001, conversely, is a certification against an international standard for an Information Security Management System (ISMS). It certifies that your organization has a formal, documented, and comprehensive system for managing information security risks. It is less focused on the detailed testing of individual technical controls over a period.

    Can a SOC 2 Report Have Mistakes?

    Yes, inaccuracies can occur. These might stem from the client providing incorrect evidence samples or the audit firm misinterpreting a complex technical control.

    To mitigate this risk, a multi-layered review process is in place. First, your own management team is required to review a draft of the report for factual accuracy. Second, the audit firm has its own internal quality assurance review. Finally, reputable CPA firms undergo a mandatory peer review every three years, where another accredited firm audits their audit practices to ensure adherence to AICPA standards.

    This rigorous verification process underpins the credibility and trustworthiness of the SOC 2 framework.


    Achieving SOC 2 compliance requires deep DevOps and cloud security expertise. At OpsMoon, we connect you with elite, vetted engineers who specialize in building the automated, auditable infrastructure required for a successful audit. Start with a free work planning session to map out your compliance roadmap.