Bare metal Kubernetes is the practice of deploying Kubernetes directly onto physical servers, completely removing the virtualization layer. This architecture provides applications with direct, unimpeded access to hardware resources, resulting in superior performance and significantly lower latency for I/O and compute-intensive workloads.
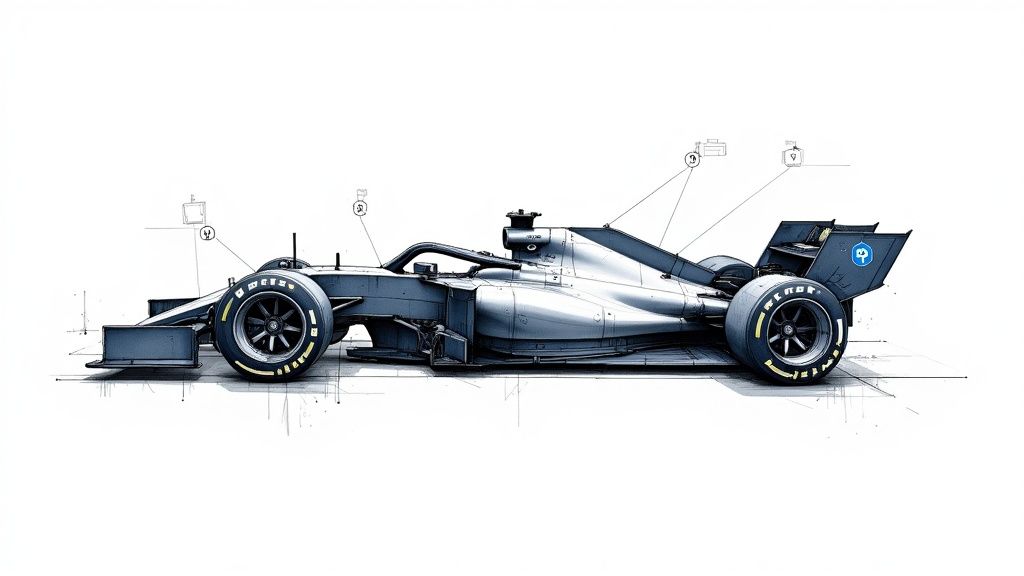
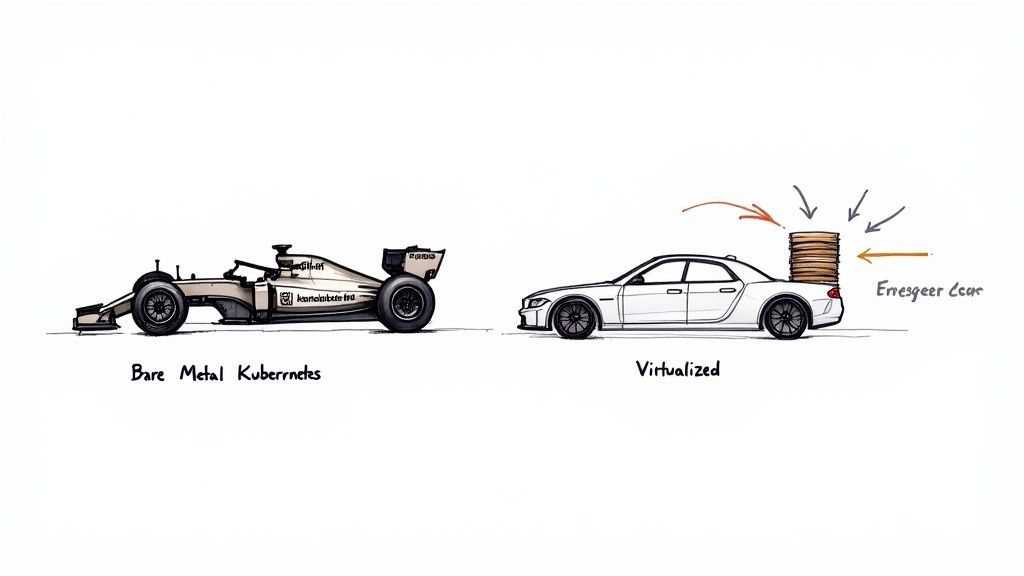
Think of it as the difference between a high-performance race car with the engine bolted directly to the chassis versus a daily driver with a complex suspension system. One is engineered for raw, unfiltered power and responsiveness; the other is designed for abstracted comfort at the cost of performance.
Unleashing Raw Performance with Bare Metal Kubernetes
When engineering teams need to extract maximum performance, they turn to bare metal Kubernetes. The core principle is eliminating the hypervisor. In a typical cloud or on-prem VM deployment, a hypervisor sits between your application's operating system and the physical hardware, managing resource allocation.
While hypervisors provide essential flexibility and multi-tenancy, they introduce a "virtualization tax"—a performance overhead that consumes CPU cycles, memory, and adds I/O latency. For most general-purpose applications, this is a reasonable trade-off for the convenience and operational simplicity offered by cloud providers. (We break down these benefits in our comparison of major cloud providers.)
However, for high-performance computing (HPC), AI/ML, and low-latency financial services, this performance penalty is unacceptable.
A bare metal Kubernetes setup is like a finely tuned race car. By mounting the engine (Kubernetes) directly to the chassis (the physical hardware), you get an unfiltered, powerful connection. A virtualized setup is more like a daily driver with a complex suspension system (the hypervisor)—it gives you a smoother, more abstracted ride, but you lose that raw speed and responsiveness.
The Decisive Advantages of Direct Hardware Access
Running Kubernetes directly on the server's host OS unlocks critical advantages that are non-negotiable for specific, demanding use cases. The primary benefits are superior performance, minimal latency, and greater cost-efficiency at scale.
- Superior Performance: Applications gain direct, exclusive access to specialized hardware like GPUs, FPGAs, high-throughput network interface cards (NICs), and NVMe drives. This is mission-critical for AI/ML training, complex data analytics, and high-frequency trading platforms where hardware acceleration is key.
- Rock-Bottom Latency: By eliminating the hypervisor, you remove a significant source of I/O and network latency. This translates to faster transaction times for databases, lower response times for caches, and more predictable performance for real-time data processing pipelines.
- Significant Cost Savings: While initial capital expenditure can be higher, a bare metal approach eliminates hypervisor licensing fees (e.g., VMware). At scale, owning and operating hardware can result in a substantially lower total cost of ownership (TCO) compared to the consumption-based pricing of public clouds.
Kubernetes adoption has exploded, with over 90% of enterprises now using the platform. As these deployments mature, organizations are recognizing the performance ceiling imposed by virtualization. By moving to bare metal, they observe dramatically lower storage latency and higher IOPS, especially for database workloads. Direct hardware access allows containers to interface directly with NVMe devices via the host OS, streamlining the data path and maximizing throughput.
To provide a clear technical comparison, here is a breakdown of how these deployment models stack up.
Kubernetes Deployment Model Comparison
This table offers a technical comparison to help you understand the key trade-offs in performance, cost, and operational complexity for each approach.
| Attribute | Bare Metal Kubernetes | Cloud-Managed Kubernetes | On-Prem VM Kubernetes |
|---|---|---|---|
| Performance & Latency | Highest performance, lowest latency | Good performance, but with virtualization overhead | Moderate performance, with hypervisor and VM overhead |
| Cost Efficiency | Potentially lowest TCO at scale, but high initial investment | Predictable OpEx, but can be costly at scale | High initial hardware cost plus hypervisor licensing fees |
| Operational Overhead | Highest; you manage everything from hardware up | Lowest; cloud provider manages the control plane and infrastructure | High; you manage the hardware, hypervisor, and Kubernetes control plane |
| Hardware Control | Full control over hardware selection and configuration | Limited to provider's instance types and options | Full control, but constrained by hypervisor compatibility |
| Best For | High-performance computing, AI/ML, databases, edge computing | General-purpose applications, startups, teams prioritizing speed | Enterprises with existing virtualization infrastructure and expertise |
Ultimately, the choice to run Kubernetes on bare metal is a strategic engineering decision. It requires balancing the pursuit of absolute control and performance against the operational simplicity of a managed service.
Designing a Production-Ready Cluster Architecture
Architecting a bare metal Kubernetes cluster is analogous to engineering a high-performance vehicle from individual components. You are responsible for every system: the chassis (physical servers), the engine (Kubernetes control plane), and the suspension (networking and storage). The absence of a hypervisor means every architectural choice has a direct and measurable impact on performance and reliability.
Unlike cloud environments where VMs are ephemeral resources, bare metal begins with physical servers. This necessitates a robust and automated node provisioning strategy. Manual server configuration is not scalable and introduces inconsistencies that can destabilize the entire cluster.
Automated provisioning is a foundational requirement.
Automating Physical Node Provisioning
To ensure consistency and velocity, you must employ tools that manage the entire server lifecycle—from PXE booting and firmware updates to OS installation and initial configuration—without manual intervention. This is Infrastructure as Code (IaC) applied to physical hardware.
Two leading open-source solutions in this domain are:
- MAAS (Metal as a Service): A project from Canonical, MAAS transforms your data center into a private cloud fabric. It automatically discovers hardware on the network (via DHCP and PXE), profiles its components (CPU, RAM, storage), and deploys specific OS images on demand, treating physical servers as composable, API-driven resources.
- Tinkerbell: A CNCF sandbox project, Tinkerbell provides a flexible, API-driven workflow for bare-metal provisioning. It operates as a set of microservices, making it highly extensible for complex, multi-stage provisioning pipelines defined via YAML templates.
Utilizing such tools ensures every node is a perfect, idempotent replica, which is a non-negotiable prerequisite for a stable Kubernetes cluster. As you design your architecture, remember that fundamental scaling decisions will also dictate your cluster's long-term efficiency and performance characteristics.
High-Throughput Networking Strategies
Networking on bare metal is fundamentally different from cloud environments. You exchange the convenience of managed VPCs and load balancers for raw, low-latency access to the physical network fabric. This hands-on approach delivers significant performance gains.
The primary objective of bare-metal networking is to minimize the path length for packets traveling between pods and the physical network. By eliminating virtual switches and overlay networks (like VXLAN), you eradicate encapsulation overhead and reduce latency, providing applications with a high-bandwidth, low-latency communication path.
For pod-to-pod communication and external service exposure, two key components are required:
| Networking Component | Technology Example | How It Works in Bare Metal |
|---|---|---|
| Pod Networking (CNI) | Calico with BGP | Calico can be configured to peer directly with your Top-of-Rack (ToR) physical routers using the Border Gateway Protocol (BGP). This configuration advertises pod CIDR blocks as routable IP addresses on your physical network, enabling direct, non-encapsulated routing and eliminating overlay overhead. |
| Service Exposure | MetalLB | MetalLB functions as a network load-balancer implementation for bare metal clusters. It operates in two modes: Layer 2 (using ARP/NDP to announce service IPs on the local network) or Layer 3 (using BGP to announce service IPs to nearby routers), effectively emulating the functionality of a cloud load balancer. |
Combining Calico in BGP mode with MetalLB provides a powerful, high-performance networking stack that mirrors the functionality of a cloud provider but runs entirely on your own hardware.
Integrating High-Performance Storage
Storage is where bare metal truly excels, allowing you to leverage direct-attached NVMe SSDs. Without a hypervisor abstracting the storage I/O path, containers can achieve maximum IOPS and minimal latency—a critical advantage for databases and other stateful applications.
The Container Storage Interface (CSI) is the standard API for integrating storage systems with Kubernetes. On bare metal, you deploy a CSI driver that can provision and manage storage directly on your nodes' physical block devices. This direct data path is a primary performance differentiator for bare metal Kubernetes.
This shift is not a niche trend. The global bare-metal cloud market was valued at $2.57 billion in 2021 and grew to $11.55 billion by 2024. Projections indicate it could reach $36.71 billion by 2030, driven largely by AI/ML workloads that demand the raw performance only dedicated hardware can deliver.
Choosing the Right Deployment Tools
Once the architecture is defined, the next step is implementation. Deploying Kubernetes on bare metal is a complex orchestration task, and your choice of tooling will profoundly impact your operational workflow and the cluster's long-term maintainability.
This is a critical decision. The optimal tool depends on your team's existing skill set (e.g., Ansible vs. declarative YAML), your target scale, and the degree of automation required. Unlike managed services that abstract this complexity, on bare metal, the responsibility is entirely yours. The objective is to achieve a repeatable, reliable process for transforming a rack of servers into a fully functional Kubernetes control plane.

Each tool offers a different approach to orchestrating the core pillars of provisioning, networking, and storage. Let's analyze the technical trade-offs.
Automation-First Declarative Tools
For any cluster beyond a small lab environment, declarative, automation-centric tools are essential. These tools allow you to define your cluster's desired state as code, enabling version control, peer review, and idempotent deployments—the most effective way to mitigate human error.
Two dominant tools in this category are:
- Kubespray (Ansible-based): For teams with deep Ansible expertise, Kubespray is the logical choice. It is a comprehensive collection of Ansible playbooks that automates the entire process of setting up a production-grade, highly available cluster. Its strength lies in its extreme customizability, allowing you to control every aspect, from the CNI plugin and its parameters to control plane component flags.
- Rancher (RKE): Rancher Kubernetes Engine (RKE) provides a more opinionated and streamlined experience. The entire cluster—nodes, Kubernetes version, CNI, and add-ons—is defined in a single
cluster.ymlfile. RKE then uses this manifest to deploy and manage the cluster. It is known for its simplicity and ability to rapidly stand up a production-ready cluster.
The core philosophy is declarative configuration: you define the desired state in a file, and the tooling's reconciliation loop ensures the cluster converges to that state. This is a non-negotiable practice for managing bare metal Kubernetes at scale.
The Foundational Approach With Kubeadm
For engineers who need to understand and control every component, kubeadm is the foundational tool. It is not a complete automation suite but a command-line utility from the Kubernetes project that bootstraps a minimal, best-practice cluster.
kubeadm handles the most complex tasks, such as generating certificates, initializing the etcd cluster, and configuring the API server. However, it requires you to make key architectural decisions, such as selecting and installing a CNI plugin manually. It is the "build-it-yourself" kit of the Kubernetes world, offering maximum flexibility at the cost of increased operational complexity.
Teams typically do not use kubeadm directly in production. Instead, they wrap it in custom automation scripts (e.g., Bash or Ansible) or integrate it into a larger Infrastructure as Code framework. For a deeper look, our guide on using Terraform with Kubernetes demonstrates how to automate the underlying infrastructure before passing control to a tool like kubeadm.
Lightweight Distributions For The Edge
Not all servers reside in enterprise data centers. For edge computing, IoT, and other resource-constrained environments, a standard Kubernetes distribution is too resource-intensive. Lightweight distributions are specifically engineered for efficiency.
- K3s: Developed by Rancher, K3s is a fully CNCF-certified Kubernetes distribution packaged as a single binary under 100MB. It replaces the resource-heavy
etcdwith an embedded SQLite database (with an option for external etcd) and removes non-essential features, making it ideal for IoT gateways, CI/CD runners, and development environments. - k0s: Marketed as a "zero friction" distribution, k0s is another single-binary solution. It bundles all necessary components and has zero host OS dependencies, simplifying installation and enhancing security. Its clean, minimal foundation makes it an excellent choice for isolated or air-gapped deployments.
Bare Metal Kubernetes Deployment Tool Comparison
Selecting the right deployment tool involves balancing automation, control, and operational complexity. This table summarizes the primary use cases for each approach to guide your technical decision.
| Tool | Primary Method | Best For | Key Feature |
|---|---|---|---|
| Kubespray | Ansible Playbooks | Teams with strong Ansible skills needing high customizability for large, complex clusters. | Extensive configuration options and broad community support. |
| Rancher (RKE) | Declarative YAML | Organizations seeking a streamlined, opinionated path to a production-ready cluster with a focus on ease of use. | Simple cluster.yml configuration and integrated management UI. |
| kubeadm | Command-Line Utility | Engineers who require granular control and want to build a cluster from foundational components. | Provides the core building blocks for bootstrapping a conformant cluster. |
| K3s / K0s | Single Binary | Edge computing, IoT, CI/CD, and resource-constrained environments where a minimal footprint is critical. | Lightweight, fast installation, and low resource consumption. |
The optimal tool is one that aligns with your team's technical capabilities and the specific requirements of your project. Each of these options is battle-tested and capable of deploying a production-grade bare metal cluster.
Implementing Production-Grade Operational Practices
Deploying a bare metal Kubernetes cluster is only the beginning. The primary challenge is maintaining its stability, security, and scalability through day-to-day operations.
Unlike a managed service where the cloud provider handles operational burdens, on bare metal, you are the provider. This means you are responsible for architecting and implementing robust solutions for high availability, upgrades, security, observability, and disaster recovery.
This section provides a technical playbook for building a resilient operational strategy. We will focus on the specific tools and processes required to run a production-grade bare metal Kubernetes environment designed for failure tolerance and simplified management.
Ensuring High Availability and Seamless Upgrades
High availability (HA) in a bare metal cluster begins with the control plane. A failure of the API server or etcd datastore will render the cluster inoperable, even if worker nodes are healthy. For any production system, a multi-master architecture is a strict requirement.
This architecture consists of at least three control plane nodes. The critical component is a stacked or external etcd cluster, typically with three or five members, to maintain quorum and tolerate node failures. This redundancy ensures that if one master node fails or is taken down for maintenance, the remaining nodes maintain cluster operations seamlessly.
Upgrading applications and the cluster itself demands a zero-downtime strategy.
- Rolling Updates: Kubernetes' native deployment strategy is suitable for stateless applications. It incrementally replaces old pods with new ones, ensuring service availability throughout the process.
- Canary Deployments: For critical services, a canary strategy offers a safer, more controlled rollout. Advanced deployment controllers like Argo Rollouts integrate with service meshes (e.g., Istio) or ingress controllers to progressively shift a small percentage of traffic to the new version, allowing for performance monitoring and rapid rollback if anomalies are detected.
In a bare metal environment, you are directly responsible for the entire lifecycle of the control plane and worker nodes. This includes not just Kubernetes version upgrades but also OS-level patching and security updates, which must be performed in a rolling fashion to avoid cluster-wide downtime.
Building a Comprehensive Observability Stack
Without the built-in dashboards of a cloud provider, you must construct your own observability stack from scratch. A complete solution requires three pillars: metrics, logs, and traces, providing a holistic view of cluster health and application performance.
The industry-standard open-source stack includes:
- Prometheus for Metrics: The de facto standard for Kubernetes monitoring. Prometheus scrapes time-series metrics from the control plane, nodes (via
node-exporter), and applications, enabling detailed performance analysis and alerting. - Grafana for Dashboards: Grafana connects to Prometheus as a data source to build powerful, interactive dashboards for visualizing key performance indicators (KPIs) like CPU/memory utilization, API server latency, and custom application metrics.
- Loki for Logs: Designed for operational efficiency, Loki indexes metadata about log streams rather than the full log content. This architecture makes it highly cost-effective for aggregating logs from all pods in a cluster.
- Jaeger for Distributed Tracing: In a microservices architecture, a single request may traverse dozens of services. Jaeger implements distributed tracing to visualize the entire request path, pinpointing performance bottlenecks and debugging cross-service failures.
Hardening Security from the Node Up
Bare metal security is a multi-layered discipline, starting at the physical hardware level. You control the entire stack, so you must implement security controls at every layer, from the host operating system to the pod-to-pod network policies.
A comprehensive security checklist must include:
- Node Hardening: This involves applying mandatory access control (MAC) systems like SELinux or AppArmor to the host OS. Additionally, you must minimize the attack surface by removing unnecessary packages and implementing strict
iptablesornftablesfirewall rules. - Network Policies: By default, Kubernetes allows all pods to communicate with each other. This permissive posture must be replaced with a zero-trust model using
NetworkPolicyresources to explicitly define allowed ingress and egress traffic for each application. - Secrets Management: Never store sensitive data like API keys or database credentials in plain text within manifests. Use a dedicated secrets management solution like HashiCorp Vault, which provides dynamic secrets, encryption-as-a-service, and tight integration with Kubernetes service accounts. Our guide on autoscaling in Kubernetes also offers key insights into dynamically managing your workloads efficiently.
Implementing Reliable Disaster Recovery
Every production cluster requires a tested disaster recovery (DR) plan. Hardware fails, configurations are corrupted, and human error occurs. The ability to recover from a catastrophic failure depends entirely on your backup and restore strategy.
The standard tool for Kubernetes backup and recovery is Velero. Velero provides more than just etcd backups; it captures the entire state of your cluster objects and can integrate with storage providers to create snapshots of your persistent volumes, enabling complete, point-in-time application recovery. For solid data management, it's crucial to prepare for data recovery by understanding different backup strategies like differential vs incremental backups.
A robust DR plan includes:
- Regular, Automated Backups: Configure Velero to perform scheduled backups and store the artifacts in a remote, durable location, such as an S3-compatible object store.
- Stateful Workload Protection: Leverage Velero’s CSI integration to create application-consistent snapshots of your persistent volumes. This ensures data integrity by coordinating the backup with the application's state.
- Periodic Restore Drills: A backup strategy is unproven until a restore has been successfully tested. Regularly conduct DR drills by restoring your cluster to a non-production environment to validate the integrity of your backups and ensure your team is proficient in the recovery procedures.
When to Use Bare Metal Kubernetes
The decision to adopt bare metal Kubernetes is a strategic one, driven by workload requirements and team capabilities. While managed cloud services like GKE or EKS offer unparalleled operational simplicity, certain use cases demand the raw performance that only direct hardware access can provide.
The decision hinges on whether the "virtualization tax"—the performance overhead introduced by the hypervisor—is an acceptable cost for your application.

For organizations operating at the performance frontier, where every microsecond and CPU cycle impacts the bottom line, this choice is critical.
Ideal Workloads for Bare Metal
Bare metal Kubernetes delivers its greatest value when applications are highly sensitive to latency and demand high I/O throughput. Eliminating the hypervisor creates a direct, high-bandwidth path between containers and hardware.
- AI/ML Training and Inference: These workloads require direct, low-latency access to GPUs and high-speed storage. The hypervisor introduces I/O overhead that can significantly slow down model training and increase latency for real-time inference.
- High-Frequency Trading (HFT): In financial markets where trades are executed in microseconds, the additional network latency from virtualization is a competitive disadvantage. HFT platforms require the lowest possible network jitter and latency, which bare metal provides.
- Large-Scale Databases: High-transaction databases and data warehouses benefit immensely from direct access to NVMe storage. Bare metal delivers the highest possible IOPS and lowest latency, ensuring the data tier is never a performance bottleneck.
- Real-Time Data Processing: Stream processing applications, such as those built on Apache Flink or Kafka Streams, cannot tolerate the performance jitter and unpredictable latency that a hypervisor can introduce.
When Managed Cloud Services Are a Better Fit
Conversely, the operational simplicity of managed Kubernetes services is often the more pragmatic choice. If your workloads are not performance-critical, can tolerate minor latency variations, or require rapid and unpredictable scaling, the public cloud offers a superior value proposition.
Startups and teams focused on rapid product delivery often find that the operational overhead of managing bare metal infrastructure is a distraction from their core business objectives.
The core question is this: Does the performance gain from eliminating the hypervisor justify the significant increase in operational responsibility your team must undertake?
Interestingly, the potential for long-term cost savings is making bare metal more accessible. Small and medium enterprises (SMEs) are projected to capture 60.69% of the bare metal cloud market revenue by 2025. This adoption is driven by the lower TCO at scale. For detailed market analysis, Data Bridge Market Research provides excellent insights on the rise of bare metal cloud adoption.
Ultimately, you must perform a thorough technical and business analysis to determine if your team is equipped to manage the entire stack, from physical hardware to the application layer.
Common Questions About Bare Metal Kubernetes
When engineering teams first explore bare metal Kubernetes, a common set of technical questions arises. Moving away from the abstractions of the cloud requires a deeper understanding of the underlying infrastructure.
This section provides direct, practical answers to these frequently asked questions to help clarify the technical realities of a bare metal deployment.
How Do You Handle Service Load Balancing?
This is a primary challenge for teams accustomed to the cloud. In a cloud environment, creating a service of type LoadBalancer automatically provisions a cloud load balancer. On bare metal, this functionality must be implemented manually.
The standard solution is MetalLB. MetalLB is a network load-balancer implementation for bare metal clusters that integrates with standard networking protocols. It can operate in two primary modes:
- Layer 2 Mode: MetalLB responds to ARP requests on the local network for the service's external IP, directing traffic to one of the service's pods.
- BGP Mode: For more advanced routing, MetalLB can establish a BGP session with your physical routers to announce the service's external IP, enabling true load balancing across multiple nodes.
For Layer 7 (HTTP/S) traffic, you still deploy a standard Ingress controller like NGINX or Traefik. MetalLB handles the Layer 4 task of routing external traffic to the Ingress controller pods.
What Is the Real Performance Difference?
The performance difference is significant and measurable. By eliminating the hypervisor, you remove the "virtualization tax," which is the CPU and memory overhead required to manage virtual machines.
This gives applications direct, unimpeded access to physical hardware, which is especially impactful for I/O-bound or network-intensive workloads.
For databases, message queues, and AI/ML training, the performance improvement can range from 10% to over 30% in terms of throughput and reduced latency. The exact gain depends on the specific workload, hardware, and system configuration, but the benefits are substantial.
Is Managing Bare Metal Significantly More Complex?
Yes, the operational burden is substantially higher. Managed services like GKE and EKS abstract away the complexity of the underlying infrastructure. The cloud provider manages the control plane, node provisioning, upgrades, and security patching.
On bare metal, your team assumes full responsibility for:
- Hardware Provisioning: Racking, cabling, and configuring physical servers.
- OS Installation and Hardening: Deploying a base operating system and applying security configurations.
- Network and Storage Configuration: Integrating the cluster with physical network switches and storage arrays.
- Full Kubernetes Lifecycle Management: Installing, upgrading, backing up, and securing the entire Kubernetes stack.
You gain ultimate control and performance in exchange for increased operational complexity, requiring a skilled team with expertise in both Kubernetes and physical infrastructure management.
How Do You Manage Persistent Storage?
Persistent storage for stateful applications on bare metal is managed via the Container Storage Interface (CSI). CSI is a standard API that decouples storage logic from the core Kubernetes code, allowing any storage system to integrate with Kubernetes.
You deploy a CSI driver specific to your storage backend. For direct-attached NVMe drives, you can use a driver like TopoLVM or the Local Path Provisioner to expose local block or file storage to pods. For external SAN or NAS systems, the vendor provides a dedicated CSI driver.
A powerful strategy is to build a software-defined storage layer using a project like Rook-Ceph. Rook deploys and manages a Ceph storage cluster that pools the local disks from your Kubernetes nodes into a single, resilient, distributed storage system. Pods then consume storage via the Ceph CSI driver, gaining enterprise-grade features like replication, snapshots, and erasure coding on commodity hardware.
Managing the complexities of a bare metal Kubernetes environment requires deep expertise. OpsMoon connects you with the top 0.7% of global DevOps engineers who specialize in building and operating high-performance infrastructure. Whether you need an end-to-end project delivery or expert hourly capacity, we provide the talent to accelerate your goals. Start with a free work planning session today at opsmoon.com.
Leave a Reply