
This Docker Compose tutorial provides a hands-on guide to defining and executing multi-container Docker applications. You will learn to manage an entire application stack—including services, networks, and volumes—from a single, declarative docker-compose.yml file. The objective is to make your local development environment portable, consistent, and easily reproducible.
Why Docker Compose Is a Critical Development Tool
If you've ever debugged an issue that "works on my machine," you understand the core problem Docker Compose solves: environment inconsistency.
Modern applications are not monolithic; they are complex ecosystems of interconnected services—a web server, a database, a caching layer, and a message queue. Managing these components individually via separate docker run commands is inefficient, error-prone, and unscalable.
Docker Compose acts as an orchestrator for your containerized application stack. It enables you to define your entire multi-service application in a human-readable YAML file. A single command, docker compose up, instantiates the complete environment in a deterministic state. This consistency is guaranteed across any machine running Docker, from a developer's laptop to a CI/CD runner.
From Inconsistency to Reproducibility
The primary technical advantage of Docker Compose is its ability to create reproducible environments through a declarative configuration. This approach eliminates complex, imperative setup scripts and documentation that quickly becomes outdated.
For development teams, this offers significant technical benefits:
- Rapid Onboarding: New developers can clone a repository and execute
docker compose upto have a full development environment running in minutes. - Elimination of Environment Drift: All team members, including developers and QA engineers, operate with identical service versions and configurations, as defined in the version-controlled
docker-compose.yml. - High-Fidelity Local Environments: Complex production-like architectures can be accurately mimicked on a local machine, improving the quality of development and testing.
Since its introduction, Docker Compose has become a standard component of the modern developer's toolkit. This adoption reflects a broader industry trend. By 2025, overall Docker usage soared to 92% among IT professionals, a 12-point increase from the previous year, highlighting the ubiquity of containerization. You can analyze more statistics on Docker's growth on ByteIota.com.
Docker Compose elevates your application's architecture to a version-controlled artifact. The
docker-compose.ymlfile becomes as critical as your source code, serving as the single source of truth for the entire stack's configuration.
The Role of Docker Compose in the Container Ecosystem
While Docker Compose excels at defining and running multi-container applications, it is primarily designed for single-host environments. For managing containers across a cluster of machines in production, a more robust container orchestrator is required.
To understand this distinction, refer to our guide on the differences between Docker and Kubernetes. Recognizing the specific use case for each tool is fundamental to architecting scalable and maintainable systems.
Before proceeding, let's review the fundamental concepts you will be implementing.
Core Docker Compose Concepts: A Technical Overview
This table provides a technical breakdown of the key directives you will encounter in any docker-compose.yml file.
| Concept | Description | Example Use Case |
|---|---|---|
| Services | A container definition based on a Docker image, including configuration for its runtime behavior (e.g., ports, volumes, networks). Each service runs as one or more containers. | A web service built from a Dockerfile running an Nginx server, or a db service running the postgres:15-alpine image. |
| Volumes | A mechanism for persisting data outside of a container's ephemeral filesystem, managed by the Docker engine. | A named volume postgres_data mounted to /var/lib/postgresql/data to ensure database files survive container restarts. |
| Networks | Creates an isolated Layer 2 bridge network for services, providing DNS resolution between containers using their service names. | An app-network allowing your api service to connect to the db service at the hostname db without exposing the database port externally. |
| Environment Variables | A method for injecting runtime configuration into services, often used for non-sensitive data. | Passing NODE_ENV=development to a Node.js service to enable development-specific features. |
| Secrets | A mechanism for securely managing sensitive data like passwords or tokens, mounted into containers as read-only files in memory (tmpfs). |
Providing a POSTGRES_PASSWORD to a database service without exposing it as an environment variable, accessible at /run/secrets/db_password. |
These five concepts form the foundation of Docker Compose. Mastering their interplay allows you to define virtually any application stack.
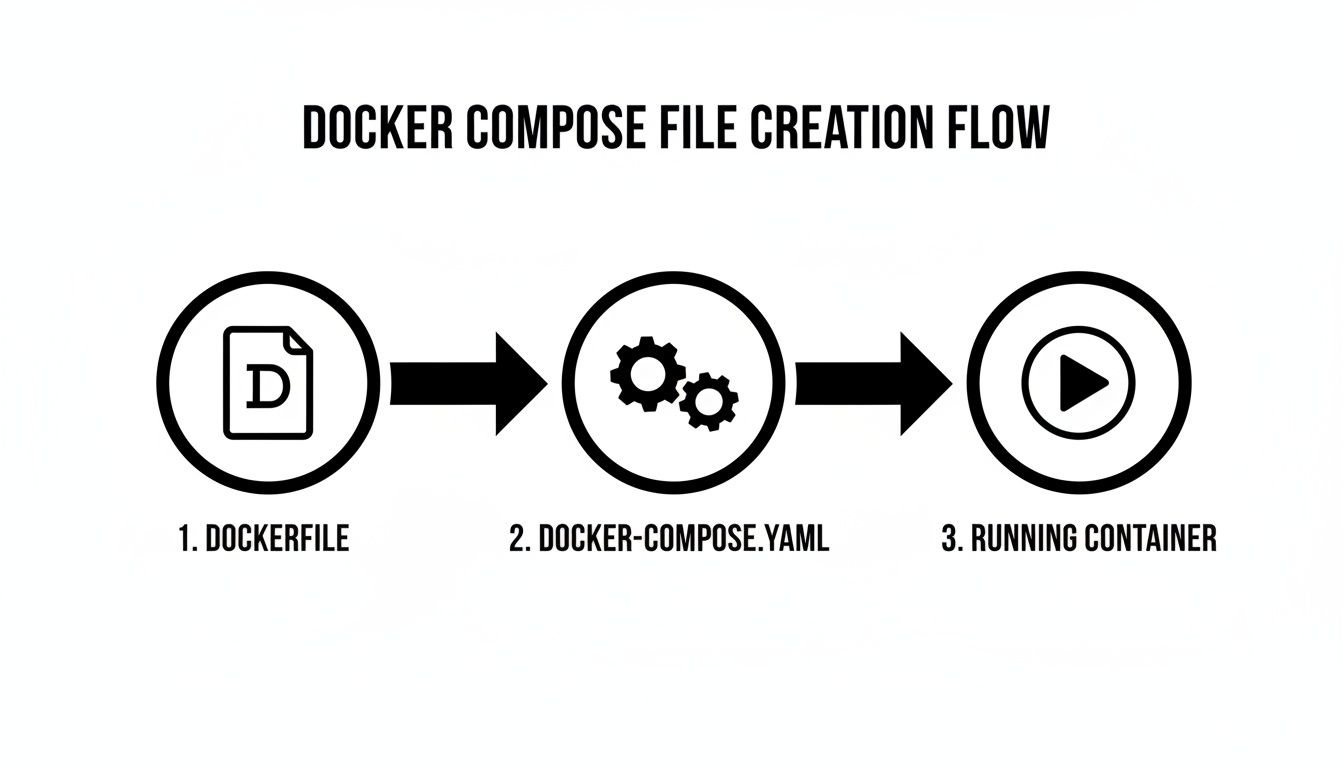
Constructing Your First Docker Compose File
Let's transition from theory to practical application. The most effective way to learn Docker Compose is by writing a docker-compose.yml file. We will begin with a simple yet practical application: a single Node.js web server. This allows us to focus on core syntax and directives.
The docker-compose.yml file is the central artifact. It is a declarative file written in YAML that instructs the Docker daemon on how to configure and run your application's services, networks, and volumes.
Defining Your First Service
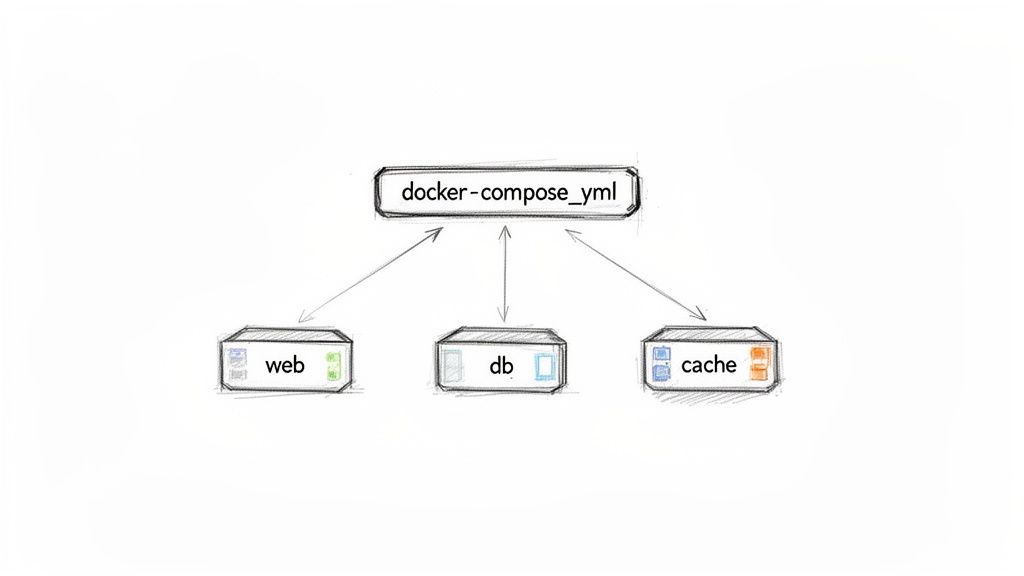
Every Compose file begins with a top-level services key. Under this key, you define each component of your application as a named service. We will create a single service named webapp.
First, establish the required file structure. Create a project directory containing a docker-compose.yml file, a Dockerfile, and a server.js file for our Node.js application.
Here is the complete docker-compose.yml for this initial setup:
# docker-compose.yml
version: '3.8'

services:
  webapp:
    build:
      context: .
    ports:
      - "8000:3000"
    volumes:
      - .:/usr/src/app
This file defines our webapp service and provides Docker with three critical instructions for its execution. If you are new to Docker, our Docker container tutorial for beginners provides essential context on container fundamentals.
A Technical Breakdown of Directives
Let's dissect the YAML file to understand its technical implementation. This is crucial for moving beyond template usage to proficiently authoring your own Compose files.
-
build: context: .: This directive instructs Docker Compose to build a Docker image. Thecontext: .specifies that the build context (the set of files sent to the Docker daemon) is the current directory. Compose will locate aDockerfilein this context and use it to build the image for thewebappservice. -
ports: - "8000:3000": This directive maps a host port to a container port. The format isHOST:CONTAINER. Traffic arriving at port 8000 on the host's network interface will be forwarded to port 3000 inside thewebappcontainer. -
volumes: - .:/usr/src/app: This line establishes a bind mount, a highly effective feature for local development. It maps the current directory (.) on the host machine to the/usr/src/appdirectory inside the container. This means any modifications to source code on the host are immediately reflected within the container's filesystem, enabling live-reloading without rebuilding the image.
Pro Tip: Use bind mounts for source code during development to facilitate rapid iteration. For stateful data like database files, use named volumes. Named volumes are managed by the Docker engine, decoupled from the host filesystem, and are the standard for data persistence.
Building from an Image vs. a Dockerfile
Our example utilizes the build key because we are building a custom image from source code. An alternative and common approach is using the image key.
The image key is used to specify a pre-built image from a container registry like Docker Hub. For example, to run a standard PostgreSQL database, you would not build it from a Dockerfile. Instead, you would instruct Compose to pull the official image, such as image: postgres:15.
| Directive | Use Case | Example |
|---|---|---|
build |
When a Dockerfile is present in the specified context to build a custom application image. |
build: . |
image |
When using a pre-built, standard image from a registry for services like databases, caches, or message brokers. | image: redis:alpine |
Understanding this distinction is fundamental. Most docker-compose.yml files use a combination of both: build for custom application services and image for third-party dependencies. With this foundation, you are prepared to orchestrate more complex, multi-service environments.
Orchestrating a Realistic Multi-Service Stack
Transitioning from a single service to a full-stack application is where Docker Compose demonstrates its full capabilities. Here, you will see how to orchestrate multiple interdependent services into a cohesive environment that mirrors a production setup. We will extend our Node.js application by adding two common backend services: a PostgreSQL database and a Redis cache.
The process involves defining the requirements for each service (e.g., a Dockerfile for the application, pre-built images for the database and cache) and then declaratively defining their relationships and configurations in the docker-compose.yml file.
The docker-compose.yml serves as the master blueprint, enabling the orchestration of individual components into a fully functional application with a single command.
Defining Service Dependencies
In a multi-service architecture, startup order is critical. An application service cannot connect to a database that has not yet started. This common race condition will cause the application to fail on startup.
Docker Compose provides the depends_on directive to manage this. This directive explicitly defines the startup order, ensuring that dependency services are started before dependent services.
Let's modify our webapp service to wait for the db and cache services to start first.
# In docker-compose.yml under the webapp service
    depends_on:
      - db
      - cache
This configuration ensures the db and cache containers are created and started before the webapp container is started. Note that depends_on only waits for the container to start, not for the application process inside it (e.g., the PostgreSQL server) to be fully initialized and ready to accept connections. For robust startup sequences, your application code should implement a connection retry mechanism with exponential backoff.
Creating a Custom Network for Secure Communication
By default, Docker Compose places all services on a single default network. A superior practice is to define a custom "bridge" network. This provides better network isolation and organization.
The key technical benefit is the embedded DNS server that Docker provides on user-defined networks. This allows containers to resolve and communicate with each other using their service names as hostnames. Your webapp can connect to the database simply by targeting the hostname db, eliminating the need to manage internal IP addresses.
Furthermore, this allows you to avoid exposing the database port (5432) to the host machine, a significant security improvement. Communication is restricted to services on the custom network.
Here is how you define a top-level network and attach services to it:
# At the bottom of docker-compose.yml
networks:
  app-network:
    driver: bridge

# In each service definition
    networks:
      - app-network
Now, the webapp, db, and cache services can communicate securely over the isolated app-network. For a deeper dive into managing interconnected systems, this guide on what is process orchestration offers valuable insights.
Managing Configuration with Environment Files
Hardcoding secrets like database passwords directly into docker-compose.yml is a critical security vulnerability. This file is typically committed to version control, which would expose credentials.
The standard practice for local development is to use an environment file, conventionally named .env. Docker Compose automatically detects and loads variables from a .env file in the project's root directory, making them available for substitution in your docker-compose.yml.
Create a .env file in your project root with your database credentials:
# .env file
POSTGRES_USER=myuser
POSTGRES_PASSWORD=mypassword
POSTGRES_DB=mydatabase
CRITICAL SECURITY NOTE: Always add the
.envfile to your project's.gitignorefile. This is the single most important step to prevent accidental commitment of secrets to your repository.
With the .env file in place, you can reference these variables within your docker-compose.yml.
Putting It All Together: A Full Stack Example
Let's integrate these concepts into a complete docker-compose.yml for our full-stack application. This file defines our Node.js web app, a PostgreSQL 15 database, and a Redis cache, all connected on a secure network and configured using environment variables.
# docker-compose.yml
version: '3.8'

services:
  webapp:
    build: .
    ports:
      - "8000:3000"
    volumes:
      - .:/usr/src/app
    networks:
      - app-network
    depends_on:
      - db
      - cache
    environment:
      - DATABASE_URL=postgres://${POSTGRES_USER}:${POSTGRES_PASSWORD}@db:5432/${POSTGRES_DB}
      - REDIS_URL=redis://cache:6379

  db:
    image: postgres:15-alpine
    restart: always
    environment:
      - POSTGRES_USER=${POSTGRES_USER}
      - POSTGRES_PASSWORD=${POSTGRES_PASSWORD}
      - POSTGRES_DB=${POSTGRES_DB}
    volumes:
      - postgres_data:/var/lib/postgresql/data
    networks:
      - app-network

  cache:
    image: redis:7-alpine
    restart: always
    networks:
      - app-network

volumes:
  postgres_data:

networks:
  app-network:
    driver: bridge
With this single file, you have declaratively defined a sophisticated, multi-service application. Executing docker compose up will trigger a sequence of actions: building the app image, pulling the database and cache images, creating a persistent volume, setting up a private network, and launching all three services in the correct order.
This capability to reliably define and reproduce complex environments is why Docker Compose is a cornerstone of modern development. This consistency is vital, as 64% of developers shifted to non-local environments in 2025, a significant increase from 36% in 2024. Compose ensures that "it works on my machine" translates to any Docker-enabled environment.
Mastering Data Persistence and Configuration
While stateless containers offer simplicity, any application requiring data persistence—user sessions, database records, file uploads—must address storage. Managing how and where your application stores data is a critical aspect of a robust Docker Compose configuration. Equally important is the secure and flexible management of configuration, especially sensitive data like API keys and credentials.

Let's explore the technical details of managing storage and configuration to ensure your application is both durable and secure.
Bind Mounts vs. Named Volumes
Docker provides two primary mechanisms for data persistence: bind mounts and named volumes. While they may appear similar, their use cases are distinct, and selecting the appropriate one is crucial for a reliable system.
A bind mount maps a file or directory on the host machine directly into a container's filesystem. This is what we implemented earlier to map our source code. It is ideal for development, as changes to host files are immediately reflected inside the container, facilitating live-reloading.
# A typical bind mount for development source code
services:
  webapp:
    volumes:
      - .:/usr/src/app
However, for application data, bind mounts are not recommended. They create a tight coupling to the host's filesystem structure, making the configuration less portable. Host filesystem permissions can also introduce complexities if the user inside the container (UID/GID) lacks the necessary permissions for the host path.
This is where named volumes excel. A named volume is a data volume managed entirely by the Docker engine. You provide a name, and Docker handles the storage allocation on the host, typically within a dedicated Docker-managed directory (e.g., /var/lib/docker/volumes/).
Named volumes are the industry standard for production-grade data persistence. They decouple application data from the host's filesystem, enhancing portability, security, and ease of management (e.g., backup, restore, migration). They are the correct choice for databases, user-generated content, and any other critical stateful data.
Here is the correct implementation for a PostgreSQL database using a named volume:
# Using a named volume for persistent database storage
services:
  db:
    image: postgres:15
    volumes:
      - postgres_data:/var/lib/postgresql/data

volumes:
  postgres_data:
By defining postgres_data under the top-level volumes key, you delegate its management to Docker. The data within this volume will persist even if the db container is removed with docker compose down. When a new container is started, Docker reattaches the existing volume, and the database resumes with its data intact.
Advanced Configuration Management
Hardcoding configuration in docker-compose.yml is an anti-pattern. A robust Docker Compose workflow must accommodate different environments (development, staging, production) without configuration duplication.
The .env file is the standard method for local development. As demonstrated, Docker Compose automatically loads variables from a .env file in the project root. This allows each developer to maintain their own local configuration without committing sensitive information to version control.
The prevalence of Docker Compose is unsurprising given the dominance of containers. Stack Overflow's 2025 survey reported a 17-point jump in Docker usage to 71.1%, with a strong admiration rating of 63.6%. With overall IT adoption reaching 92%, tools like Compose are essential for managing modern stacks. A multi-service application (e.g., Postgres, Redis, Python app) can be instantiated with a simple docker compose build && docker compose up. You can read the full 2025 application development report for more on these trends.
Environment-Specific Overrides
For distinct environments like staging or production, creating entirely separate docker-compose.yml files leads to code duplication and maintenance overhead.
A cleaner, more scalable solution is using override files. Docker Compose is designed to merge configurations from multiple files. By default, it looks for both docker-compose.yml and an optional docker-compose.override.yml. This allows you to define a base configuration and then layer environment-specific modifications on top.
For example, a production environment might require different restart policies and the use of Docker Secrets.
-
docker-compose.yml(Base Configuration)- Defines all services, builds, and networks.
- Configured for local development defaults.
-
docker-compose.override.yml(Local Development Override – Optional)- Adds bind mounts for source code (
.:/usr/src/app). - Exposes ports to the host for local access (
ports: - "8000:3000").
- Adds bind mounts for source code (
-
docker-compose.prod.yml(Production Override)- Removes development-only settings (e.g., bind mounts).
- Adds
restart: alwayspolicies for resilience. - Configures logging drivers (e.g.,
json-file,syslog). - Integrates Docker Secrets instead of environment variables.
To launch the production configuration, you specify the files to merge:docker compose -f docker-compose.yml -f docker-compose.prod.yml up -d
This layered approach maintains a DRY (Don't Repeat Yourself) configuration, making environment management systematic and less error-prone.
For highly sensitive production data, you should graduate from environment variables to Docker Secrets. Secrets are managed by the Docker engine and are securely mounted into the container as files in a tmpfs (in-memory) filesystem at /run/secrets/. This prevents them from being exposed via container inspection.
This combination—named volumes for data, .env for local config, override files for environments, and secrets for production—provides a complete, secure, and flexible configuration management toolkit.
Scaling Services and Preparing for Production
A functional multi-container application on a local machine is a significant achievement, but production workloads introduce requirements for scalability, load balancing, and resilience. This section explores how to bridge the gap between a development setup and a more production-ready configuration.
While Docker Compose is primarily a development tool, it includes features that allow for simulating and even running simple, single-host production environments.
Scaling Services Horizontally
As traffic to a web or API service increases, a single container can become a performance bottleneck. The standard solution is horizontal scaling: running multiple identical instances of a service to distribute the workload. Docker Compose facilitates this with the --scale flag.
To run three instances of the webapp service, execute the following command:
docker compose up -d --scale webapp=3
Compose will start three identical webapp containers. This immediately presents a new problem: how to distribute incoming traffic evenly across these three instances. This requires a reverse proxy.
Implementing a Reverse Proxy for Load Balancing
A reverse proxy acts as a traffic manager for your application. It sits in front of your service containers, intercepts all incoming requests, and routes them to available downstream instances. Nginx is a high-performance, industry-standard choice for this role. By adding an Nginx service to our docker-compose.yml, we can implement an effective load balancer.
In this architecture, the Nginx service would be the only service exposing a port (e.g., port 80 or 443) to the host. It then proxies requests internally to the webapp service. Docker's embedded DNS resolves the service name webapp to the internal IP addresses of all three running containers, and Nginx automatically load balances requests between them using a round-robin algorithm by default.
A reverse proxy is a mandatory component for most production deployments. Beyond load balancing, it can handle SSL/TLS termination, serve static assets from a cache, apply rate limiting, and provide an additional security layer for your application services.
Ensuring Service Resilience with Healthchecks
In a production environment, you must handle container failures gracefully. Traffic should not be routed to a container that has crashed or become unresponsive. Docker provides a built-in mechanism for this: healthchecks.
A healthcheck is a command that Docker executes periodically inside a container to verify its operational status. If the check fails a specified number of times, Docker marks the container as "unhealthy." Combined with a restart policy, this creates a self-healing system where Docker will automatically restart unhealthy containers.
Here is an example of a healthcheck added to our webapp service, assuming it exposes a /health endpoint that returns an HTTP 200 OK status:
services:
  webapp:
    # ... other configurations ...
    healthcheck:
      test: ["CMD", "curl", "-f", "http://localhost:3000/health"]
      interval: 30s
      timeout: 10s
      retries: 3
      start_period: 40s
    restart: always
This configuration instructs Docker to:
test: Executecurl -f http://localhost:3000/healthevery 30 seconds. The-fflag causes curl to exit with a non-zero status code on HTTP failures (4xx, 5xx).timeout: Consider the check failed if it takes longer than 10 seconds.retries: Mark the container as unhealthy after 3 consecutive failures.start_period: Grace period of 40 seconds after container start before initiating health checks, allowing the application time to initialize.
With a restart: always policy, this setup ensures that failing instances are automatically replaced. To formalize such resilience patterns, teams often adopt continuous delivery and DevOps strategies.
From Compose to Kubernetes: When to Graduate
Docker Compose is highly effective for local development, CI/CD, and single-host production deployments. However, as application scale and complexity grow, a more powerful container orchestrator like Kubernetes becomes necessary.
Consider migrating when you require features such as:
- Multi-host clustering: Managing containers distributed across a fleet of servers for high availability and resource pooling.
- Automated scaling (autoscaling): Automatically adjusting the number of running containers based on metrics like CPU utilization or request count.
- Advanced networking policies: Implementing granular rules for service-to-service communication (e.g., network segmentation, access control).
- Zero-downtime rolling updates: Executing sophisticated, automated deployment strategies to update services without interrupting availability.
Your docker-compose.yml file serves as an excellent blueprint for a Kubernetes migration. The core concepts of services, volumes, and networks translate directly to Kubernetes objects like Deployments, PersistentVolumes, and Services, significantly simplifying the transition process. As you scale, remember to secure your production environment by adhering to Docker security best practices.
Answering Your Docker Compose Questions
This section addresses common technical questions and issues encountered when integrating Docker Compose into a development workflow, providing actionable solutions.
What Is the Technical Difference Between Compose V1 and V2?
The primary difference between docker-compose (V1) and docker compose (V2) is their implementation and integration with the Docker ecosystem.
- V1 (
docker-compose) was a standalone binary written in Python, requiring separate installation and management viapip. - V2 (
docker compose) is a complete rewrite in Go, integrated directly into the Docker CLI as a plugin. It is included with Docker Desktop and modern Docker Engine installations. The command is now part of the maindockerbinary (docker composeinstead ofdocker-compose).
V2 offers improved performance, better integration with other Docker commands, and is the actively developed version. The YAML specification is almost entirely backward-compatible. For all new projects, you should exclusively use the docker compose (V2) command.
How Should I Handle Secrets Without Committing Them to Git?
Committing secrets to your docker-compose.yml file is a severe security misstep. The strategy for managing sensitive data differs between local development and production.
For local development, the standard is the .env file. Docker Compose automatically sources a .env file from the project root, substituting variables into the docker-compose.yml file. The most critical step is to add .env to your .gitignore file to prevent accidental commits.
For production, Docker Secrets are the recommended approach. Secrets are managed by the Docker engine and are mounted into containers as read-only files in an in-memory tmpfs at /run/secrets/. This is more secure than environment variables, which can be inadvertently exposed through logging or container introspection (docker inspect).
Is Docker Compose Suitable for Production Use?
Yes, with the significant caveat that it is designed for single-host deployments. Many applications, from small projects to commercial SaaS products, run successfully in production using Docker Compose on a single server. It provides an excellent, declarative way to manage the application stack.
Docker Compose's limitations become apparent when you need to scale beyond a single machine. It lacks native support for multi-node clustering, cross-host networking, automated node failure recovery, and advanced autoscaling, which are the domain of full-scale orchestrators like Kubernetes.
Use Docker Compose for local development, CI/CD pipelines, and single-host production deployments. When high availability, fault tolerance across multiple nodes, or dynamic scaling are required, use your docker-compose.yml as a blueprint for migrating to a cluster orchestrator.
My Container Fails to Start. How Do I Debug It?
When a container exits immediately after docker compose up, you can use several diagnostic commands.
First, inspect the logs for the specific service.
docker compose logs <service_name>
This command streams the stdout and stderr from the container. In most cases, an application error message or stack trace will be present here, pinpointing the issue.
If the container exits too quickly to generate logs, check the container status and exit code.
docker compose ps -a
This lists all containers, including stopped ones. An exit code other than 0 indicates an error. For a more interactive approach, you can override the container's entrypoint to gain shell access.
docker compose run --entrypoint /bin/sh <service_name>
This starts a new container using the service's configuration but replaces the default command with a shell (/bin/sh or /bin/bash). From inside the container, you can inspect the filesystem, check file permissions, test network connectivity, and manually execute the application's startup command to observe the failure directly.
Transitioning from a local Docker Compose environment to a scalable, production-grade architecture involves complex challenges in infrastructure, automation, and security. When you are ready to scale beyond a single host or require expertise in building a robust DevOps pipeline, OpsMoon can help. We connect you with elite engineers to design and implement the right architecture for your needs. Schedule a free work planning session and let's architect your path to production.
Leave a Reply