Pairing Terraform with Kubernetes provides a single, declarative workflow to manage your entire cloud-native stack—from the underlying cloud infrastructure to the containerized applications running inside your clusters. This approach codifies your VPCs, managed Kubernetes services (like EKS or GKE), application Deployments, and Services, creating a unified, version-controlled, and fully automated system from the ground up.
Why Use Terraform for Kubernetes Management
Using Terraform with Kubernetes solves a fundamental challenge in cloud-native environments: managing infrastructure complexity through a single, consistent interface. Kubernetes excels at orchestrating containers but remains agnostic to the infrastructure it runs on. It cannot provision the virtual machines, networking, or managed services it requires. This is precisely where Terraform's capabilities as a multi-cloud infrastructure provisioning tool come into play.
By adopting a unified Infrastructure as Code (IaC) approach, you establish a single source of truth for your entire stack. This synergy is critical in microservices architectures where infrastructure complexity can escalate rapidly. Blending Terraform’s declarative syntax with Kubernetes's orchestration capabilities streamlines automation across provisioning, CI/CD pipelines, and dynamic resource scaling.
Recent DevOps community analyses underscore the value of this integration. To explore the data, you can discover insights on the effectiveness of Terraform and Kubernetes in DevOps.
Terraform vs. Kubernetes Native Tooling: A Technical Comparison
| Task | Terraform Approach | Kubernetes Native Tooling Approach (kubectl) |
|---|---|---|
| Cluster Provisioning | Defines and provisions entire clusters (e.g., EKS, GKE, AKS) and their dependencies like VPCs, subnets, and IAM roles using cloud provider resources. | Not applicable. kubectl and manifests assume a cluster already exists and is configured in ~/.kube/config. |
| Node Pool Management | Manages node pools as distinct resources (aws_eks_node_group), allowing for declarative configuration of instance types, taints, labels, and autoscaling policies. |
Requires cloud provider-specific tooling (eksctl, gcloud container node-pools) or manual actions in the cloud console. |
| Application Deployment | Deploys Kubernetes resources (Deployments, Services, etc.) using the kubernetes or helm provider, mapping HCL to Kubernetes API objects. |
The primary function of kubectl apply -f <manifest.yaml>. Relies on static YAML or JSON files. |
| Secret Management | Integrates with external secret stores like HashiCorp Vault or AWS Secrets Manager via data sources to dynamically inject secrets at runtime. | Uses native Secret objects, which are only Base64 encoded and are not encrypted at rest by default. Requires additional tooling for secure management. |
| Lifecycle Management | Manages the full lifecycle of both infrastructure and in-cluster resources with a single terraform apply and terraform destroy. Dependencies are explicitly graphed. |
Manages only the lifecycle of in-cluster resources. Deleting a cluster requires separate, out-of-band actions. |
| Drift Detection | The terraform plan command explicitly shows any delta between the desired state (code) and the actual state (live infrastructure). |
Lacks a built-in mechanism. Manual checks like kubectl diff -f <manifest.yaml> can be used but are not integrated into a stateful workflow. |
This comparison highlights how Terraform manages the "outside-the-cluster" infrastructure, while Kubernetes-native tools manage the "inside." Using them together provides comprehensive, end-to-end automation.
Unifying Infrastructure and Application Lifecycles
One of the most significant advantages is managing the complete lifecycle of an application and its environment cohesively. Consider deploying a new microservice that requires a dedicated database, specific IAM roles for cloud API access, and a custom-configured node pool. A traditional approach involves multiple tools and manual steps, increasing the risk of misconfiguration.
With Terraform and Kubernetes, you define all these components in a single, coherent configuration.
A single terraform apply command can execute the following sequence:
- Provision an RDS database instance on AWS using the
aws_db_instanceresource. - Create the necessary IAM policies and roles using
aws_iam_policyandaws_iam_role. - Deploy the Kubernetes
Namespace,Deployment, andServicefor the microservice using thekubernetesprovider.
This unified workflow eliminates coordination overhead and dramatically reduces the risk of configuration mismatches between infrastructure and application layers.
Key Takeaway: The core value of using Terraform for Kubernetes is creating a single, version-controlled definition for both the cluster's foundational infrastructure and the applications it hosts. This simplifies dependency management and guarantees environmental consistency.
Preventing Configuration Drift with State Management
While Kubernetes manifests define the desired state, they don't prevent "configuration drift"—the gradual divergence between your live environment and your version-controlled code. An engineer might use kubectl patch to apply a hotfix, a change that is now untracked by your Git repository.
Terraform's state management directly addresses this. The terraform.tfstate file serves as a detailed map of all managed resources. Before applying any changes, the terraform plan command performs a crucial comparison: it checks your HCL code against the state file and the live infrastructure.
This process instantly flags any drift, forcing a decision: either codify the manual change into your HCL or allow Terraform to revert it. This proactive drift detection is essential for maintaining reliability and auditability, particularly in regulated environments.
Getting Your Local Environment Ready for IaC
Before writing HCL, a correctly configured local environment is non-negotiable. This foundation ensures your machine can authenticate and communicate with both your cloud provider and your target Kubernetes cluster seamlessly. A misconfigured environment is a common source of cryptic authentication errors and unpredictable behavior.
The Essential Tooling
To begin, you need three core command-line interface (CLI) tools installed and available in your system's PATH.
- Terraform CLI: This is the execution engine that parses HCL, builds a dependency graph, and interacts with provider APIs to manage infrastructure. Always install it from the official HashiCorp website to ensure you have the latest stable version.
- kubectl: The standard Kubernetes CLI is indispensable for inspecting cluster state, fetching logs, and debugging resources post-deployment. Terraform provisions, but
kubectlis how you observe. - Cloud Provider CLI: You need the specific CLI for your cloud to handle authentication. This will be the AWS CLI, Azure CLI (
az), or Google Cloud SDK (gcloud). Terraform providers are designed to automatically leverage the authentication context established by these tools.
After installation, authenticate with your cloud provider (e.g., run aws configure or gcloud auth login). This action creates the credential files that Terraform will automatically detect and use. For a deeper dive into these fundamentals, our Terraform tutorial for beginners is an excellent resource.
Pinning Your Terraform Providers
With the CLIs configured, the next critical step is defining and pinning your Terraform providers. Providers are the plugins that enable Terraform to communicate with a specific API, such as the Kubernetes API server or Helm.
Pin your provider versions. This is a fundamental best practice that ensures deterministic builds. It guarantees that every team member running terraform init will download the exact same provider version, eliminating "it works on my machine" issues caused by breaking changes in provider updates.
terraform {
  required_providers {
    kubernetes = {
      source  = "hashicorp/kubernetes"
      version = "~> 2.23.0" # Allows patch updates but locks the minor version
    }
    helm = {
      source  = "hashicorp/helm"
      version = "~> 2.11.0"
    }
  }
}
This required_providers block makes your configuration portable and your builds reproducible—a critical requirement for reliable CI/CD pipelines.
Don't Hardcode Credentials—Use Dynamic Authentication
Hardcoding cluster credentials in your Terraform configuration is a major security anti-pattern. The correct approach is to configure the kubernetes provider to source its credentials dynamically, often from a data source that references a cluster created earlier in the same apply process or by another configuration.
For an Amazon EKS cluster, the configuration should look like this:
data "aws_eks_cluster" "cluster" {
  name = module.eks.cluster_id
}

data "aws_eks_cluster_auth" "cluster" {
  name = module.eks.cluster_id
}

provider "kubernetes" {
  host                   = data.aws_eks_cluster.cluster.endpoint
  cluster_ca_certificate = base64decode(data.aws_eks_cluster.cluster.certificate_authority.0.data)
  token                  = data.aws_eks_cluster_auth.cluster.token
}
This configuration tells the Kubernetes provider to fetch its connection details directly from the aws_eks_cluster data source. This elegantly solves the "chicken-and-egg" problem where the provider needs access to a cluster that Terraform is creating. The key is to separate cluster creation from in-cluster resource management into distinct Terraform configurations or modules.
For local development, using a
kubeconfigfile generated by your cloud CLI is acceptable. However, in a CI/CD environment, always use short-lived credentials obtained via mechanisms like IAM Roles for Service Accounts (IRSA) on EKS or Workload Identity on GKE to avoid storing long-lived secrets.
Provisioning a Production-Ready Kubernetes Cluster
It's time to translate theory into practice by building a production-grade managed Kubernetes cluster with Terraform. The objective is not just to create a cluster but to define a modular, reusable configuration that can consistently deploy environments for development, staging, and production.
A resilient cluster begins with a robust network foundation. Before defining the Kubernetes control plane, you must provision a Virtual Private Cloud (VPC), logically segmented subnets (public and private), and restrictive security groups. This ensures the cluster has a secure, isolated environment from inception.
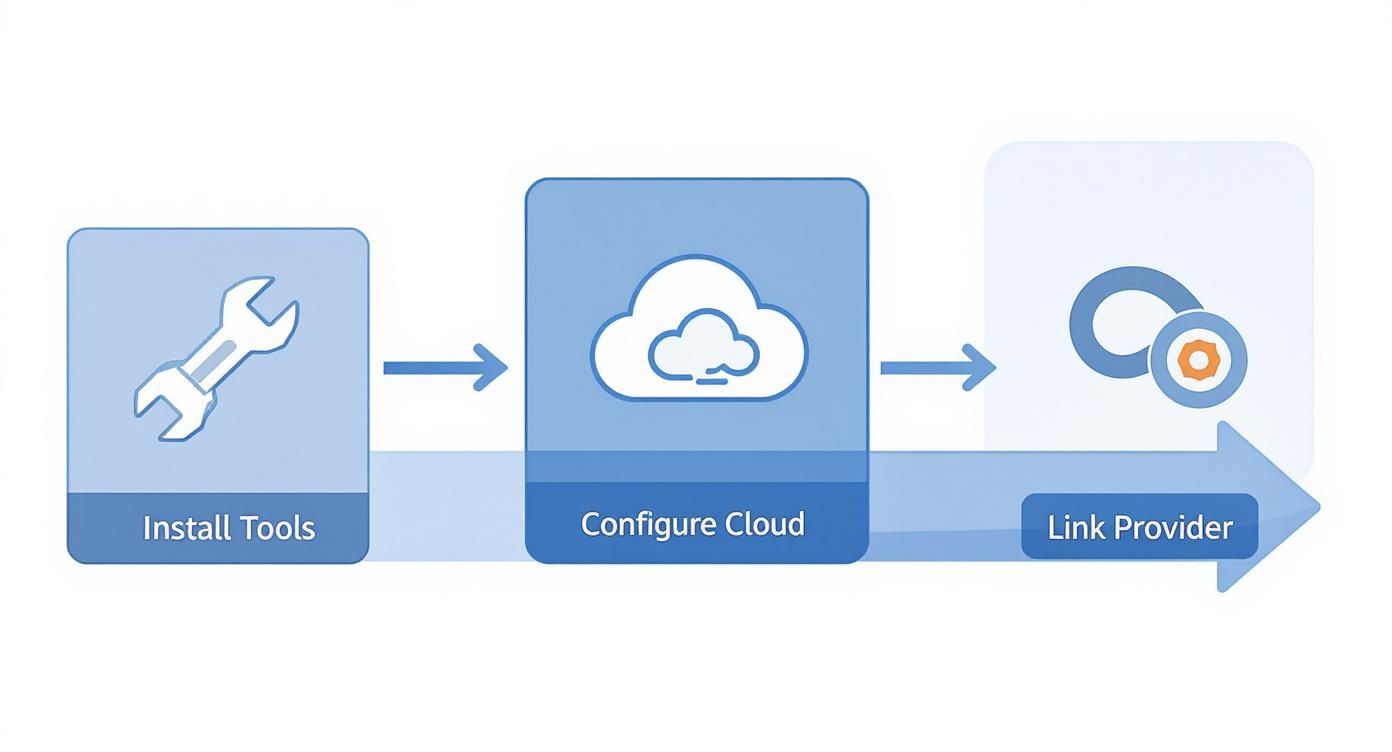
This diagram emphasizes a critical workflow: first, configure tooling and authentication; second, connect Terraform to your cloud provider's API; and only then, begin provisioning resources.
Building the Network Foundation
First, we define the networking infrastructure. For an AWS environment, this involves using resources like aws_vpc and aws_subnet to create the foundational components.
resource "aws_vpc" "main" {
  cidr_block           = "10.0.0.0/16"
  enable_dns_support   = true
  enable_dns_hostnames = true

  tags = {
    Name = "production-vpc"
  }
}

resource "aws_subnet" "private_a" {
  vpc_id            = aws_vpc.main.id
  cidr_block        = "10.0.1.0/24"
  availability_zone = "us-east-1a"

  tags = {
    "kubernetes.io/cluster/production-cluster" = "shared"
    "kubernetes.io/role/internal-elb"          = "1"
    Name                                       = "private-subnet-a"
  }
}

resource "aws_subnet" "private_b" {
  vpc_id            = aws_vpc.main.id
  cidr_block        = "10.0.2.0/24"
  availability_zone = "us-east-1b"

  tags = {
    "kubernetes.io/cluster/production-cluster" = "shared"
    "kubernetes.io/role/internal-elb"          = "1"
    Name                                       = "private-subnet-b"
  }
}
Note the specific tags applied to the subnets. These are required by the Kubernetes AWS cloud provider to discover resources for creating internal LoadBalancers.
A crucial best practice is to manage this network infrastructure in a separate Terraform state. This decouples the network's lifecycle from the cluster's, allowing independent updates and reducing the "blast radius" of any changes.
Configuring the Control Plane and Node Groups
With the network in place, we can define the Kubernetes control plane and its worker nodes. Using a high-level, community-vetted module like the official terraform-aws-modules/eks/aws is highly recommended. It abstracts away significant complexity, allowing you to focus on configuration rather than implementation details.
In the module block, you specify the desired Kubernetes version, reference the subnets created previously, and define your node groups with specific instance types, disk sizes, and autoscaling policies.
module "eks" {
  source  = "terraform-aws-modules/eks/aws"
  version = "~> 19.0"

  cluster_name    = var.cluster_name
  cluster_version = "1.28"

  vpc_id     = aws_vpc.main.id
  subnet_ids = [aws_subnet.private_a.id, aws_subnet.private_b.id]

  eks_managed_node_groups = {
    general_purpose = {
      min_size     = 2
      max_size     = 5
      instance_types = ["t3.medium"]

      # For production, consider Spot instances for cost savings
      # capacity_type = "SPOT"
    }
  }
}
Using variables like var.cluster_name makes the configuration reusable. A new environment can be provisioned simply by providing a different variable file (.tfvars), without modifying the core logic.
Pro Tip: Strictly separate your cluster infrastructure (VPC, EKS Control Plane) from your in-cluster application manifests (Deployments, Services). This separation of concerns simplifies management and prevents complex dependency chains. To explore other tools, see our comparison of https://opsmoon.com/blog/kubernetes-cluster-management-tools.
Exporting Critical Cluster Data
Once the cluster is provisioned, you need programmatic access to its connection details. This is where Terraform outputs are essential. Configure your module to export key information like the cluster endpoint and certificate authority data.
output "cluster_endpoint" {
  description = "The endpoint for your EKS Kubernetes API."
  value       = module.eks.cluster_endpoint
}

output "cluster_certificate_authority_data" {
  description = "Base64 encoded certificate data required to communicate with the cluster."
  value       = module.eks.cluster_certificate_authority_data
}
These outputs can be consumed by other Terraform configurations (using the terraform_remote_state data source), CI/CD pipelines, or scripts to configure local kubectl access, enabling a fully automated workflow.
Kubernetes is the de facto standard for container orchestration. The Cloud Native Computing Foundation (CNCF) reports a 96% adoption rate among organizations. With an estimated 5.6 million global users—representing 31% of all backend developers—its dominance is clear. As you codify your cluster with Terraform, security must be integral. A robust guide to remote cybersecurity provides a solid framework for securing infrastructure from the code up.
Managing In-Cluster Resources With Terraform
With a production-grade Kubernetes cluster provisioned, the focus shifts to deploying and managing applications within it. Using Terraform with Kubernetes for this layer ensures your entire stack, from the virtual network to the application manifest, is managed as a single, cohesive unit.
Terraform’s kubernetes and helm providers are the bridge to the Kubernetes API, allowing you to define Deployments, Services, and complex Helm chart releases declaratively in HCL. This closes the loop, achieving true end-to-end IaC.
Defining Core Resources With The Kubernetes Provider
The most direct method for managing in-cluster resources is the kubernetes provider. It provides HCL resources that map one-to-one with core Kubernetes API objects like kubernetes_namespace, kubernetes_deployment, and kubernetes_service.
Let's walk through a technical example of deploying a simple Nginx application. First, we create a dedicated namespace for organizational and security isolation.
resource "kubernetes_namespace" "nginx_app" {
  metadata {
    name = "nginx-production"
    labels = {
      "managed-by" = "terraform"
    }
  }
}
Next, we define the Deployment. Note the explicit dependency on the namespace via kubernetes_namespace.nginx_app.metadata[0].name. This tells Terraform to create the namespace before attempting to create the deployment within it.
resource "kubernetes_deployment" "nginx" {
  metadata {
    name      = "nginx-deployment"
    namespace = kubernetes_namespace.nginx_app.metadata[0].name
  }

  spec {
    replicas = 3

    selector {
      match_labels = {
        app = "nginx"
      }
    }

    template {
      metadata {
        labels = {
          app = "nginx"
        }
      }

      spec {
        container {
          image = "nginx:1.21.6"
          name  = "nginx"

          port {
            container_port = 80
          }

          resources {
            limits = {
              cpu    = "0.5"
              memory = "512Mi"
            }
            requests = {
              cpu    = "250m"
              memory = "256Mi"
            }
          }
        }
      }
    }
  }
}
Finally, to expose the Nginx deployment, we define a Service of type LoadBalancer.
resource "kubernetes_service" "nginx" {
  metadata {
    name      = "nginx-service"
    namespace = kubernetes_namespace.nginx_app.metadata[0].name
  }
  spec {
    selector = {
      app = kubernetes_deployment.nginx.spec[0].template[0].metadata[0].labels.app
    }
    port {
      port        = 80
      target_port = 80
      protocol    = "TCP"
    }
    type = "LoadBalancer"
  }
}
This resource-by-resource approach provides fine-grained control over every attribute of your Kubernetes objects, making it ideal for managing custom applications and foundational services.
Deploying Packaged Applications With The Helm Provider
While the kubernetes provider offers precision, it becomes verbose for complex applications like Prometheus or Istio, which consist of dozens of interconnected resources. For such scenarios, the helm provider is a more efficient tool. It allows you to deploy entire pre-packaged applications, known as Helm charts, declaratively.
Here is an example of deploying the Prometheus monitoring stack from its community repository:
resource "helm_release" "prometheus" {
  name       = "prometheus"
  repository = "https://prometheus-community.github.io/helm-charts"
  chart      = "prometheus"
  namespace  = "monitoring"
  create_namespace = true
  version    = "15.0.0" # Pin the chart version for reproducibility

  # Override default values from the chart's values.yaml
  values = [
    yamlencode({
      alertmanager = {
        persistentVolume = { enabled = false }
      }
      server = {
        persistentVolume = { enabled = false }
      }
    })
  ]
}
The power lies in the values block, which allows you to override the chart's default values.yaml directly in HCL using the yamlencode function. This enables deep customization without forking the chart or managing separate YAML files.
Choosing Your Deployment Method
The choice between the kubernetes and helm provider depends on the use case. A robust strategy often involves using both.
| Criteria | Kubernetes Provider | Helm Provider |
|---|---|---|
| Control | Granular. Full control over every field of every resource. | High-level. Manage application configuration via Helm values. |
| Complexity | Higher. Can become verbose for applications with many resources. | Lower. Abstracts the complexity of multi-resource applications. |
| Use Case | Best for custom-built applications and simple, core resources. | Ideal for off-the-shelf software (e.g., monitoring, databases, service meshes). |
| Maintenance | You are responsible for the entire manifest definition and its updates. | Chart maintainers handle updates; you manage the chart version and value overrides. |
The integration of Terraform with Kubernetes is a cornerstone of modern IaC. The Kubernetes provider's popularity, with over 400 million downloads, underscores its importance. It ranks among the top providers in an ecosystem of over 3,000, where the top 20 account for 85% of all downloads. This adoption is driven by enterprises spending over $100,000 annually on Terraform tooling, demonstrating the value of unified workflows. For more context, see this analysis of the most popular Terraform providers.
Key Takeaway: Use the native
kubernetesprovider for precise control over your custom applications. Use thehelmprovider to efficiently manage complex, third-party software. Combining them provides a flexible and powerful deployment strategy.
Advanced IaC Patterns and Best Practices
To manage Terraform with Kubernetes at scale, you must adopt patterns that promote reusability, collaboration, and automation. These practices are what distinguish a functional setup from a resilient, enterprise-grade operation.
Structuring Projects with Reusable Modules
Copy-pasting HCL code across environments is inefficient and error-prone. A change must be manually replicated, increasing the risk of configuration drift. Terraform modules are the solution.
Modules are reusable, composable units of infrastructure. You define a standard configuration once—for example, a complete application stack including its Deployment, Service, and ConfigMap—and then instantiate that module for each environment, passing in environment-specific variables.
For instance, a standard web application module could encapsulate all necessary Kubernetes resources while exposing variables like image_tag, replica_count, and cpu_limits. For a deeper dive, explore these Terraform modules best practices.
This modular approach not only keeps your code DRY (Don't Repeat Yourself) but also enforces architectural consistency across all deployments. Adhering to established Infrastructure as Code (IaC) best practices provides a solid foundation for building robust systems.
Centralizing State for Team Collaboration
By default, Terraform stores its state file (terraform.tfstate) locally. This is untenable for team collaboration, as concurrent runs from different machines will lead to state divergence and infrastructure corruption.
The solution is a remote backend, which moves the state file to a shared location like an AWS S3 bucket and uses a locking mechanism (like a DynamoDB table) to prevent race conditions. When one engineer runs terraform apply, the state is locked, forcing others to wait until the operation completes.
This ensures the entire team operates from a single source of truth. Common remote backend options include:
- AWS S3 with DynamoDB: The standard, cost-effective choice for teams on AWS.
- Azure Blob Storage: The equivalent for teams within the Azure ecosystem.
- Terraform Cloud/Enterprise: A managed service from HashiCorp that provides state management, a private module registry, and collaborative features like policy enforcement with Sentinel.
Integrating Terraform into CI/CD Pipelines
The ultimate goal is to automate your Terraform workflow within a CI/CD pipeline, such as GitHub Actions or GitLab CI. This enforces a consistent, repeatable process for every infrastructure change.
A battle-tested CI/CD workflow for a pull request follows these steps:
- On Pull Request: The pipeline automatically runs
terraform initandterraform validateto catch syntax errors. - Plan Generation: A
terraform planis executed, and its output is posted as a comment to the pull request for peer review. - Manual Review: The team reviews the plan to ensure the proposed changes are correct and safe.
- On Merge: Once the PR is approved and merged into the main branch, the pipeline triggers a
terraform apply -auto-approveto deploy the changes to the target environment.
Key Insight: This GitOps-style workflow establishes your Git repository as the single source of truth. Every infrastructure change is proposed, reviewed, and audited through a pull request, creating a transparent and controlled deployment process.
Securing Kubernetes Secrets with Vault
Committing plaintext secrets (API keys, database credentials) to a Git repository is a severe security vulnerability. The best practice is to integrate Terraform with a dedicated secrets management tool like HashiCorp Vault.
The workflow is as follows: Secrets are stored securely in Vault. During a terraform apply, the Terraform Vault provider dynamically fetches these secrets. They exist only in memory on the CI/CD runner for the duration of the run and are never written to the state file or codebase. The secrets are then injected directly into Kubernetes Secret objects, making them available to application pods. This pattern completely decouples secrets management from your infrastructure code, significantly improving your security posture.
Common Questions About Terraform and Kubernetes
When first managing Kubernetes with Terraform, several common technical challenges arise. Understanding these concepts early will help you build a robust and scalable workflow.
Can I Manage Existing Kubernetes Resources with Terraform?
Yes, this is a common requirement in "brownfield" projects where IaC is introduced to an existing, manually-managed environment. The terraform import command is the tool for this task.
The process involves two steps:
- Write HCL code that precisely mirrors the configuration of the live Kubernetes resource.
- Run the
terraform importcommand, providing the resource address from your code and the resource ID from Kubernetes (typically<namespace>/<name>). This command maps the existing resource to your HCL definition in the Terraform state.
Caution: Your HCL code must be an exact representation of the live resource's state. If there are discrepancies, the next terraform plan will detect this "drift" and propose changes to align the resource with your code, which could cause unintended modifications.
How Do I Handle Provider Configuration for a Cluster That Does Not Exist Yet?
This is the classic "chicken-and-egg" problem: the Kubernetes provider needs credentials for a cluster that Terraform is supposed to create.
The best practice is to split your Terraform configurations. One configuration provisions the core cluster infrastructure (VPC, EKS/GKE cluster), and a second, separate configuration manages resources inside that cluster.
This separation of concerns is critical for a clean, modular architecture.
The first (infrastructure) configuration creates the cluster and uses output blocks to export its connection details (endpoint, certificate authority data). The second (application) configuration then uses a terraform_remote_state data source to read those outputs from the first configuration's state file. These values are then dynamically passed into its Kubernetes provider block, cleanly resolving the dependency.
How Does Terraform Handle Kubernetes Custom Resource Definitions?
Terraform provides excellent support for Custom Resource Definitions (CRDs) and their associated Custom Resources (CRs) via the flexible kubernetes_manifest resource.
This resource allows you to embed a raw YAML manifest for any Kubernetes object directly within your HCL. This means you don't need to wait for the provider to add native support for a new operator or custom controller.
You can manage the full lifecycle:
- Deploy the CRD manifest using a
kubernetes_manifestresource. - Use a
depends_onmeta-argument to establish an explicit dependency, ensuring Terraform applies the CRD before creating any Custom Resources that rely on it. - Deploy the Custom Resources themselves using another
kubernetes_manifestresource.
This powerful feature enables you to manage complex, operator-driven applications with the same unified IaC workflow used for standard Kubernetes resources.
Ready to implement these advanced DevOps practices but need the right expertise? At OpsMoon, we connect you with the top 0.7% of remote DevOps engineers to accelerate your projects. From strategic planning to hands-on implementation, we provide the talent and support to scale your infrastructure confidently. Get started with a free work planning session today.
Leave a Reply